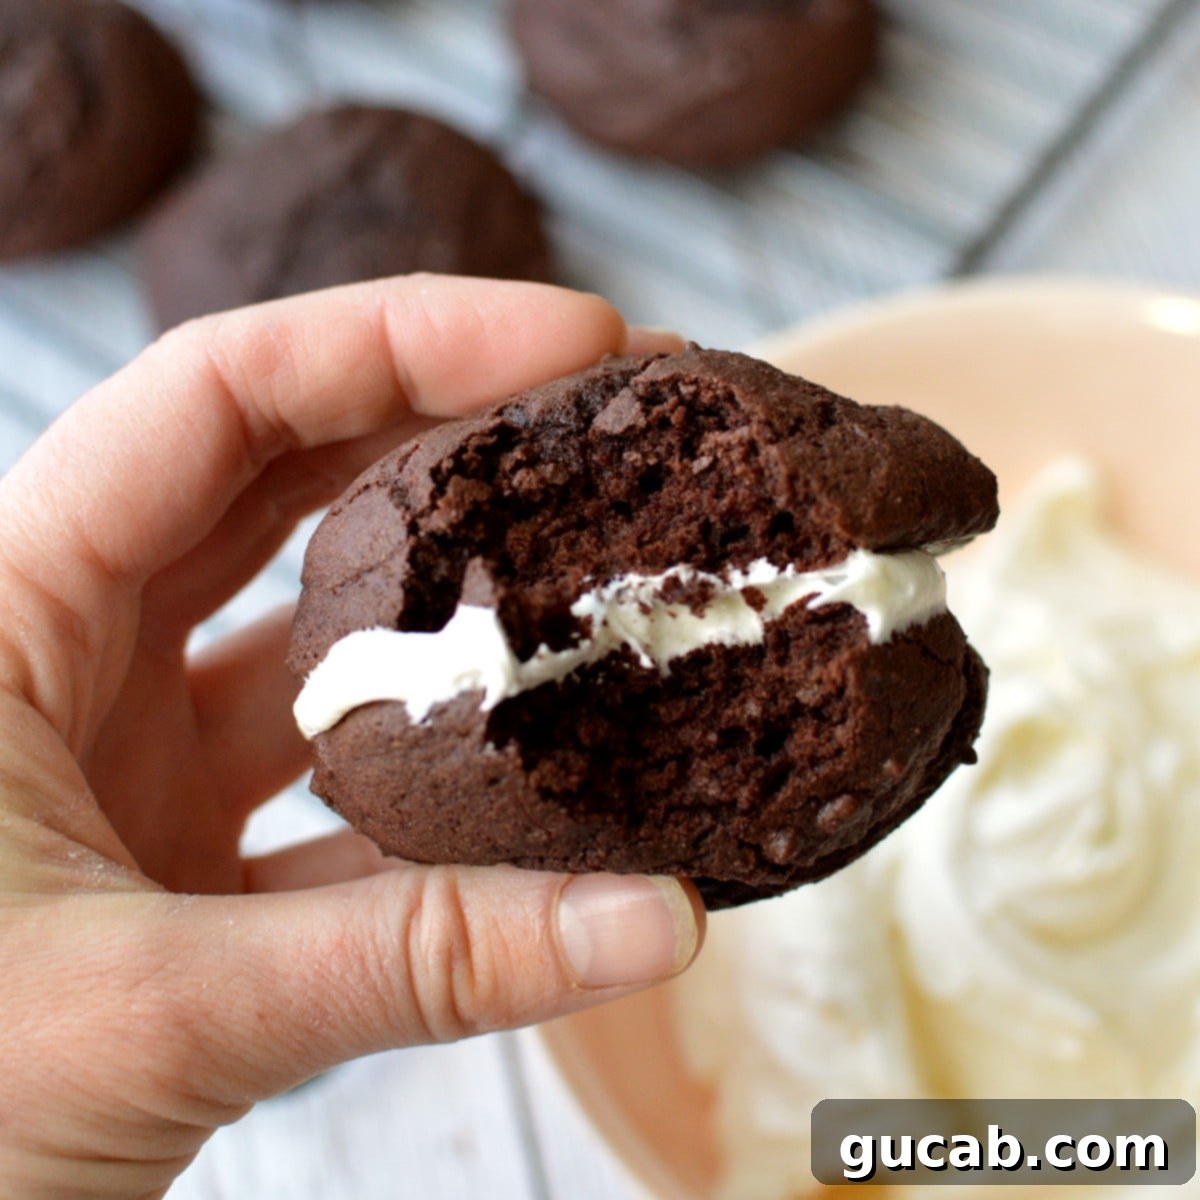
Decadent Gluten-Free Chocolate Whoopie Pies with Fluffy Marshmallow Buttercream: Your New Favorite Homemade Treat!
Prepare your taste buds for an unforgettable experience with these incredible homemade gluten-free chocolate whoopie pies. Imagine two irresistibly moist, rich chocolate cakelets perfectly sandwiching a generous dollop of airy, sweet marshmallow buttercream. This isn’t just a dessert; it’s a nostalgic treat brought to life in your own kitchen, tasting worlds better than any store-bought alternative, and surprisingly easy to master!
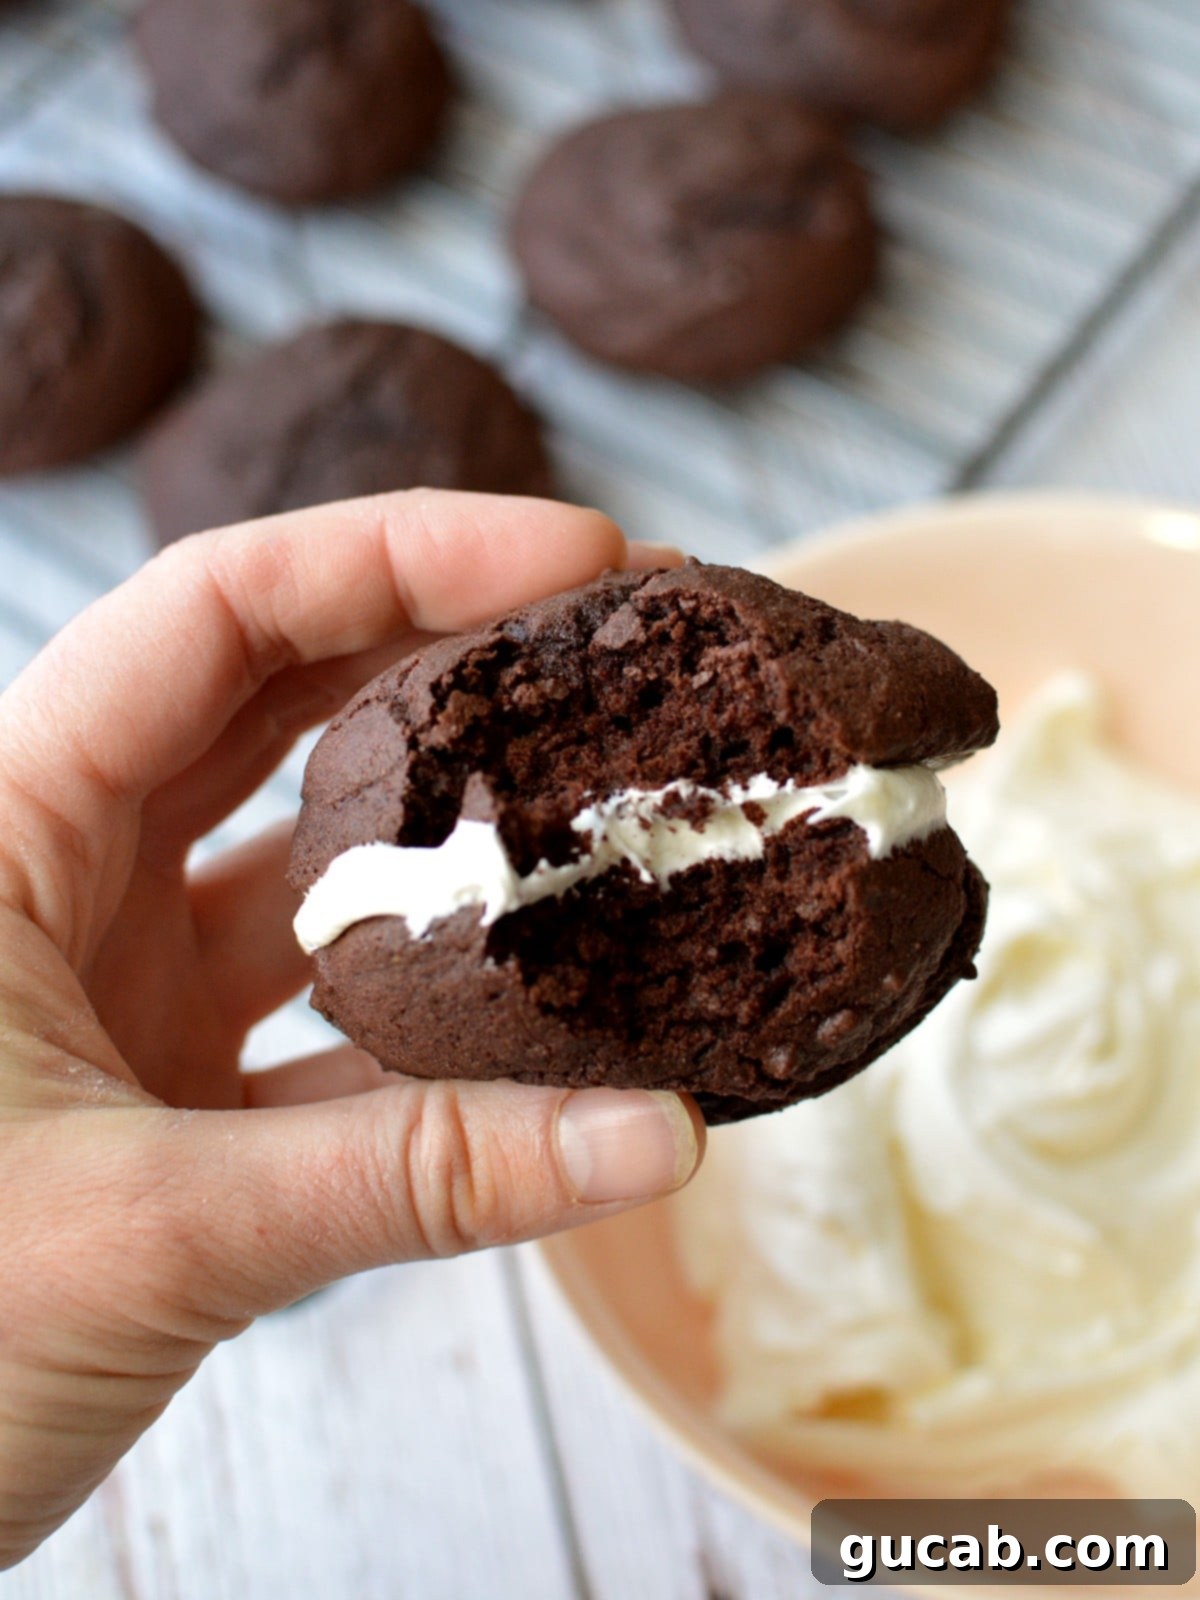
If you’ve never experienced the sheer bliss of a freshly baked homemade whoopie pie, you are truly in for a life-changing treat. These gluten-free chocolate cakes, generously filled with a pillowy marshmallow buttercream, are nothing short of dreamy. Each bite transports you to a realm of pure confectionary delight. The rich chocolate and sweet, creamy filling create a harmonious balance that makes it impossible to stop at just one.
Despite their sophisticated appearance, these gluten-free whoopie pies are remarkably simple to make, proving that gourmet desserts don’t have to be complicated. Whether you’re adhering to a gluten-free diet or simply seeking an exceptional homemade chocolate treat, this recipe promises to deliver pure joy with minimal effort. Get ready to impress your friends and family with these delightful creations!
What Exactly Are Whoopie Pies? The Ultimate Comfort Dessert Explained
Often confused with their crispier cousins, moon pies, whoopie pies stand distinctly apart as a beloved American classic. A whoopie pie consists of two soft, round, cake-like cookies (often called “cakelets”) that are generously joined together by a creamy, sweet filling. While chocolate is the most traditional flavor for the cake, and a marshmallow-based buttercream for the filling, these delightful treats can be found in a multitude of exciting variations.
The origin of the whoopie pie is a subject of friendly debate, with both Pennsylvania and Maine laying claim to its invention. Regardless of its true birthplace, it has become a cherished staple across New England and beyond, loved for its unique texture – a perfect cross between a cookie and a cake, and its irresistible filling. Unlike moon pies, which typically feature a graham cracker-like base and a firmer marshmallow filling, whoopie pies boast a softer, richer cake component and a lighter, more luxurious buttercream, making them a truly unique indulgence.
Ingredient Notes: Crafting Perfect Gluten-Free Chocolate Whoopie Pies
Achieving perfectly moist and flavorful gluten-free chocolate whoopie pies starts with understanding the role of each ingredient. This recipe utilizes simple, accessible ingredients to deliver an extraordinary result. Here’s a closer look at what you’ll need and why each component is vital:
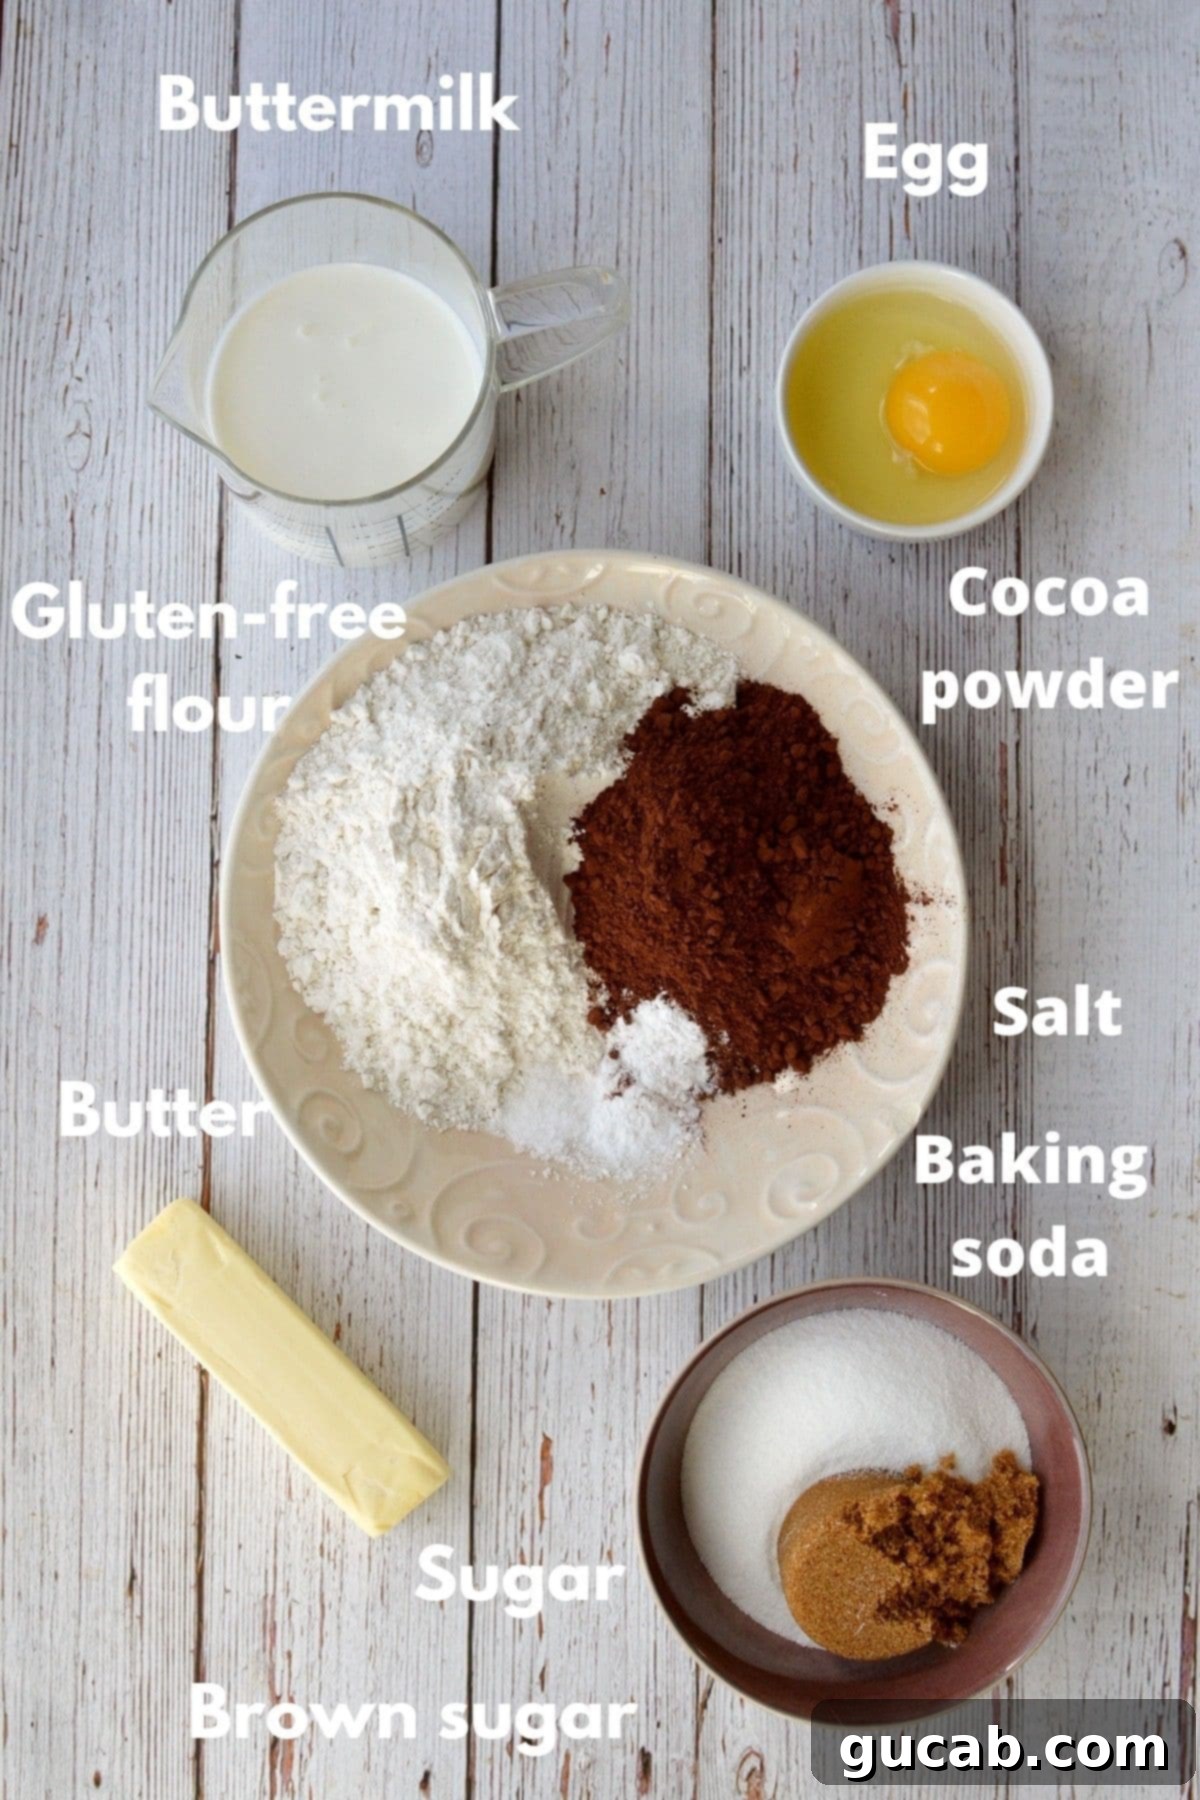
Gluten-Free Flour Blend: For this recipe, I highly recommend Bob’s Red Mill 1:1 All-Purpose Gluten-Free Flour. This blend is my go-to for almost all gluten-free cakes and cookies because it consistently delivers a taste and texture remarkably similar to traditional gluten-containing flour. The “1:1” means it’s formulated to be a direct substitute in most recipes, and crucially, it includes xanthan gum. Xanthan gum is essential in gluten-free baking as it acts as a binder, providing the elasticity and structure that gluten usually offers, preventing a crumbly texture. If you choose a different all-purpose gluten-free blend, ensure it also contains xanthan gum, as results can vary significantly between brands. For best results, weighing your flour for accuracy is always recommended.
Dutch Processed Cocoa Powder: This is key to the deep, rich chocolate flavor and dark color of your whoopie pies. Dutch processing involves treating cocoa powder with an alkalizing agent, which reduces its acidity. This results in a darker, less bitter, and intensely chocolatey flavor compared to natural cocoa powder. Hershey’s often labels it as “dark cocoa powder.” Because Dutch processed cocoa is not acidic, it primarily relies on baking soda (which needs an acid to react) and the acidity from other ingredients like buttermilk and brown sugar for leavening. Do not substitute with natural cocoa powder without adjusting the leavening agents, as this could negatively impact the cake’s texture.
Baking Soda: This leavening agent is critical for creating a light, tender, and fluffy crumb in our chocolate cakes. Baking soda reacts with the acidic components in the recipe – specifically the buttermilk and brown sugar. This reaction produces carbon dioxide gas, which creates air pockets in the batter, causing the cakes to rise during baking and giving them their characteristic soft texture.
Kosher Salt: While it might seem counterintuitive to add salt to a sweet dessert, kosher salt plays a crucial role in enhancing and balancing the flavors. It doesn’t make the whoopie pies salty; rather, it amplifies the chocolate notes, brightens the sweetness, and provides a depth of flavor that would be missing without it.
Unsalted Butter: Room temperature unsalted butter is vital for proper creaming. When butter is soft (but not melted!), it can incorporate air more effectively with the sugars, creating a light and fluffy base for the cake batter. This aeration contributes significantly to the final cake’s tender texture. If your butter is too cold, it won’t cream properly; if it’s too warm, it can make the batter greasy. To quickly bring butter to room temperature, you can microwave it for 5-10 seconds, being careful not to melt it.
Granulated Sugar & Dark Brown Sugar: The combination of these two sugars contributes both sweetness and texture. Granulated sugar provides straightforward sweetness and helps tenderize the cake. Dark brown sugar, with its molasses content, adds a deeper, more complex flavor, moisture, and a slight chewiness to the whoopie pie cakes, complementing the rich chocolate beautifully.
Large Egg: Eggs serve multiple functions in baking. They act as a binder, holding the ingredients together, and contribute to the cake’s structure. Additionally, eggs add richness, moisture, and help with leavening. Using a large egg ensures the right balance for the recipe’s structure and moisture content.
Buttermilk: Buttermilk is a secret weapon for moist and tender cakes. Its acidity tenderizes the gluten (even in GF flour, it interacts with starches) and, as mentioned, activates the baking soda, promoting a light and airy texture. It also imparts a subtle tang that beautifully complements the sweetness and chocolate flavor. If you don’t have buttermilk on hand, you can easily make a substitute by adding one tablespoon of white vinegar or lemon juice to a liquid measuring cup, then filling the rest of the cup with regular milk to the 1-cup mark. Let it sit for 5-10 minutes until it slightly curdles.
Vegetable Oil: A small amount of neutral-flavored vegetable oil, such as canola or sunflower oil, is included to enhance the moistness of the whoopie pies. Oil helps keep cakes soft and tender over time, ensuring your whoopie pies remain delightful and never dry, even a day or two after baking. This extra fat contributes to a rich, melt-in-your-mouth texture.
Marshmallow Buttercream Ingredients: The Dreamy Filling
This marshmallow buttercream isn’t just a frosting; it’s the heart of the whoopie pie – light, fluffy, and perfectly sweet. You only need three simple ingredients for this divine filling:
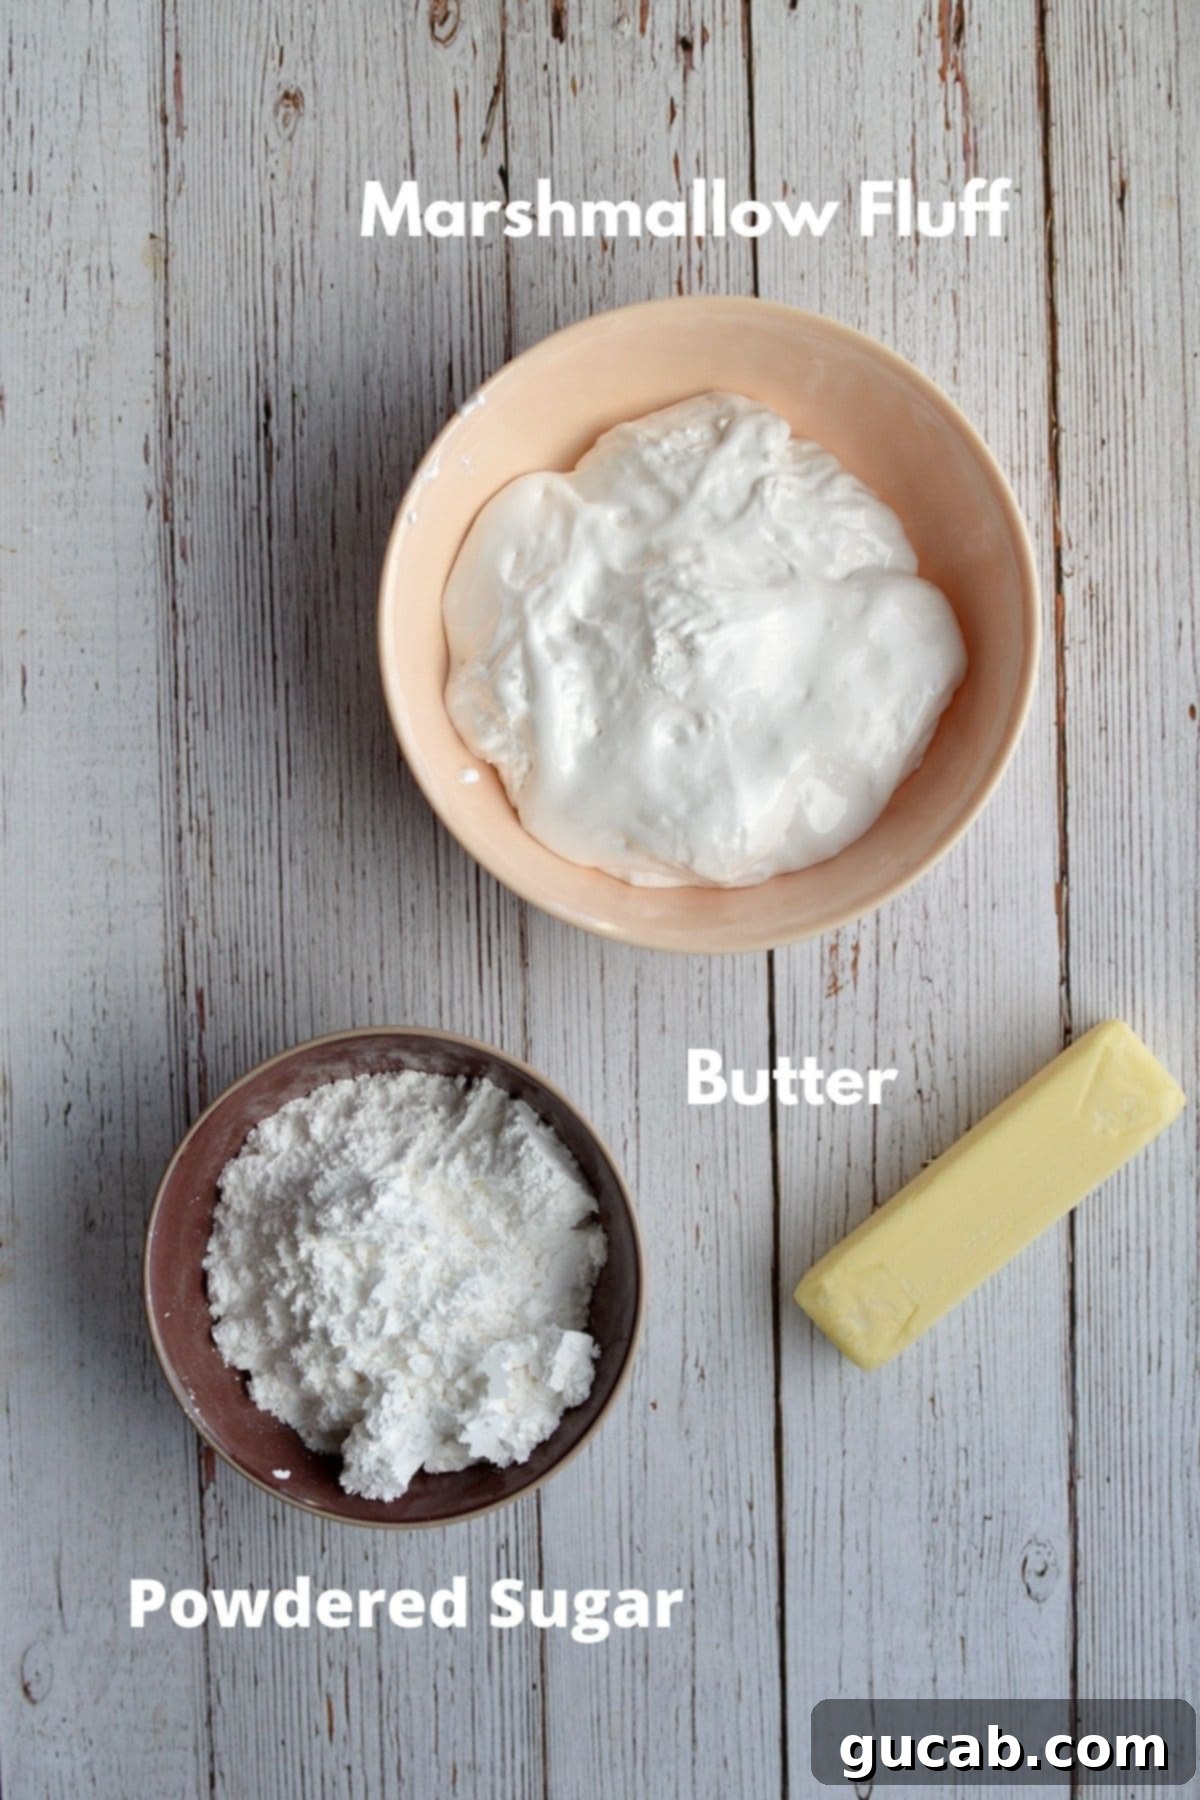
Marshmallow Fluff (Marshmallow Cream): This is the star of the filling, providing that iconic light, airy, and slightly sticky texture unique to whoopie pie filling. You’ll need one 7.5-ounce tub of marshmallow cream. While most brands are naturally gluten-free, it’s always a good practice to check the label for certification if you have severe sensitivities or allergies.
Powdered Sugar (Confectioners’ Sugar): Powdered sugar dissolves easily, ensuring a smooth, lump-free buttercream. It adds sweetness and helps thicken the frosting to the perfect spreadable consistency without making it overly sweet or grainy. You can adjust the amount slightly to achieve your desired sweetness and thickness.
Unsalted Butter: Just like for the cake, room temperature unsalted butter is crucial here. It provides the necessary fat and structure for the buttercream, allowing it to whip up into a light and fluffy consistency. Ensure it’s soft enough to cream easily but not melted, as this will affect the texture of your frosting.
How to Make Gluten-Free Chocolate Whoopie Pies from Scratch: A Step-by-Step Guide
Making homemade whoopie pies is a fun and rewarding process. Don’t be intimidated by their gourmet appearance; they come together quite quickly with a few straightforward steps. Here’s how to create these delightful gluten-free treats:
For the Moist Chocolate Cakes:
-
Prepare Your Workspace: Begin by preheating your oven to 350 degrees Fahrenheit (175°C). Line a large baking sheet with parchment paper or a silicone baking mat. This step is essential to prevent sticking and ensure your delicate cakelets lift off easily. Set the prepared pan aside.
-
Combine Dry Ingredients: In a medium mixing bowl, whisk together the gluten-free flour blend, Dutch processed cocoa powder, baking soda, and kosher salt. Whisking ensures all ingredients are evenly distributed and aerated, preventing lumps in the final batter. Set this bowl aside.
-
Prepare Wet Ingredients: In a separate liquid measuring cup or small bowl, combine the buttermilk and vegetable oil. Give it a quick stir to ensure they are well mixed. Set this liquid mixture aside.
-
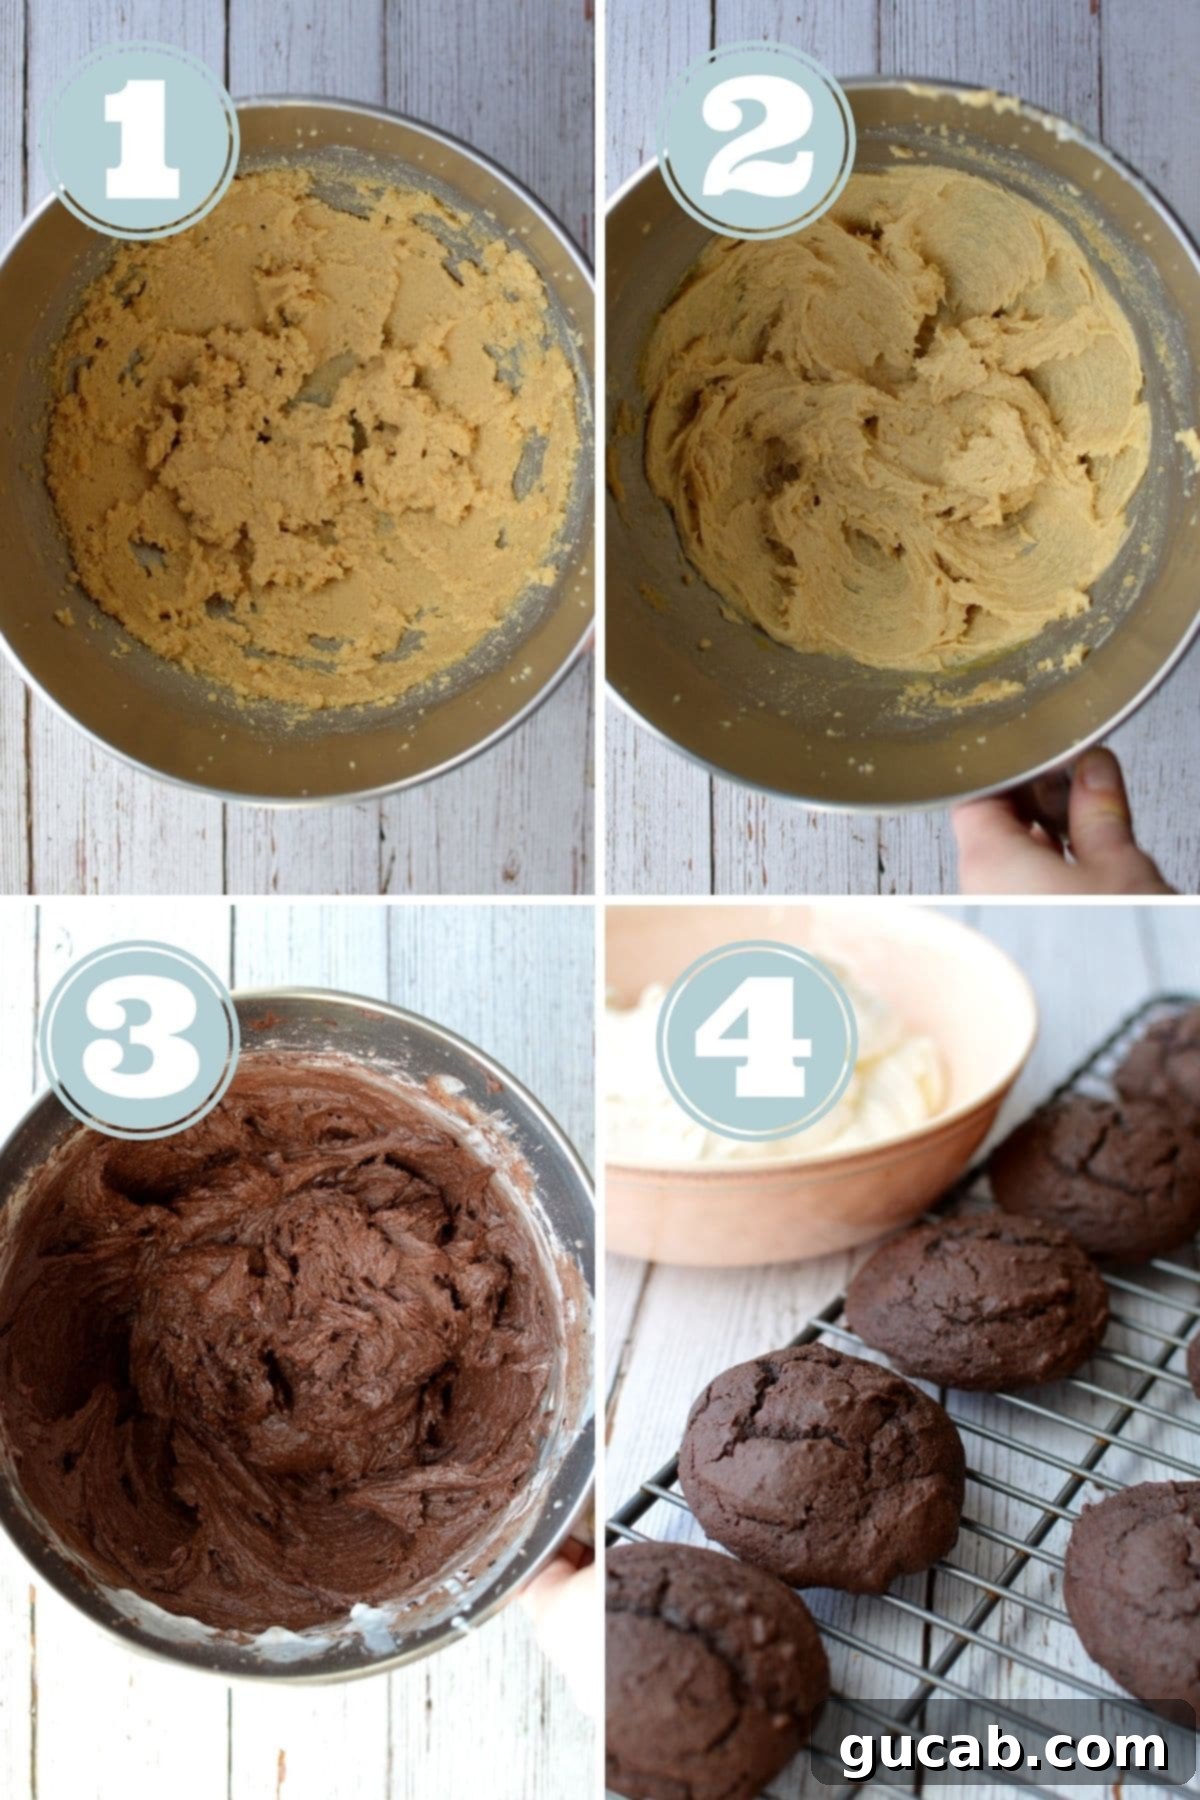
Cream Butter & Sugars: In the bowl of a stand mixer fitted with the paddle attachment (or using a hand mixer), beat the softened unsalted butter with both the granulated sugar and dark brown sugar. Beat on medium-high speed for about 3-4 minutes, or until the mixture becomes visibly light in color and fluffy in texture. This step incorporates air, which is crucial for a tender cake.
-
Add the Egg: Crack the large egg into the creamed butter and sugar mixture. Beat on medium speed until the egg is fully incorporated and the mixture is smooth. Stop the mixer occasionally to scrape down the sides and bottom of the bowl with a spatula, ensuring everything is thoroughly combined.
-
Alternate Dry & Wet Additions: With the mixer on low speed, add approximately half of the dry ingredient mixture to the butter mixture and beat until just combined. Then, add half of the buttermilk and oil mixture and beat until incorporated. Scrape down the sides of the bowl again. Repeat this process with the remaining dry ingredients and then the remaining wet ingredients. Be careful not to overmix; stop as soon as the last streaks of flour disappear to keep the cakes tender.
-
Scoop & Bake: Using a small portion scoop (about 1.5-2 tablespoons, like a small ice cream scoop), drop rounded mounds of batter onto your prepared baking sheet, leaving about 2 inches between each to allow for slight spreading. Bake for 11-12 minutes, or until the edges are set and the tops spring back when lightly touched. The cakes will be soft. Carefully transfer the baked cakelets to a wire rack to cool completely. Repeat this process with the remaining batter. This recipe yields approximately 24 individual cakelets, which will make 12 whoopie pies once assembled. Ensuring they are fully cool before filling is crucial to prevent the buttercream from melting.
For the Marshmallow Buttercream Filling:
-
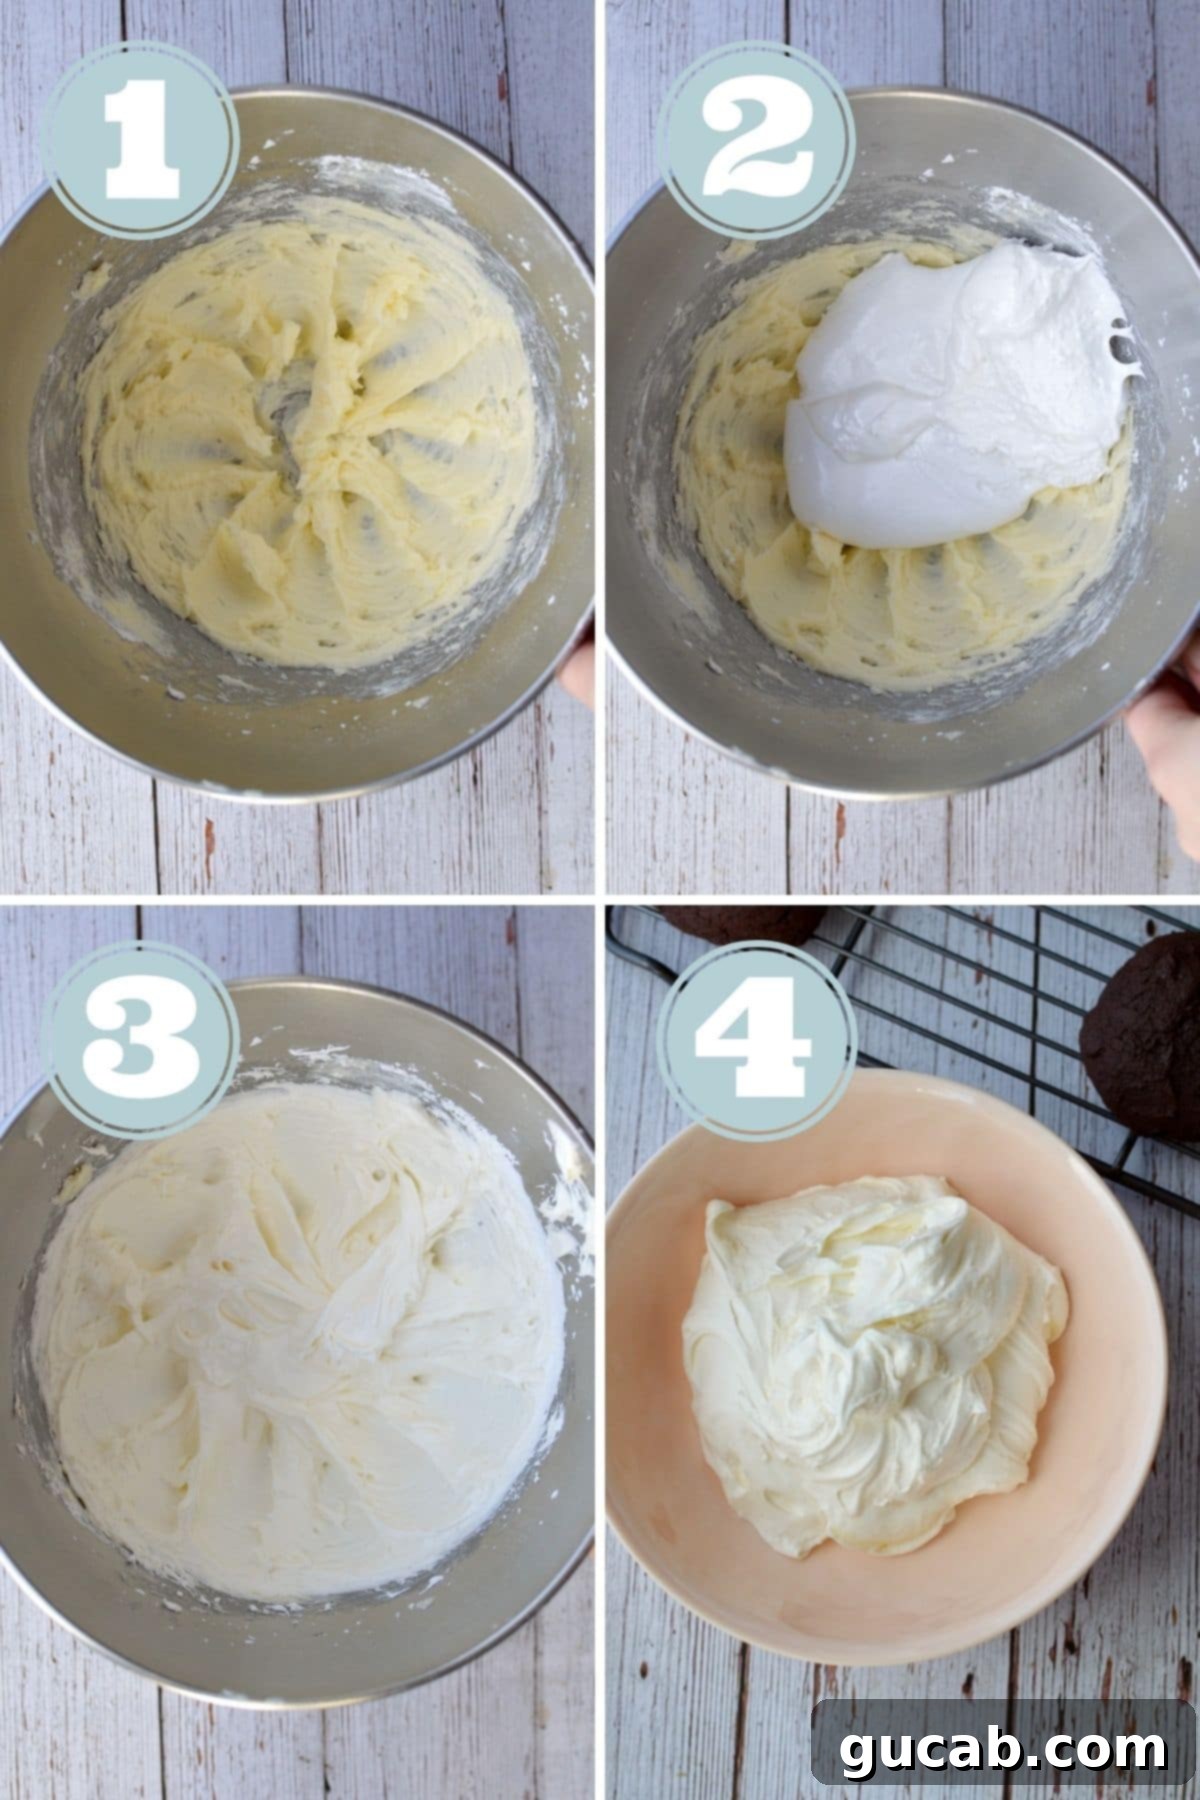
Whip Ingredients: In the clean bowl of a stand mixer (or using a hand mixer), combine the room temperature unsalted butter, marshmallow cream, and powdered sugar. Start on low speed to incorporate the powdered sugar, then gradually increase to medium-high.
-
Beat Until Fluffy: Beat the mixture for 3-5 minutes, or until it transforms into a thick, creamy, and wonderfully fluffy buttercream. The longer you beat, the lighter and airier the frosting will become. Scrape down the sides of the bowl as needed to ensure even mixing.
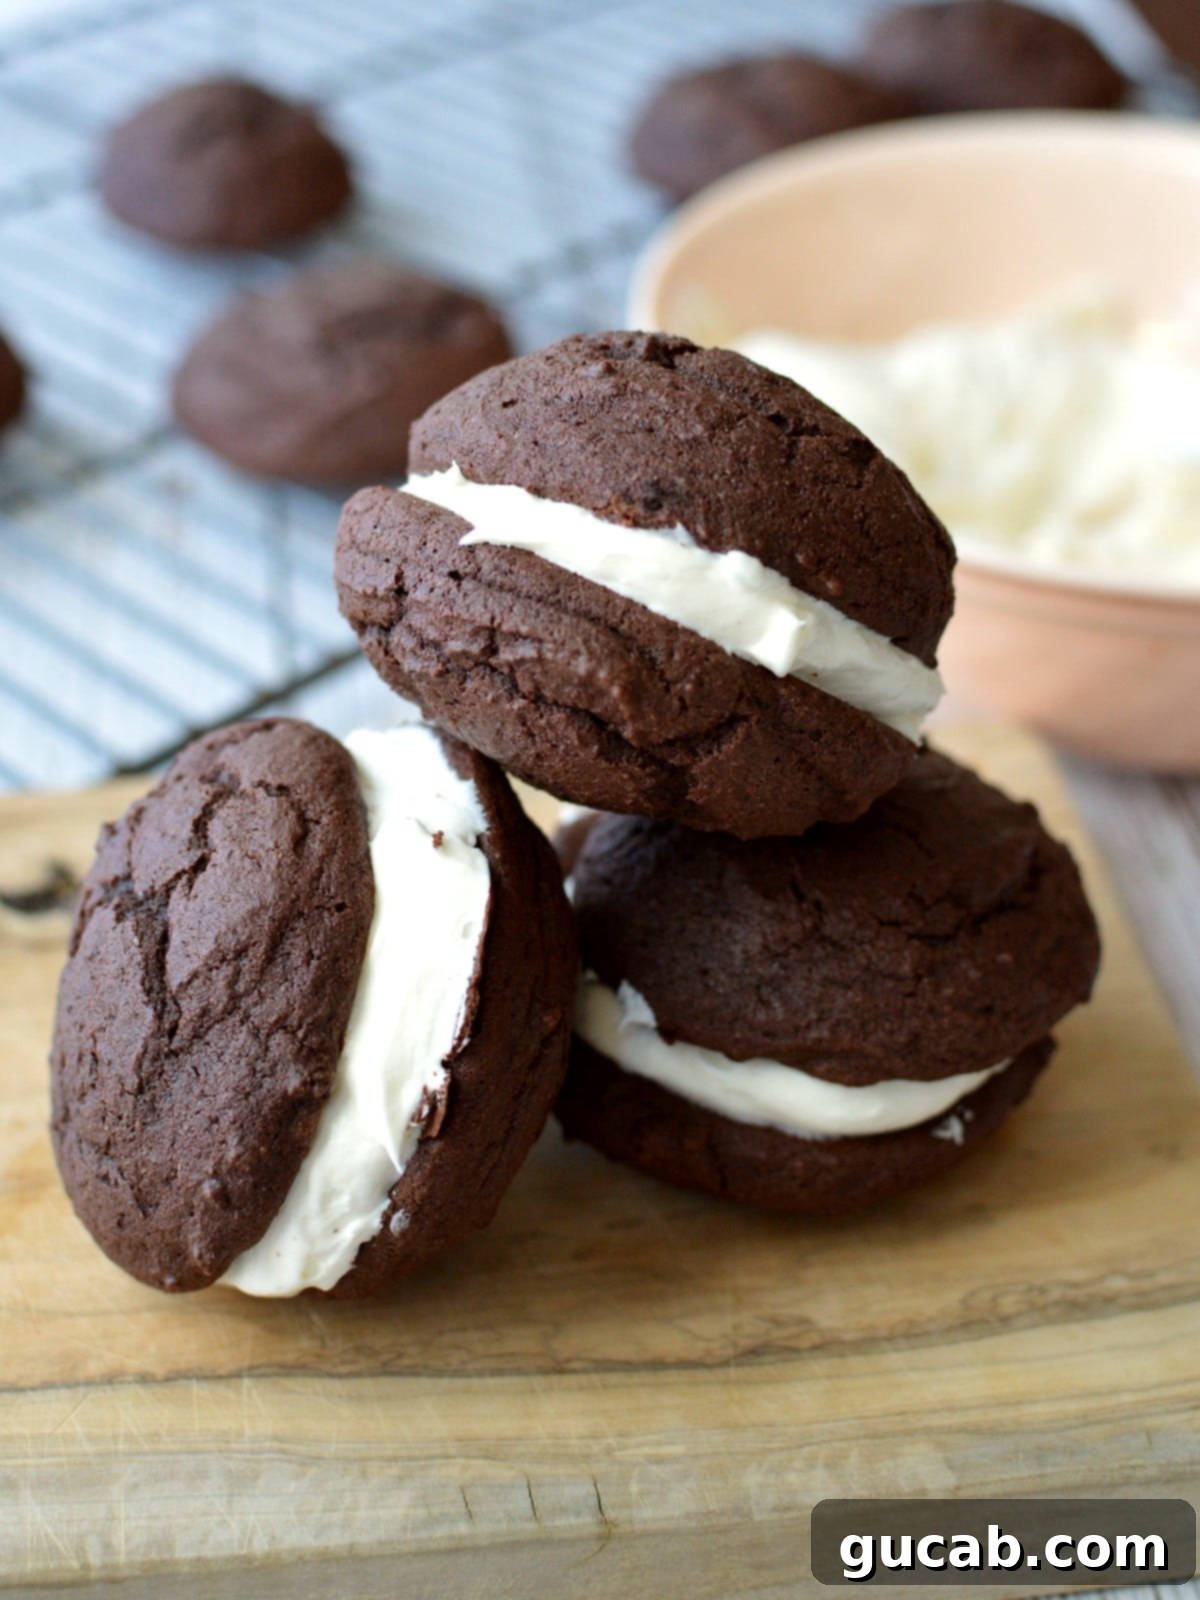
Fill Whoopie Pies: Once the chocolate cakelets are completely cool, match them up into pairs of similar sizes. Take one cakelet and spread a generous amount of marshmallow buttercream on its flat side. Top it with the flat side of another cakelet, gently pressing them together to form a perfect whoopie pie sandwich. Repeat with all remaining cakelets and frosting.
FAQs: Your Gluten-Free Whoopie Pie Questions Answered
To maintain their freshness and delicious texture, store your gluten-free whoopie pies in an airtight container. They can be kept at room temperature on the counter for up to two days. For extended freshness, especially in warmer climates, or if you prefer a firmer filling, you can store them in the refrigerator for up to 5 days. Just be sure to bring them back to room temperature for about 15-20 minutes before serving for the best texture.
Absolutely! Whoopie pies freeze exceptionally well, making them a fantastic make-ahead dessert. You can freeze the baked cakelets unfrosted by wrapping them tightly in plastic wrap and then placing them in a freezer-safe bag or container for up to 3 months. Thaw them at room temperature before filling. Alternatively, you can freeze assembled whoopie pies by placing them in a single layer on a baking sheet to freeze solid, then transferring them to an airtight freezer-safe container or bag. Enjoy within 3 months for optimal taste and texture. Thaw overnight in the refrigerator or for a few hours at room temperature.
No, you absolutely do not need a special whoopie pie pan! The beauty of this recipe is that the batter is thick enough to hold its shape well on a regular baking sheet. Using a small cookie or portion scoop ensures uniform sizes, and baking on parchment paper or a silicone mat will prevent sticking and allow for easy removal.
Dry cakes can happen for a few reasons. The most common culprit is overbaking, so keep a close eye on your oven and start checking for doneness at the lower end of the baking time. An oven thermometer can help ensure your oven is at the correct temperature. Also, ensure you are using a reliable 1:1 gluten-free flour blend with xanthan gum, as different GF flours absorb liquids differently. Finally, make sure your ingredients, especially butter and eggs, are at room temperature for proper emulsion and moisture retention.
Recipe Tips for the Best Gluten-Free Whoopie Pies
- Room Temperature Ingredients are Key: For both the cake batter and the buttercream, ensure your butter and egg are at proper room temperature. This allows for better emulsification, aeration, and a smoother, more uniform texture in both components.
- Don’t Rush the Cooling: Be sure to let the whoopie pie cakes cool completely on a wire rack before attempting to fill them. If the cakes are even slightly warm, the marshmallow buttercream will melt and make a messy, unappealing pie. Patience is a virtue here!
- No Special Pan Needed: You truly don’t need a specific whoopie pie pan. The thick consistency of the batter means it will spread just enough on a regular baking sheet lined with parchment paper or a silicone mat.
- Uniform Scooping for Perfect Pairs: This recipe yields 12 whoopie pies, which means you’ll bake 24 individual cakelets. Using a small portion scoop (like a cookie scoop) will help you create uniformly sized cakes that are easier to match up for neat and tidy whoopie pies.
- Avoid Overmixing: Especially with gluten-free flour, overmixing the batter can lead to tough or gummy cakes. Mix until just combined – as soon as the last streaks of dry ingredients disappear, stop the mixer.
- Weigh Your Flour: For the most consistent and accurate results in gluten-free baking, weighing your flour with a kitchen scale is always preferred over volumetric cup measurements. Different brands and types of flour can compact differently in a measuring cup.
- Piping for Professional Finish: For an extra neat and professional look, you can pipe the marshmallow buttercream onto the flat side of the cakelets using a piping bag fitted with a large round tip or a star tip.
Delicious Variations to Customize Your Whoopie Pies
- Alternate Fillings: While this marshmallow buttercream is heavenly, feel free to experiment with other fillings. Cream cheese frosting adds a lovely tang, a classic vanilla buttercream is always a winner, or double down on chocolate with a rich chocolate buttercream. You could also try peanut butter cream cheese frosting or even a coffee-flavored buttercream for an adult twist.
- Cake Flavor Swaps: Don’t limit yourself to chocolate! You can easily adapt this recipe to make other gluten-free whoopie pie flavors. Consider pumpkin whoopie pies for fall, red velvet for holidays, or classic vanilla cakelets for a lighter option. Gingerbread, lemon, or even carrot cake flavors would be fantastic too.
- Fun Add-ins and Toppings: Sprinkle the edges of your filled whoopie pies with mini chocolate chips, colorful sprinkles, cocoa nibs, or even a dusting of powdered sugar for an extra touch of flair and texture.
Other Gluten-Free Cake Recipes You Might Like
If you’re a fan of delicious gluten-free baking, explore some of our other cherished cake recipes:
- Gluten Free Marble Cake
- Gluten Free Chocolate Pound Cake
- Gluten Free Italian Cream Cake
- Gluten Free Sour Cream Pound Cake
Gluten Free Whoopie Pies
Carolyn
Pin Recipe
Equipment
-
Stand mixer or hand mixer
-
Measuring cups & spoons
-
Liquid Measuring cup
-
Sheet pan
-
Portion scoop (optional, but recommended)
Ingredients
- 2 cups Bob’s Red Mill 1:1 All-Purpose Gluten-Free Flour or other gluten-free all-purpose flour that contains xanthan gum
- ½ cup Dutch processed cocoa powder (Hershey’s labels it dark cocoa powder)
- 1 teaspoon baking soda
- ¼ teaspoon kosher salt
- ½ cup unsalted butter, room temperature
- ¾ cup granulated sugar
- ¼ cup dark brown sugar, packed
- 1 large egg, room temperature
- 1 cup buttermilk
- 2 tbsp vegetable oil
For the Marshmallow Buttercream
- ½ cup unsalted butter, room temperature
- ¾ cup powdered sugar
- 7.5 oz tub of marshmallow cream (like Marshmallow Fluff)
Instructions
-
Preheat oven to 350 degrees Fahrenheit. Line a sheet pan with parchment paper or a silicone baking mat and set aside.
-
In a mixing bowl, combine the gluten-free flour, cocoa powder, baking soda, and salt. Stir to combine then set aside.
-
In a liquid measuring cup, combine the buttermilk and oil. Set aside.
-
In the bowl of a stand mixer, combine the butter with both sugars. Beat until light and fluffy – about 4 minutes.
-
Add the egg and beat until incorporated. Stop the mixer and use a spatula to scrape down the sides of the bowl.
-
Add half of the dry ingredients to the mixture and beat until incorporated. Add half of the buttermilk mixture and beat until incorporated. Scrape down the sides of the bowl and repeat.
-
Use a small portion scoop to scoop 8 cakes onto the sheet pan. Bake for 11 to 12 minutes. Repeat until all the batter is gone. You should have 24 round cakes to make 12 whoopie pies. Once they’re cool, fill with marshmallow buttercream.
For the frosting:
-
In the bowl of a stand mixer, combine the butter, marshmallow cream, and powdered sugar.
-
Beat until thick and fluffy.
Nutrition
Conclusion: Your Journey to Gluten-Free Whoopie Pie Perfection
There’s an unparalleled satisfaction that comes from creating a truly exceptional dessert from scratch, and these gluten-free chocolate whoopie pies are no exception. With their perfectly balanced moist chocolate cakelets and incredibly fluffy marshmallow buttercream, they offer a moment of pure culinary bliss that caters to everyone, regardless of dietary needs. This recipe proves that going gluten-free doesn’t mean sacrificing flavor or indulgence. So gather your ingredients, follow these simple steps, and prepare to delight in a homemade treat that will undoubtedly become a treasured favorite in your recipe collection. Enjoy the process, and savor every single delicious bite!
