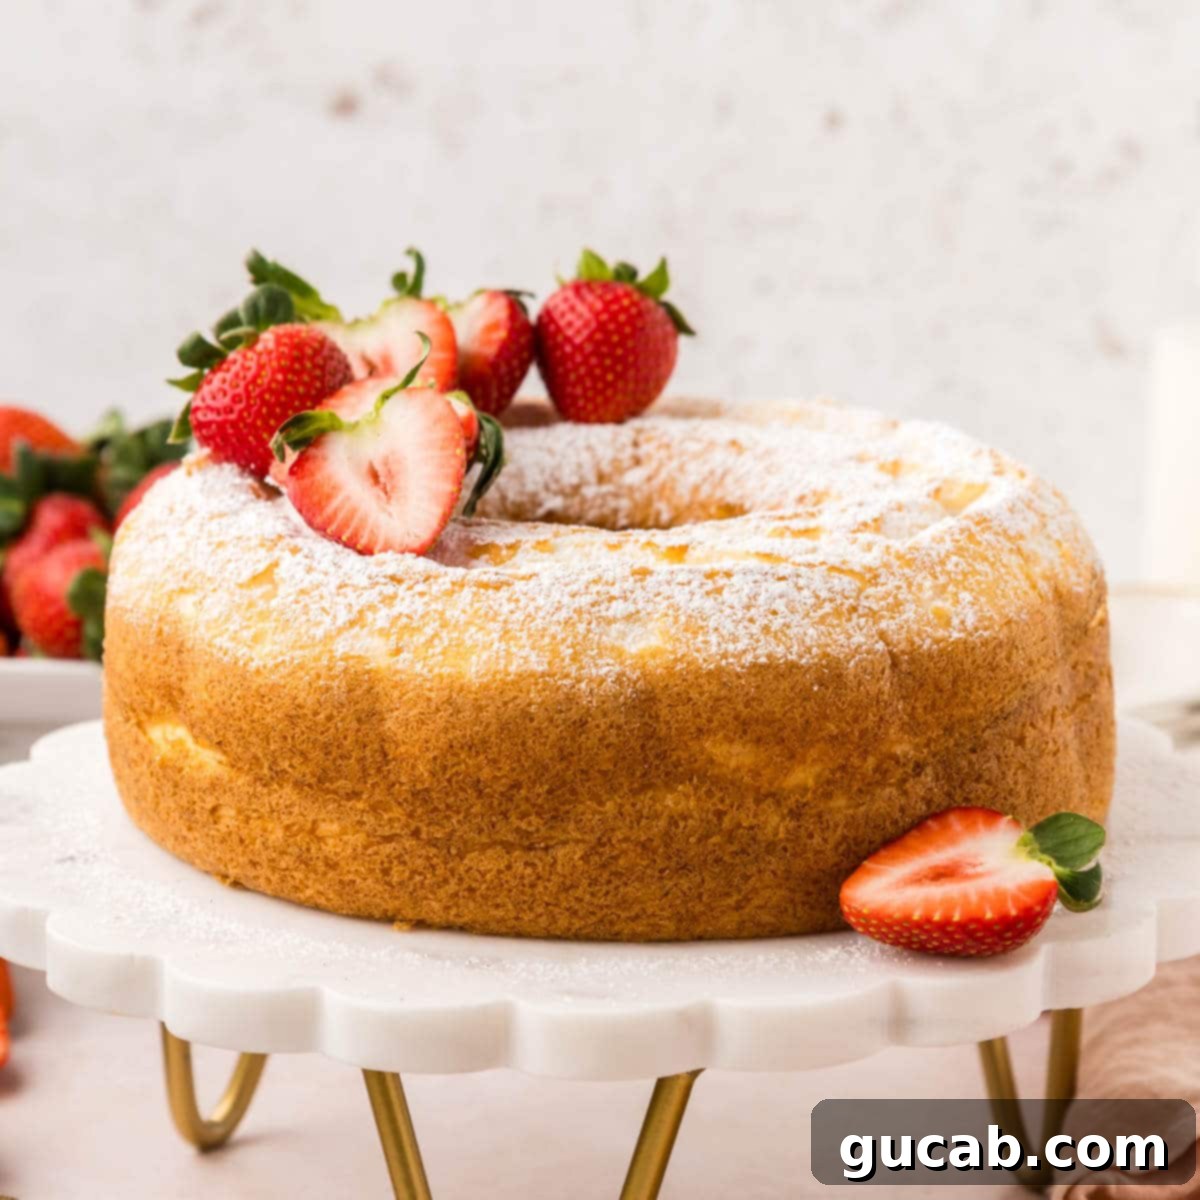
The Ultimate Homemade Angel Food Cake: Light, Fluffy, & Easy Recipe
Prepare to bake a truly celestial dessert with this incredible angel food cake recipe. It’s renowned for being as light as air and perfectly sweet, making it a beloved classic. What’s even better? It’s surprisingly simple to create in your own kitchen with just a few essential tips and tricks. This timeless cake requires only 6 main ingredients and a mere 15 minutes of active hands-on time, promising a delightful baking experience and an even more delightful treat. Whether you’re a seasoned baker or trying your hand at this heavenly dessert for the first time, our detailed guide will help you achieve a show-stopping cake that’s sure to impress.
Discovering the Lightest, Fluffiest Cake Imaginable
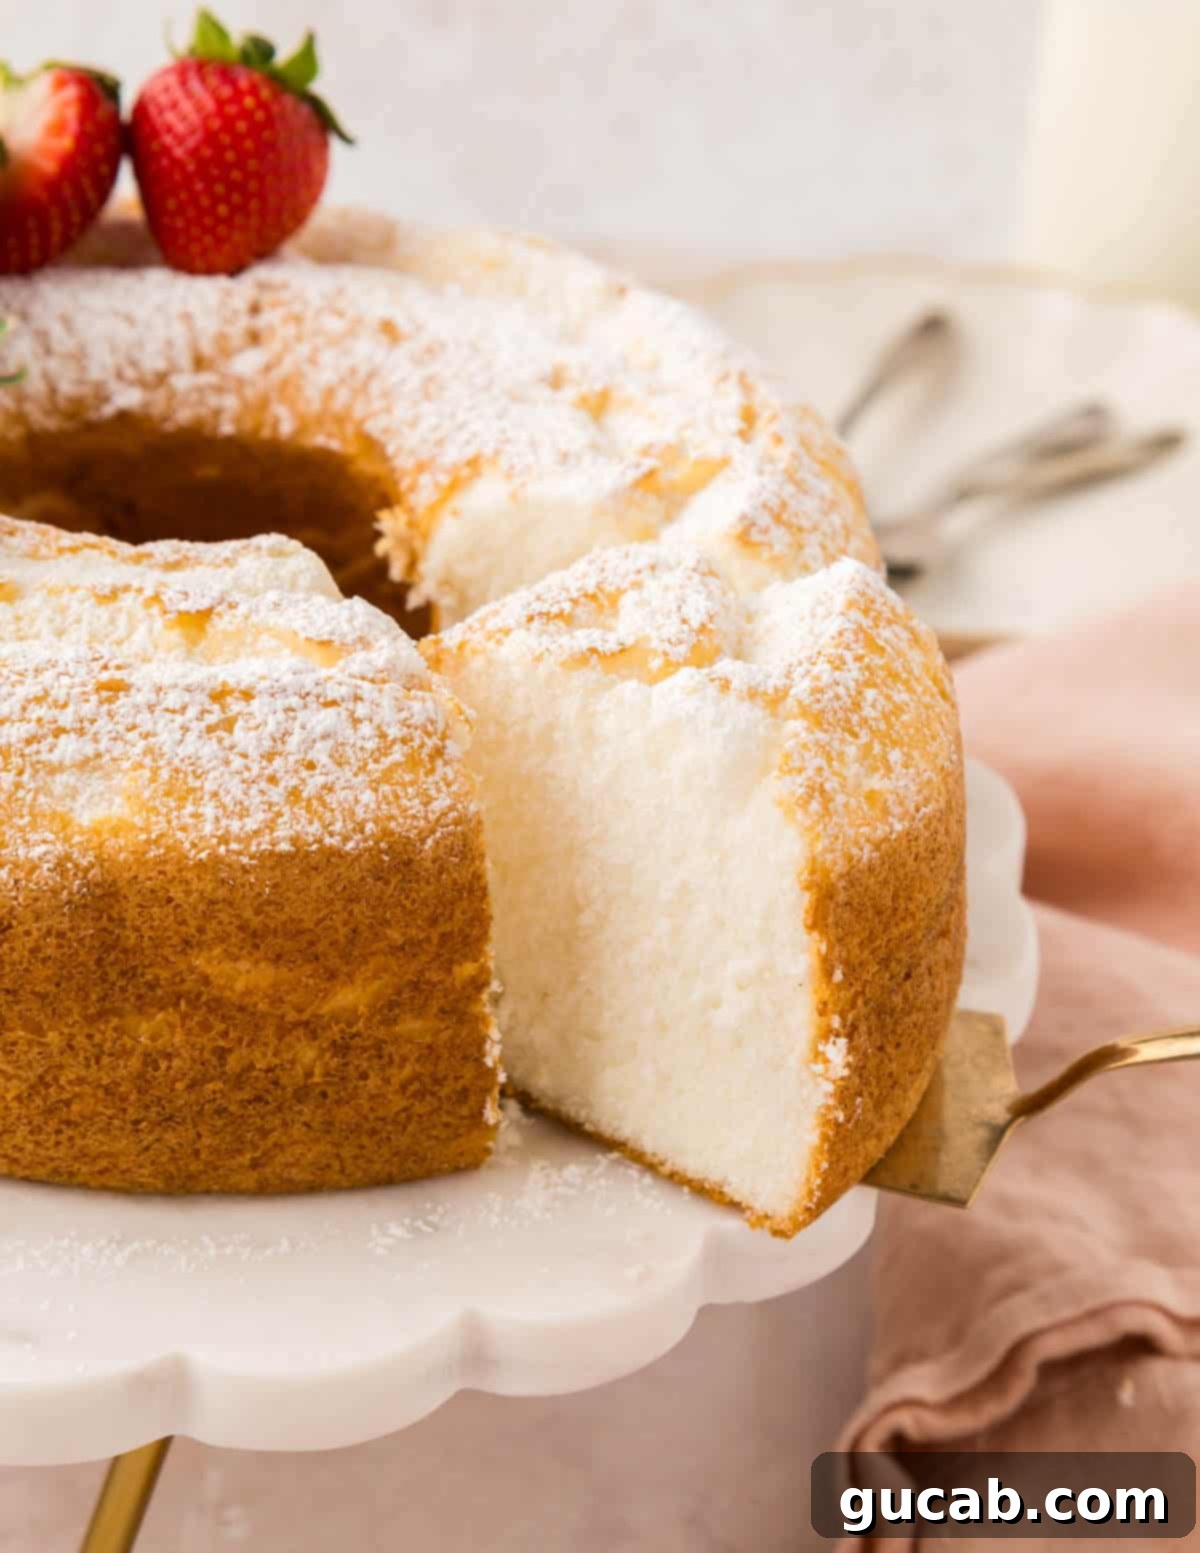
Imagine a dessert that’s sweet, pillowy, and utterly melts in your mouth – that’s the magic of angel food cake. This delicate creation offers a refreshing change of pace from richer, buttercream-stuffed layer cakes. Its unique character lies in its composition: a meringue-based cake made exclusively with whipped egg whites and sugar, completely devoid of butter, egg yolks, or any other fats. It’s this very absence of fat that bestows upon it a remarkably delicate, airy, and cloud-like texture, making it an ideal partner for fresh fruit and a dollop of whipped cream.
If you’ve never ventured into making a homemade angel food cake, you are truly in for an exquisite treat. This dessert isn’t just for special occasions; it’s versatile enough for any celebration, from a casual summer gathering to an elegant holiday dinner. It’s especially perfect for Valentine’s Day, where its light elegance can truly shine. Embracing the challenge of creating this classic will reward you with a dessert that embodies pure, unadulterated bliss.
Essential Ingredients for Your Angel Food Cake
While angel food cake uses only a handful of ingredients, the quality and preparation of each are crucial to achieving that signature ethereal texture. Here’s a closer look at what you’ll need and why:
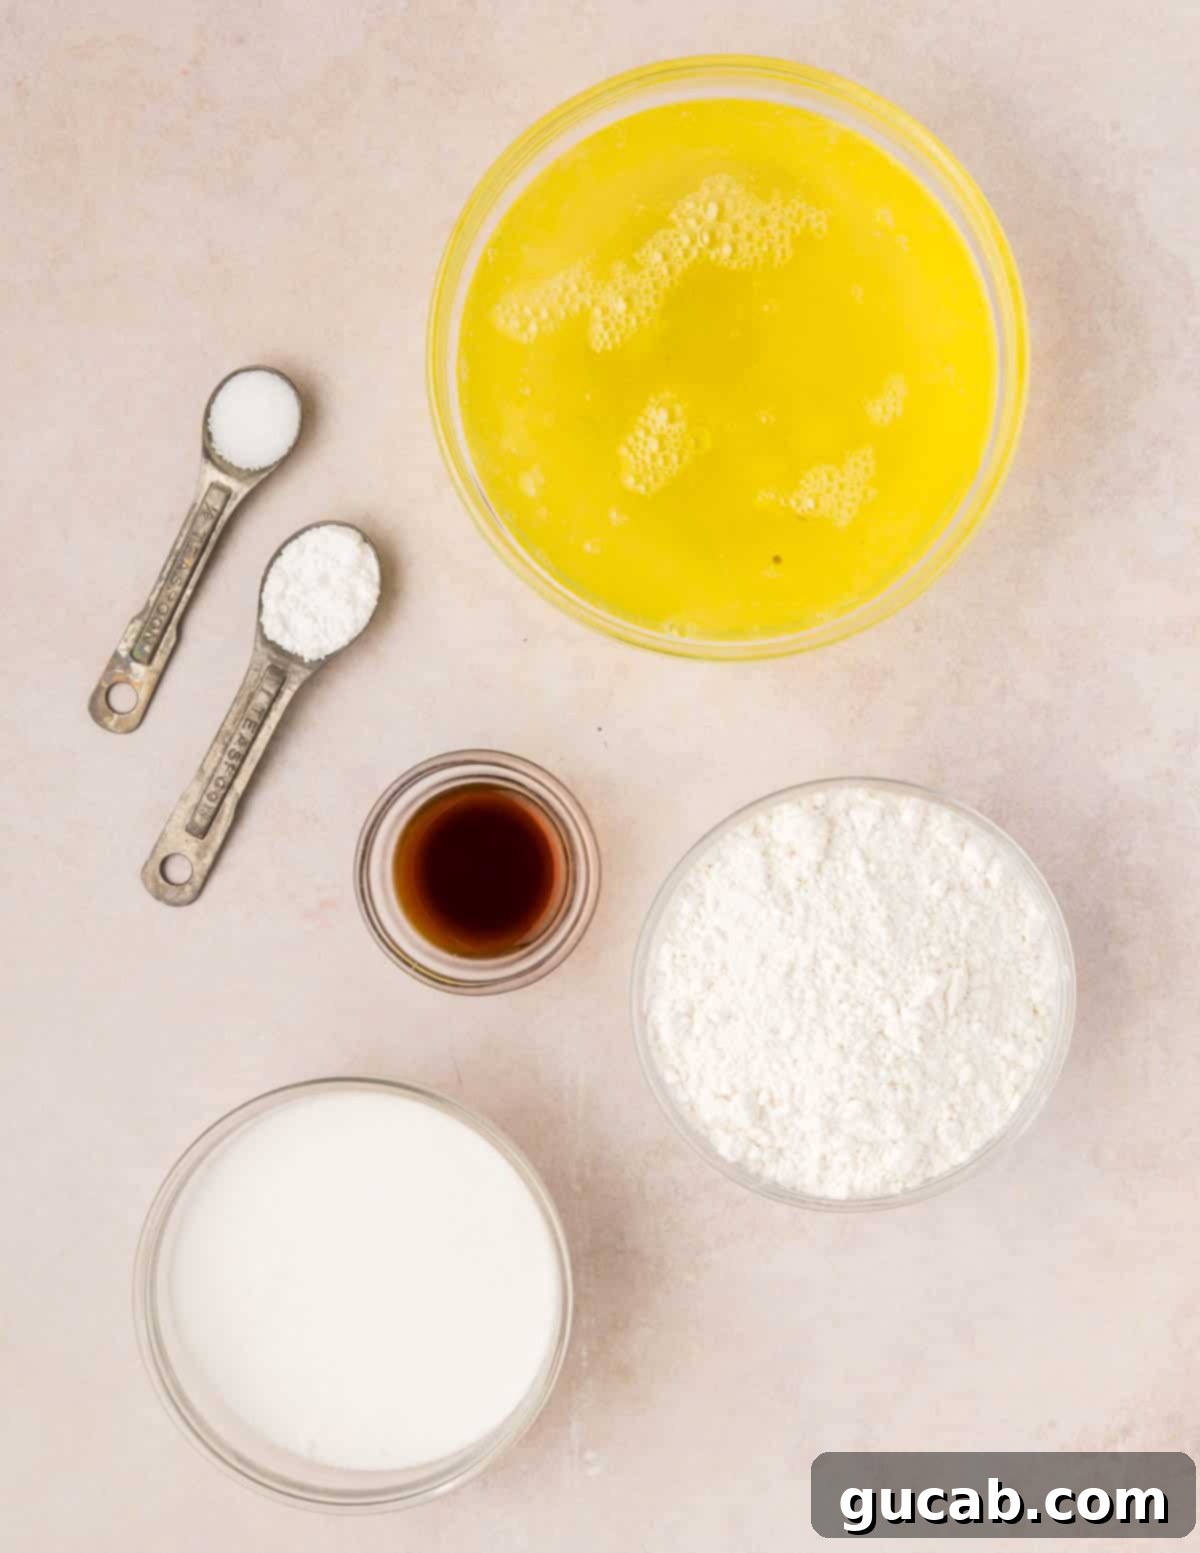
- Fresh Egg Whites: This is arguably the most crucial ingredient. For the best results, absolutely avoid carton egg whites for this recipe! They often contain additives that prevent them from whipping effectively and achieving the necessary volume and stability. Freshly separated egg whites are essential for that characteristic fluffy texture. Since egg sizes can vary, measuring them in a liquid measuring cup ensures accuracy. Aim for egg whites that are at room temperature after separation, as they whip up more easily and to a greater volume.
- Cream of Tartar: This powdered form of tartaric acid plays a vital role in stabilizing the whipped egg whites. It helps them reach their full volume, maintains their structure, and prevents them from collapsing, separating, or “weeping” during and after baking. It’s a key secret to a perfectly tall and stable angel food cake.
- Kosher Salt: A small amount of salt doesn’t just add flavor; it enhances all the other sweet notes in your baked goods, creating a more balanced and complex taste profile. Don’t skip it!
- Vanilla Extract: Vanilla is a quintessential flavor in classic baking. While a high-quality vanilla extract is always a good choice, vanilla bean paste offers a richer, more nuanced flavor and the beautiful visual specks of vanilla bean. Feel free to use whichever you prefer or have on hand. Consider purchasing in bulk from stores like Costco for better value.
- Cake Flour: Cake flour is ideal for angel food cake because it has a lower protein content than all-purpose flour. This lower protein results in less gluten development, which is critical for creating a softer, more tender, and airy final texture. If you don’t have cake flour, you can substitute it with all-purpose flour, though the result might be slightly less delicate. Ensure it’s sifted thoroughly, regardless of type.
- Fine Sugar (Superfine or Caster Sugar): This type of sugar, also known as caster sugar, has finer crystals than regular granulated sugar. Its small size allows it to dissolve more easily and thoroughly into the egg whites, creating a smooth, stable meringue without deflating the delicate air bubbles. If you can’t find superfine sugar, simply pulse regular granulated sugar in a food processor a few times until it reaches a finer consistency – just be careful not to turn it into powdered sugar.
How to Make Homemade Angel Food Cake: Step-by-Step
Crafting a perfect angel food cake is a rewarding process. Follow these detailed steps to ensure a flawless, sky-high dessert. Before you begin, always preheat your oven to 350 degrees Fahrenheit (175°C).
1. Prepare Your Egg Whites by Separating Them
- The process begins with careful egg separation. There are several methods for separating egg whites from yolks, but I find cracking the egg into my hand and letting the white slip through my fingers to be the most reliable.
- The absolute golden rule here is to avoid any egg yolk whatsoever from mingling with the whites. Even the tiniest speck of fat from the yolk can inhibit the egg whites from whipping up properly, drastically affecting the cake’s volume and texture.
- While strict adherence is important, don’t panic over trace amounts of fat; a microscopic speck usually won’t ruin your meringue. However, if a significant piece of yolk breaks, it’s best to discard that egg white and start fresh. For more advanced tips on whipping egg whites, consider this helpful article. For best results, use cold eggs for separation, as the yolks are firmer and less likely to break. Once separated, let the egg whites come to room temperature (about 30 minutes) as they whip up with more volume.
2. Sift the Flour and Sugar Mixture
- This step is crucial and often overlooked. It’s imperative to sift the flour before you incorporate it into the delicate whipped egg whites. Why? Sifting performs two critical functions: it thoroughly aerates the flour, making it lighter, and it meticulously removes any lumps. Both actions are vital for preventing the flour from deflating our meticulously prepared meringue, which forms the airy structure of the cake.
- Combine the cake flour with half of the fine sugar (¾ cup) and sift them together at least twice, or even three times, to ensure maximum aeration and a smooth, lump-free mixture. Set this light and airy mixture aside for later use.
3. Whip the Egg Whites to Stiff Peaks
This stage is where the magic truly happens, but don’t let it stress you out! I’m going to walk you through achieving the perfect meringue.
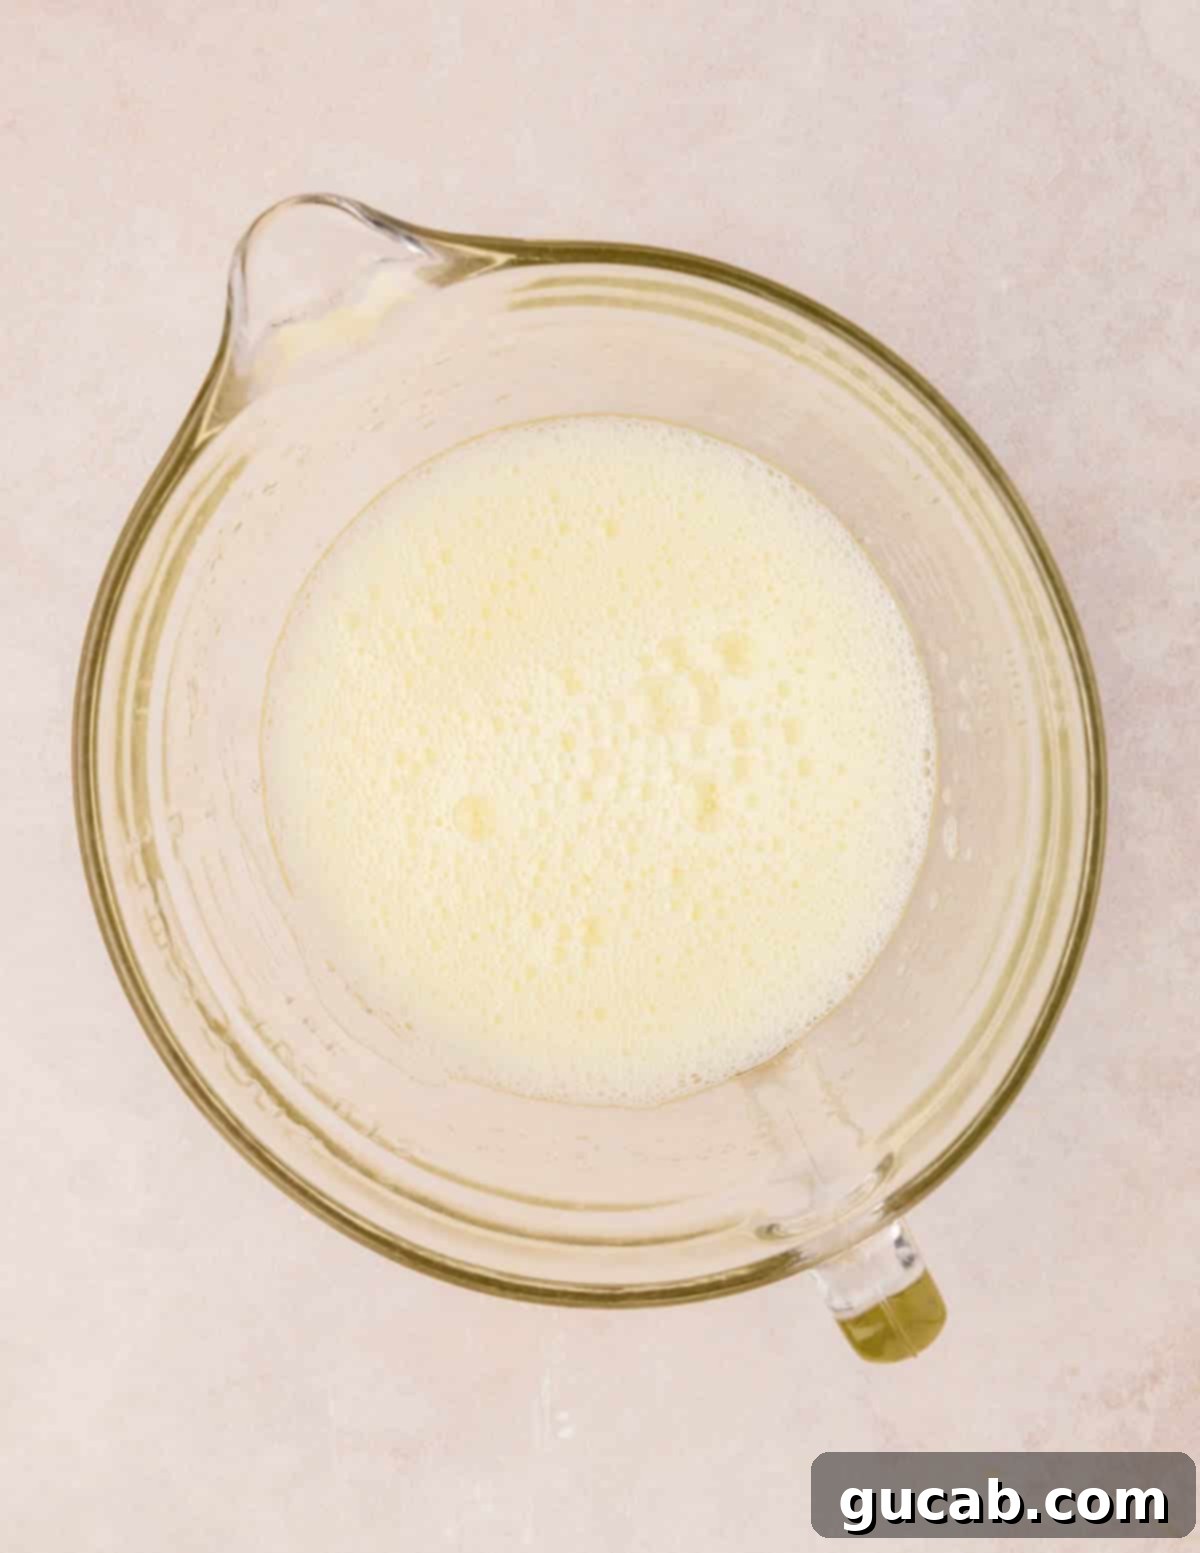
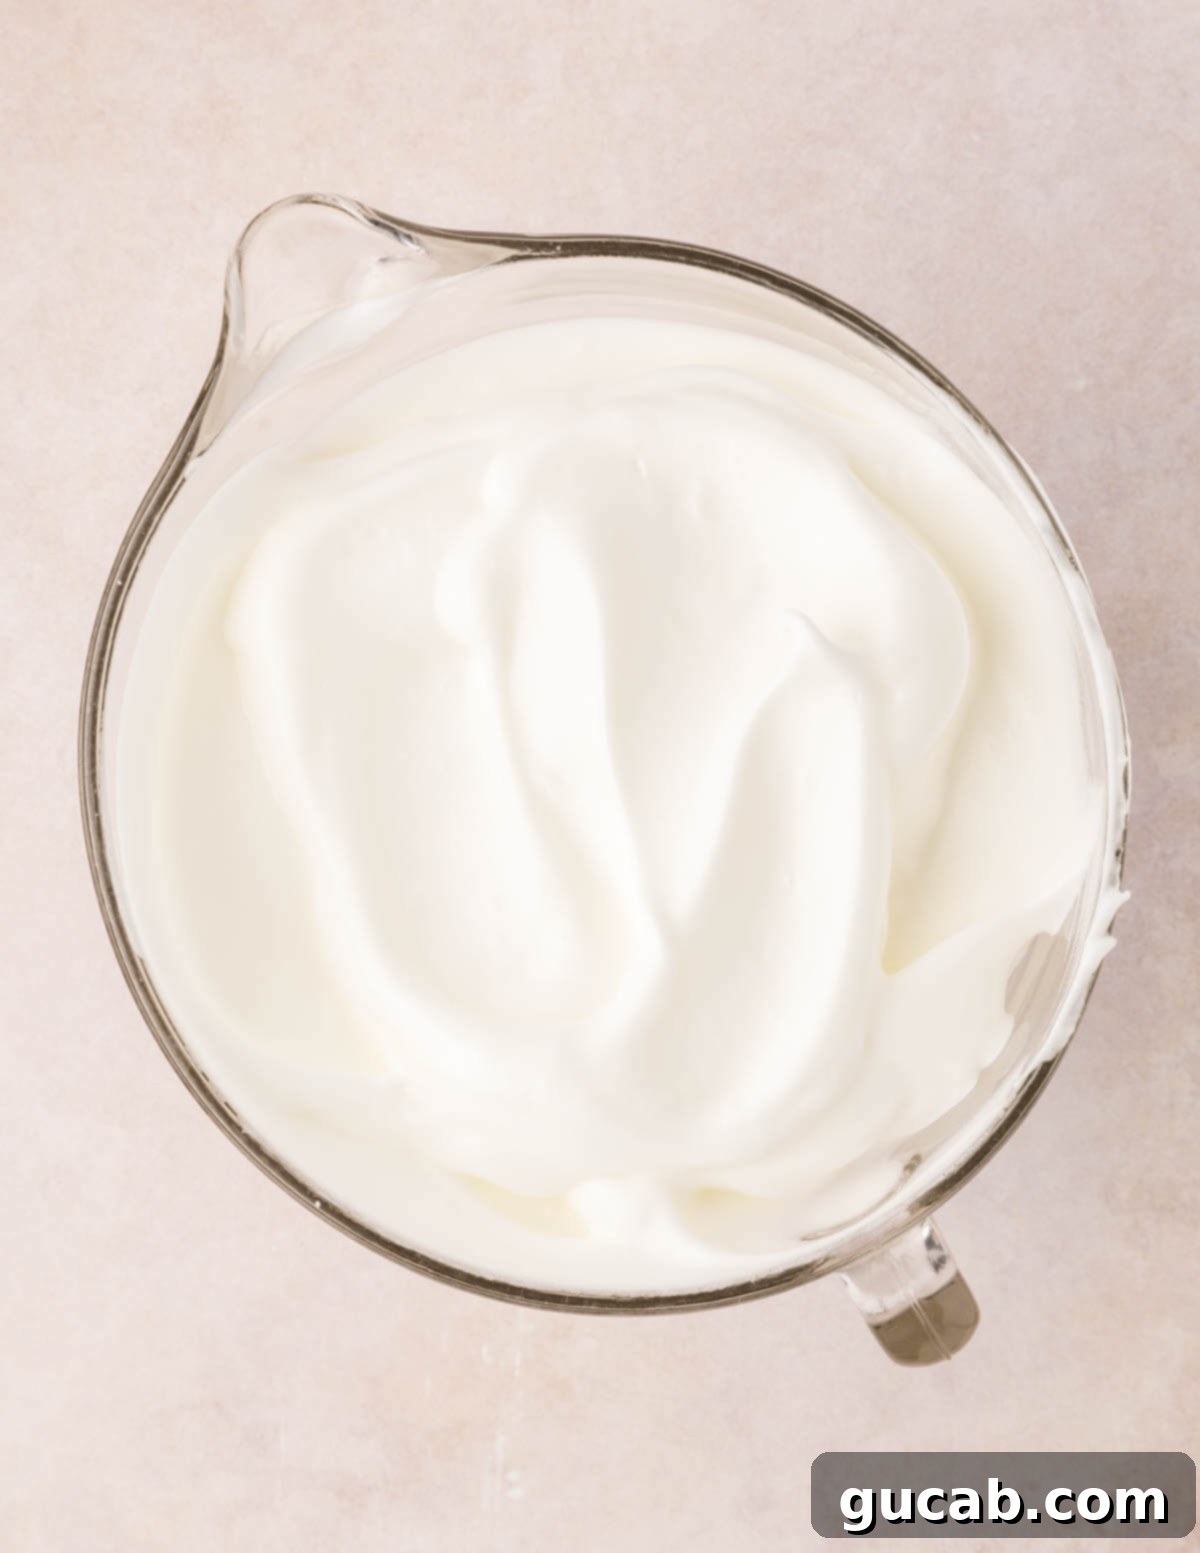
- Begin with a meticulously clean mixing bowl. Any grease or oil residue can prevent the egg whites from whipping properly. I highly recommend using a stand mixer with the whisk attachment for ease and efficiency, but a powerful hand mixer can also work if you’re prepared for a bit of an arm workout!
- Pour the room-temperature egg whites into the bowl, add the cream of tartar and salt. Start beating them on medium speed until they become frothy and bubbly, resembling a bubble bath.
- Increase the speed to medium-high. Gradually, and very slowly, begin adding the remaining ¾ cup of fine sugar, a tablespoon at a time. This slow addition allows the sugar to dissolve properly into the egg whites, creating a smooth and stable meringue. Once all the sugar is incorporated, mix in the vanilla extract.
- Continue beating the egg whites until they reach stiff peaks. To test for stiff peaks, lift the whisk attachment from the mixture. The whipped whites should stand straight up and hold their shape firmly, without curling over or drooping at the tip. They should also appear glossy and smooth. Be careful not to over-whip, which can make them dry and crumbly.
4. Gently Combine to Make the Batter
- The folding process is delicate work. Add the sifted flour/sugar mixture to the whipped egg whites in thirds, rather than all at once. Dumping it in can instantly deflate your beautifully aerated egg whites, undoing all your hard work.
- After each addition, use a rubber spatula to gently fold the mixture. Use a “cut-and-fold” motion, sweeping the spatula down through the center of the bowl, across the bottom, and up the side, turning the mixture over. Rotate the bowl and repeat. Continue until just combined; overmixing will deflate the meringue and result in a dense cake. The goal is to retain as much air as possible.
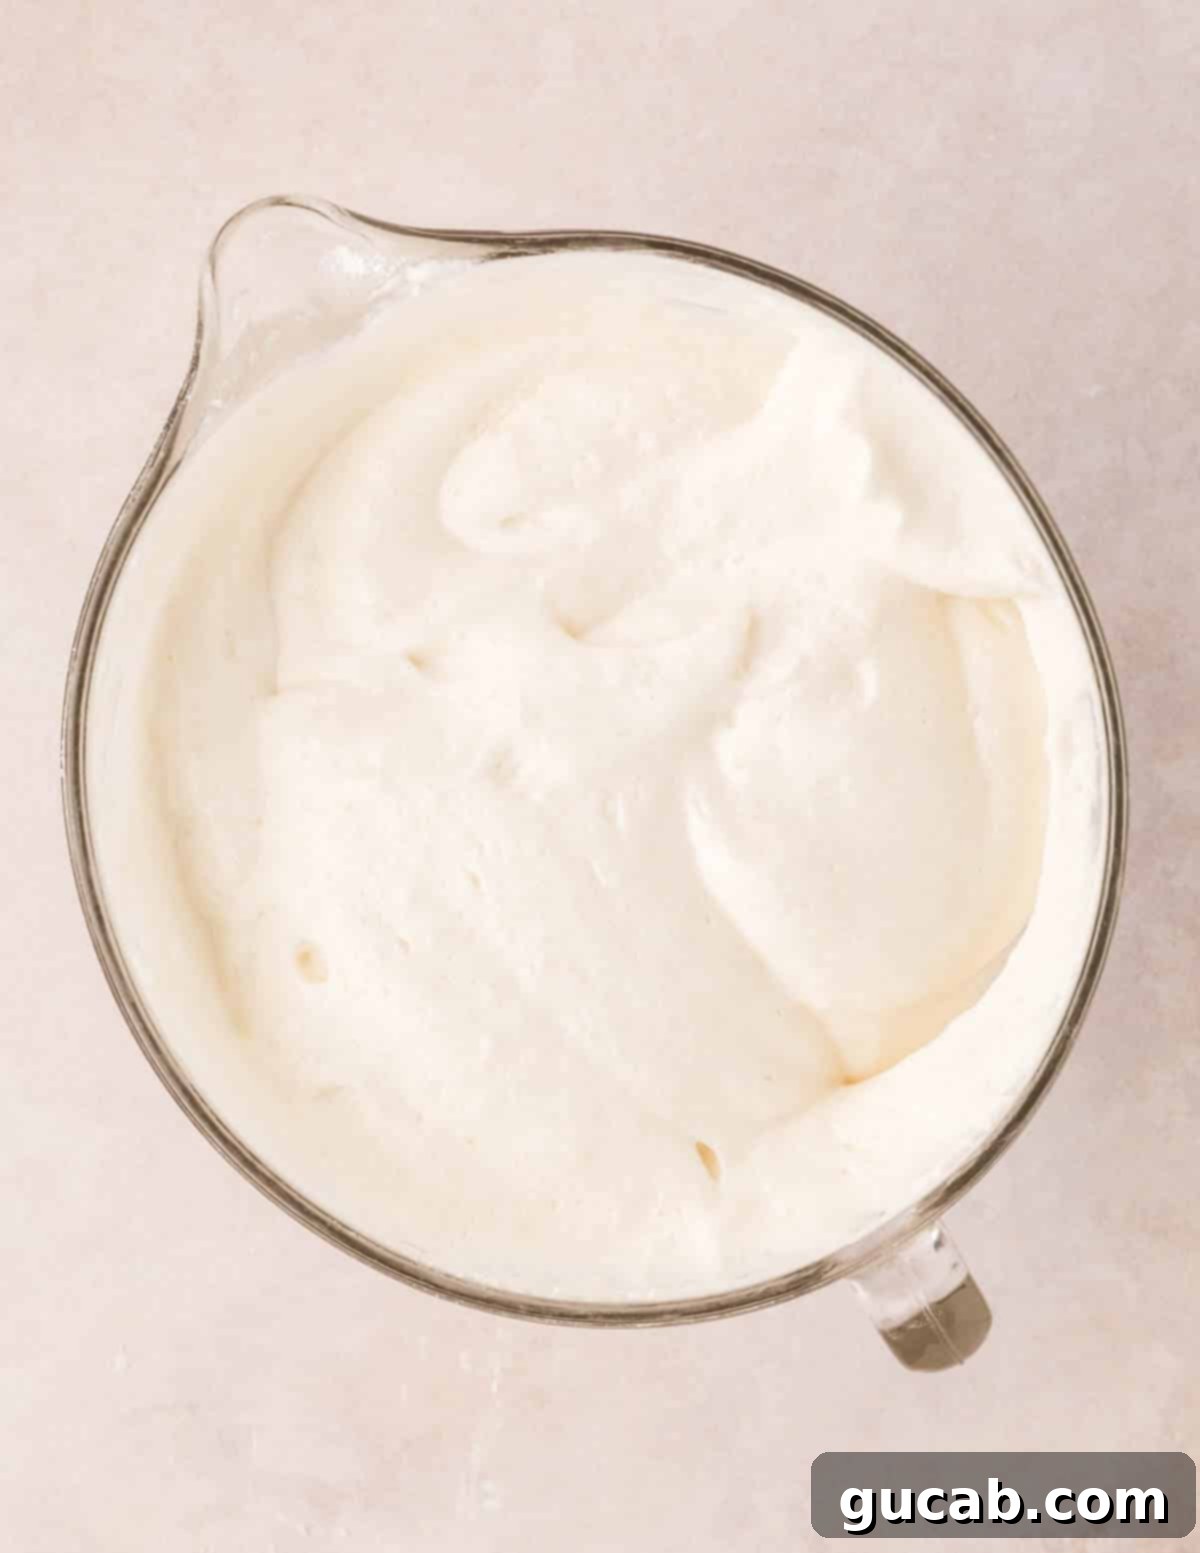
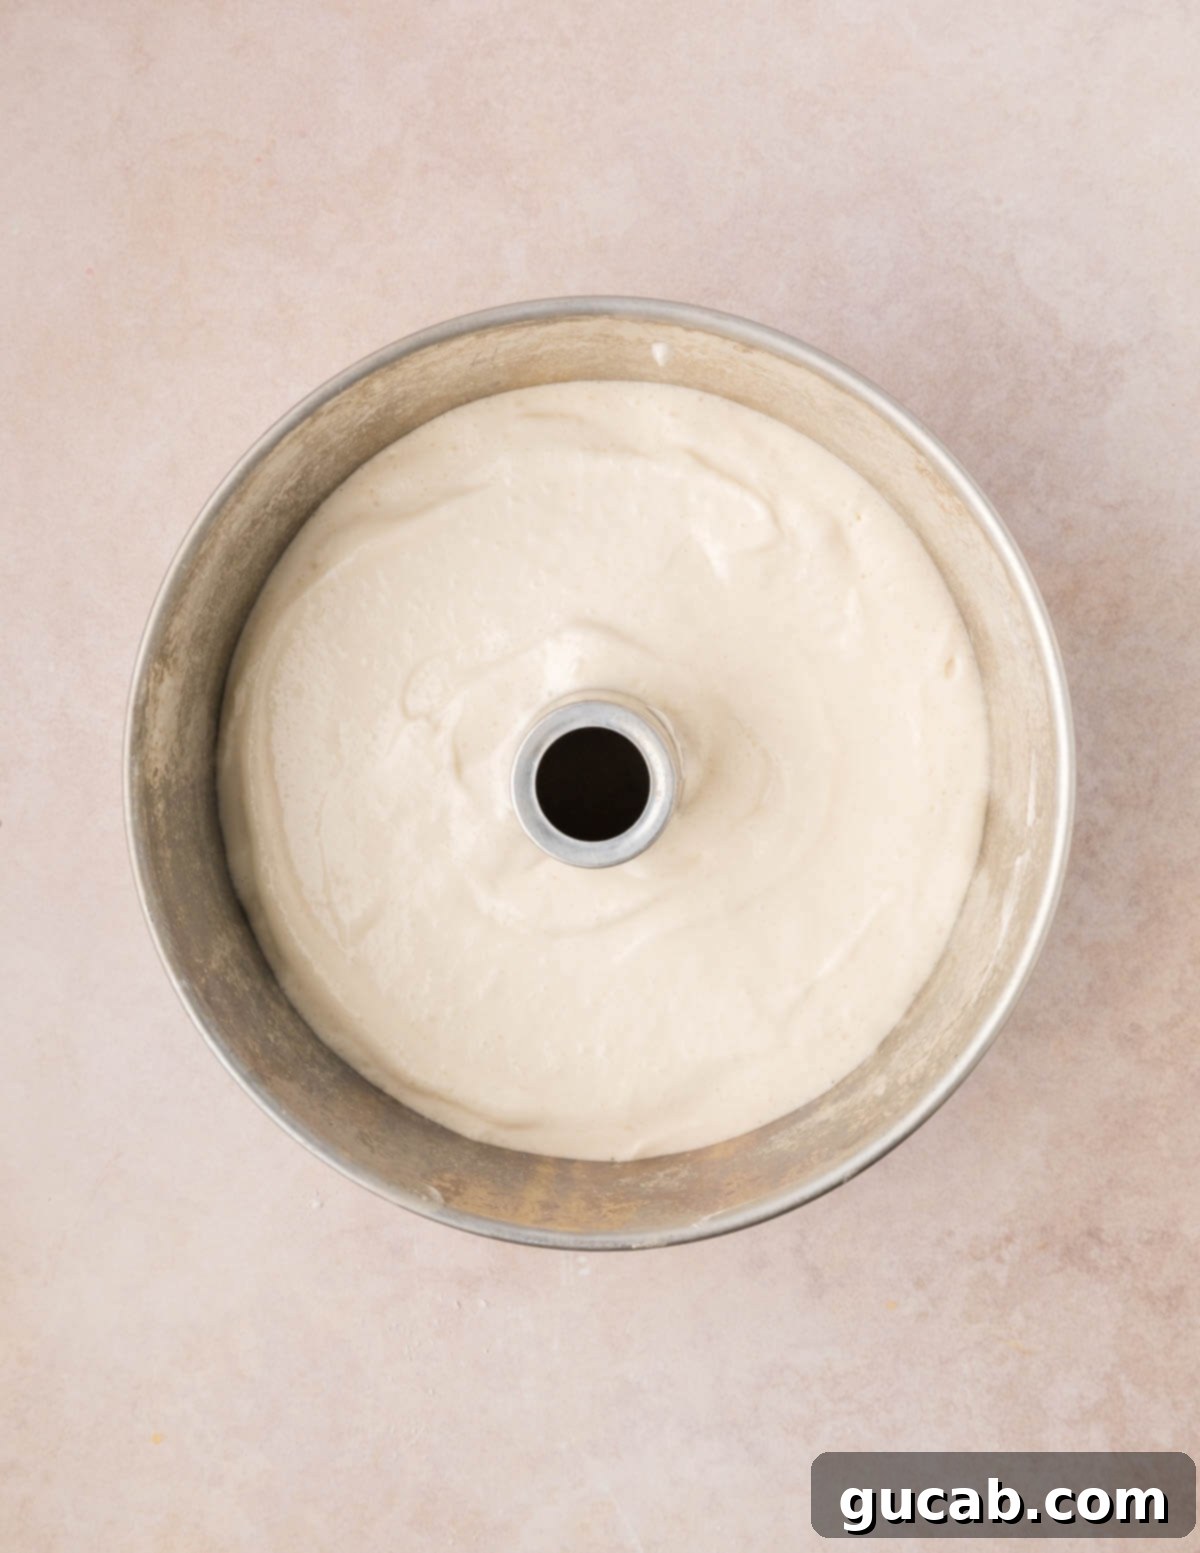
5. Bake and Cool for Perfection
- Carefully pour the delicate batter into your ungreased angel food cake pan. You’ll immediately notice how much lighter and airier it is compared to typical cake batters. Gently smooth the top with your spatula.
- Bake for 40 to 45 minutes, or until the top of the cake turns a beautiful golden brown and develops fine cracks, indicating it’s fully set. To confirm doneness, insert a toothpick into the cake; it should come out clean. Avoid opening the oven door too frequently during baking, as this can cause the cake to collapse.
- Once baked, immediately remove the cake from the oven and carefully invert the pan. Place it on a bottle, the legs of the pan, or a wire rack with a large central opening, so the cake hangs upside down. This critical step prevents the cake from compressing under its own weight as it cools, ensuring it retains its incredible height and airy texture. Let it cool completely in this inverted position, which can take 1-2 hours.
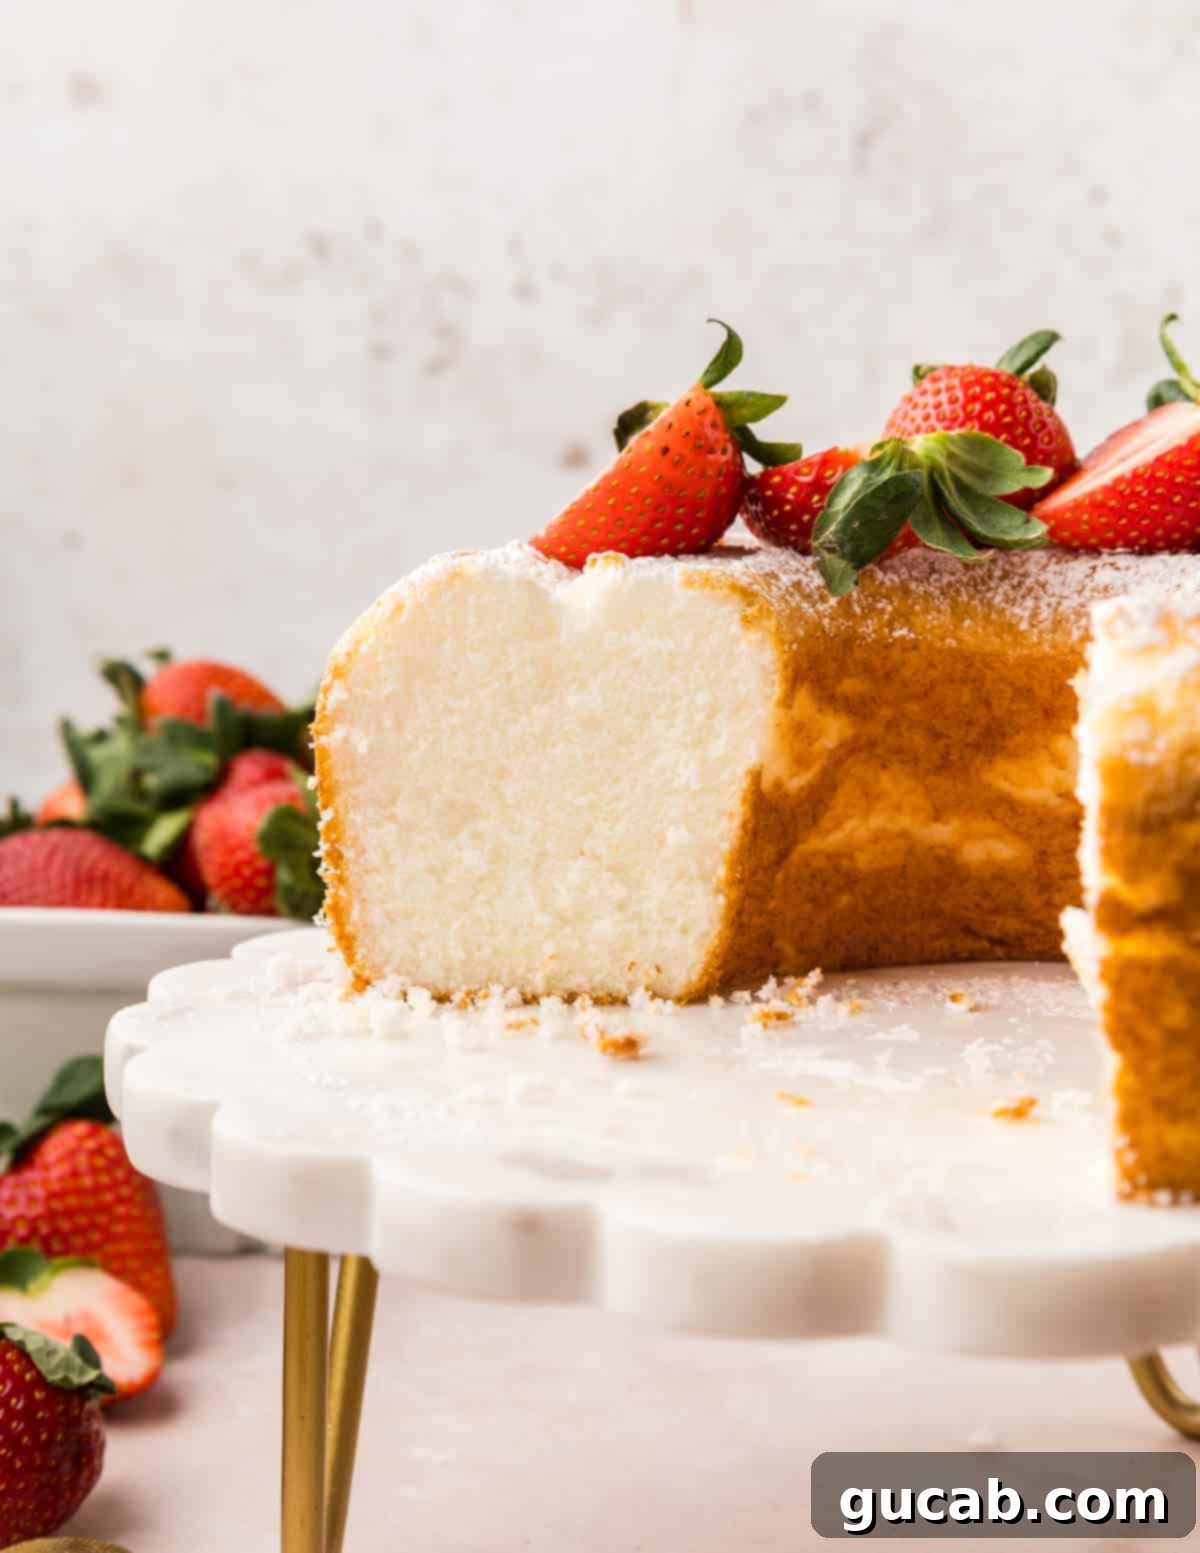
- Only when the cake is entirely cool, run a thin, sharp knife around the outer and inner edges of the pan to loosen the cake. Gently remove it from the pan. For the cleanest slices, always use a serrated knife. Serve this beautiful homemade angel food cake with whipped cream and fresh strawberries for a classic treat.
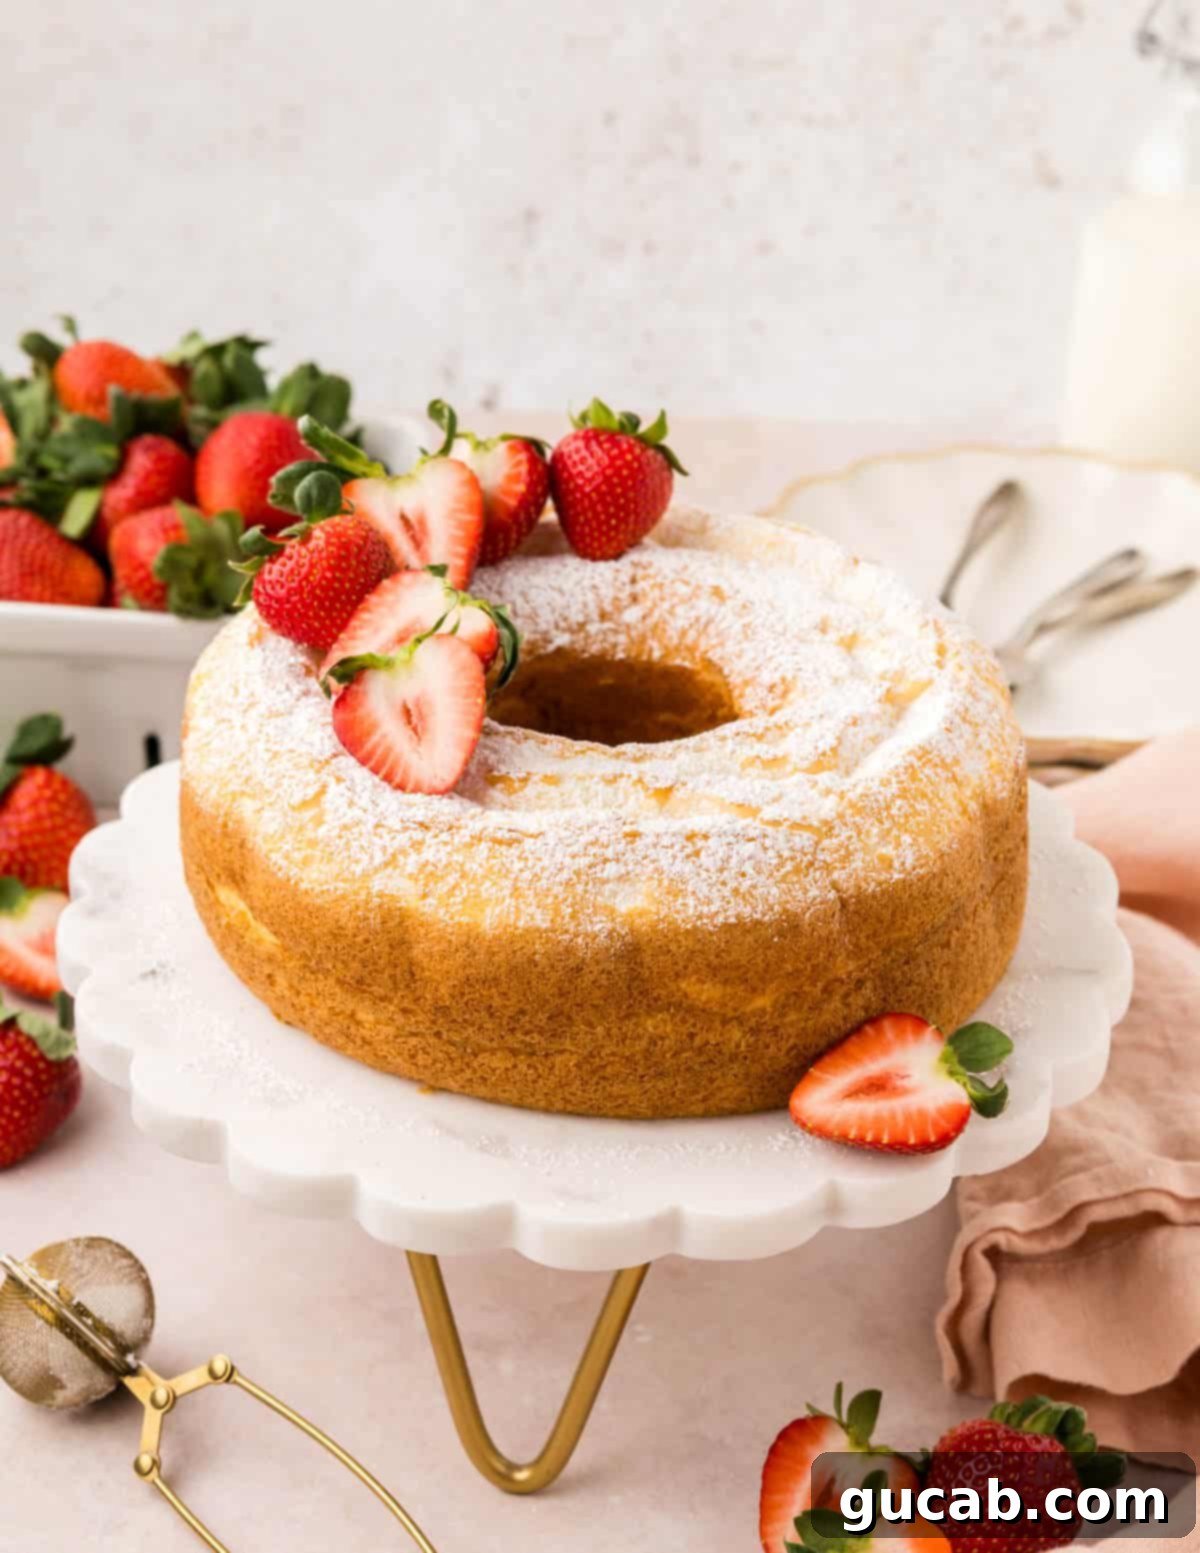
Expert Tips for Angel Food Cake Success:
- Never Grease the Pan! This is perhaps the most crucial rule for angel food cake. Unlike other cakes, you want the batter to “grip” the sides of the ungreased tube pan as it bakes. This adherence allows the cake to climb high, resulting in its signature lofty appearance and incredibly light texture. Greasing the pan will cause the cake to slide down and compress.
- Avoid Carton Egg Whites: Reiterating this vital point: store-bought liquid egg whites typically contain anti-foaming agents or stabilizers that prevent them from whipping up properly and achieving the necessary volume. Always use freshly separated eggs for the best and most reliable results.
- Separate Cold Eggs, Whip Room-Temperature Eggs: Cold eggs are easier to separate, as the yolks and whites are firmer and less likely to break. After separating, let the egg whites sit at room temperature for about 30 minutes to an hour. Room-temperature egg whites whip up faster and achieve greater volume and stability than cold ones.
- Cool Upside Down: As detailed in the instructions, immediately inverting the pan after baking is essential. This prevents the delicate cake structure from collapsing under its own weight as it cools, ensuring it remains tall, airy, and truly “angelic.”
- Cool Completely Before Slicing: Patience is a virtue, especially with angel food cake. Cutting into a warm cake can cause it to compress and become gummy. Allow it to cool entirely for the best texture and clean slices.
- Always Use a Serrated Knife: The delicate, airy texture of angel food cake means a straight-edge knife will typically compress and tear it. A serrated knife, used with a gentle sawing motion, glides through the cake, preserving its delicate structure and resulting in beautiful, clean slices.
- Clean Equipment is Key: Ensure your mixing bowl and whisk attachment are spotlessly clean and free of any grease or soap residue. Even a tiny amount can prevent egg whites from whipping properly. Wiping them down with a little lemon juice or vinegar before use can help.
- Don’t Open the Oven Door: Resist the temptation to peek! Opening the oven door, especially in the first 30 minutes, can cause a sudden drop in temperature, leading to the cake collapsing.
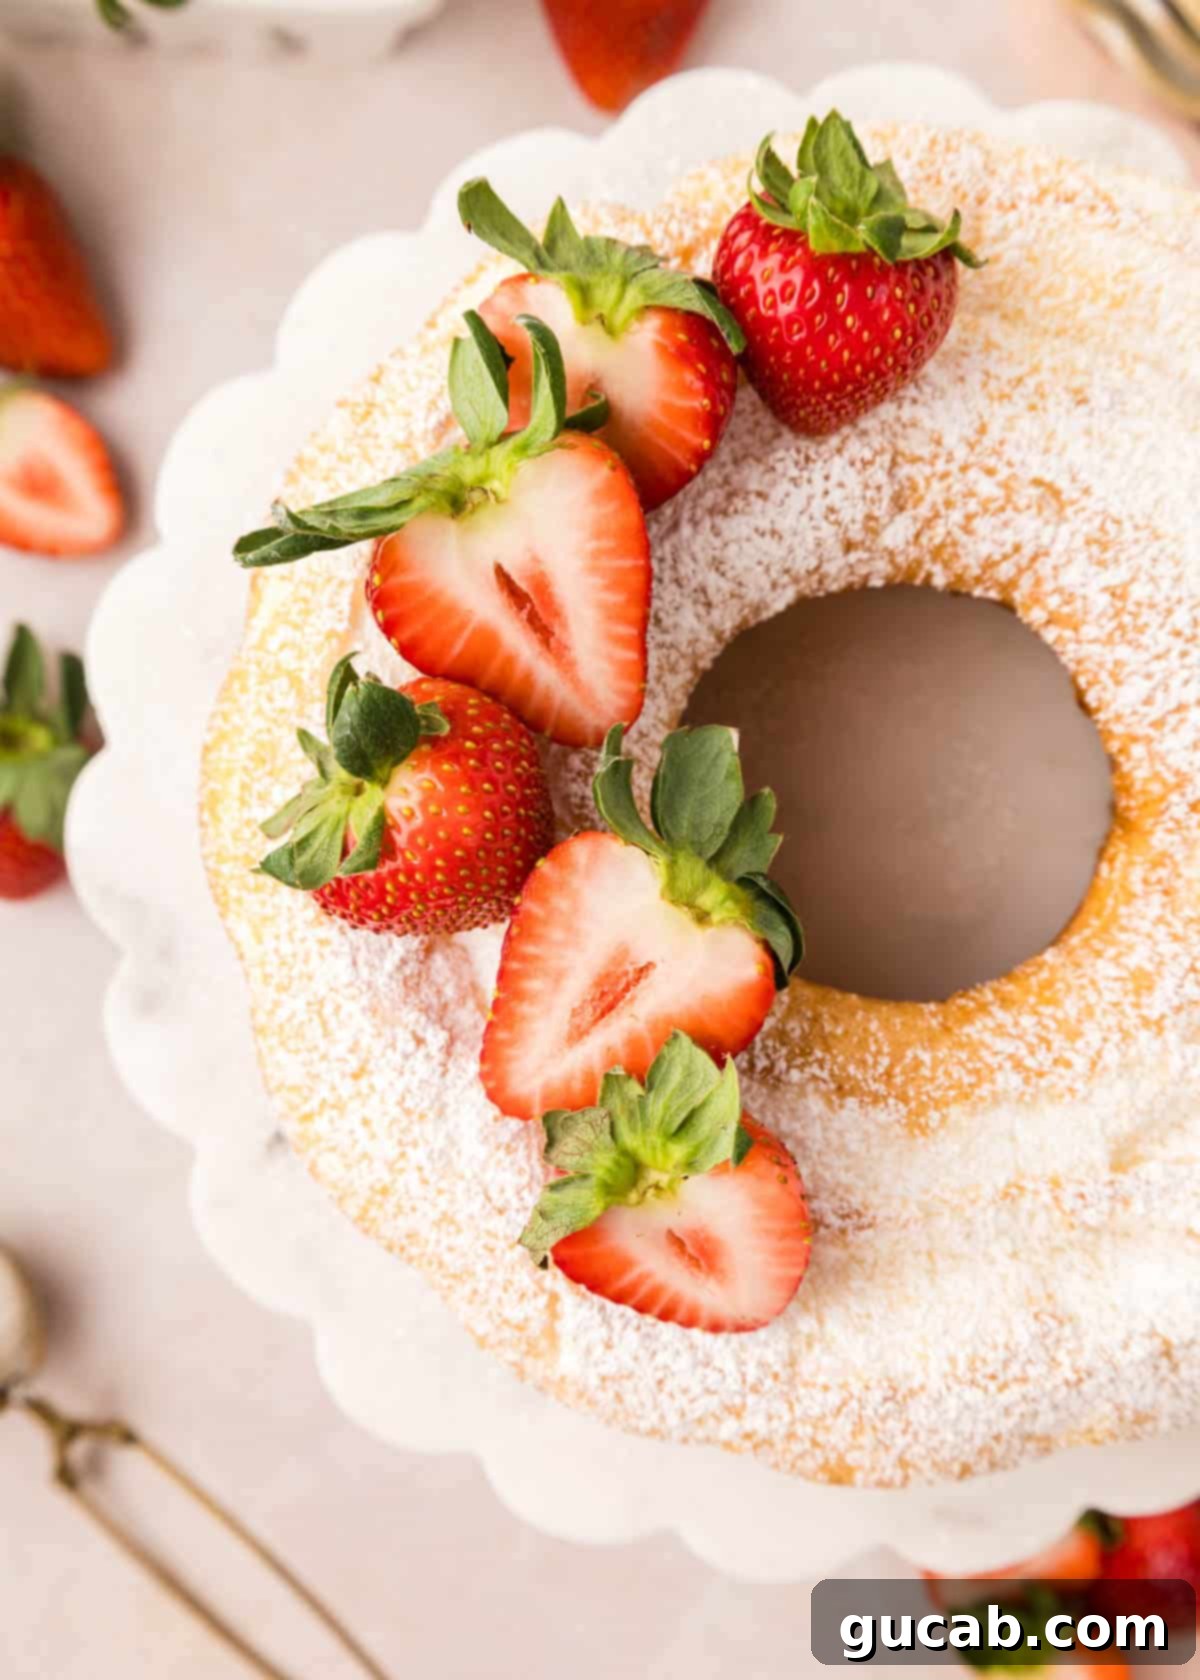
Delightful Ways to Enjoy Angel Food Cake:
Angel food cake is a wonderfully versatile base for a variety of toppings and desserts. Its subtle sweetness and airy texture make it perfect for pairing with vibrant flavors.
- The Classic Trio: Whipped Cream and Macerated Strawberries: This is arguably the most beloved way to enjoy angel food cake, and for good reason! To macerate strawberries, simply slice them and toss them gently with a little bit of sugar. Let them sit for about 10-15 minutes; they’ll soften, release their delicious juices, and their flavor will intensify beautifully. Spoon them generously over a slice of cake with a dollop of freshly whipped cream.
- Elegant Trifle: Angel food cake makes an incredible trifle. For my daughter’s first birthday, I prepared this, and it was an absolute hit! Dice the angel food cake into bite-sized chunks. In a beautiful glass trifle bowl, create layers of cake chunks, rich whipped cream, and plenty of fresh sliced strawberries (or other berries). The layers create a stunning visual and a delightful texture combination.
- Decadent Caramel Sauce: While often paired with fruit, angel food cake is surprisingly delicious with a drizzle of homemade caramel sauce. The light cake provides a perfect counterpoint to the rich, buttery sweetness of the caramel.
- Lemon Curd & Blueberries: For a bright, tangy option, serve slices with a generous spoonful of homemade lemon curd and fresh blueberries. The citrus cuts through the sweetness beautifully.
- Grilled or Toasted: For a unique twist, lightly grill or toast slices of angel food cake until slightly golden. The caramelized edges add a lovely texture. Serve with grilled peaches and a scoop of vanilla bean ice cream.
- Chocolate Drizzle & Raspberries: A simple drizzle of melted dark chocolate and a handful of fresh raspberries elevate the cake to a sophisticated dessert.
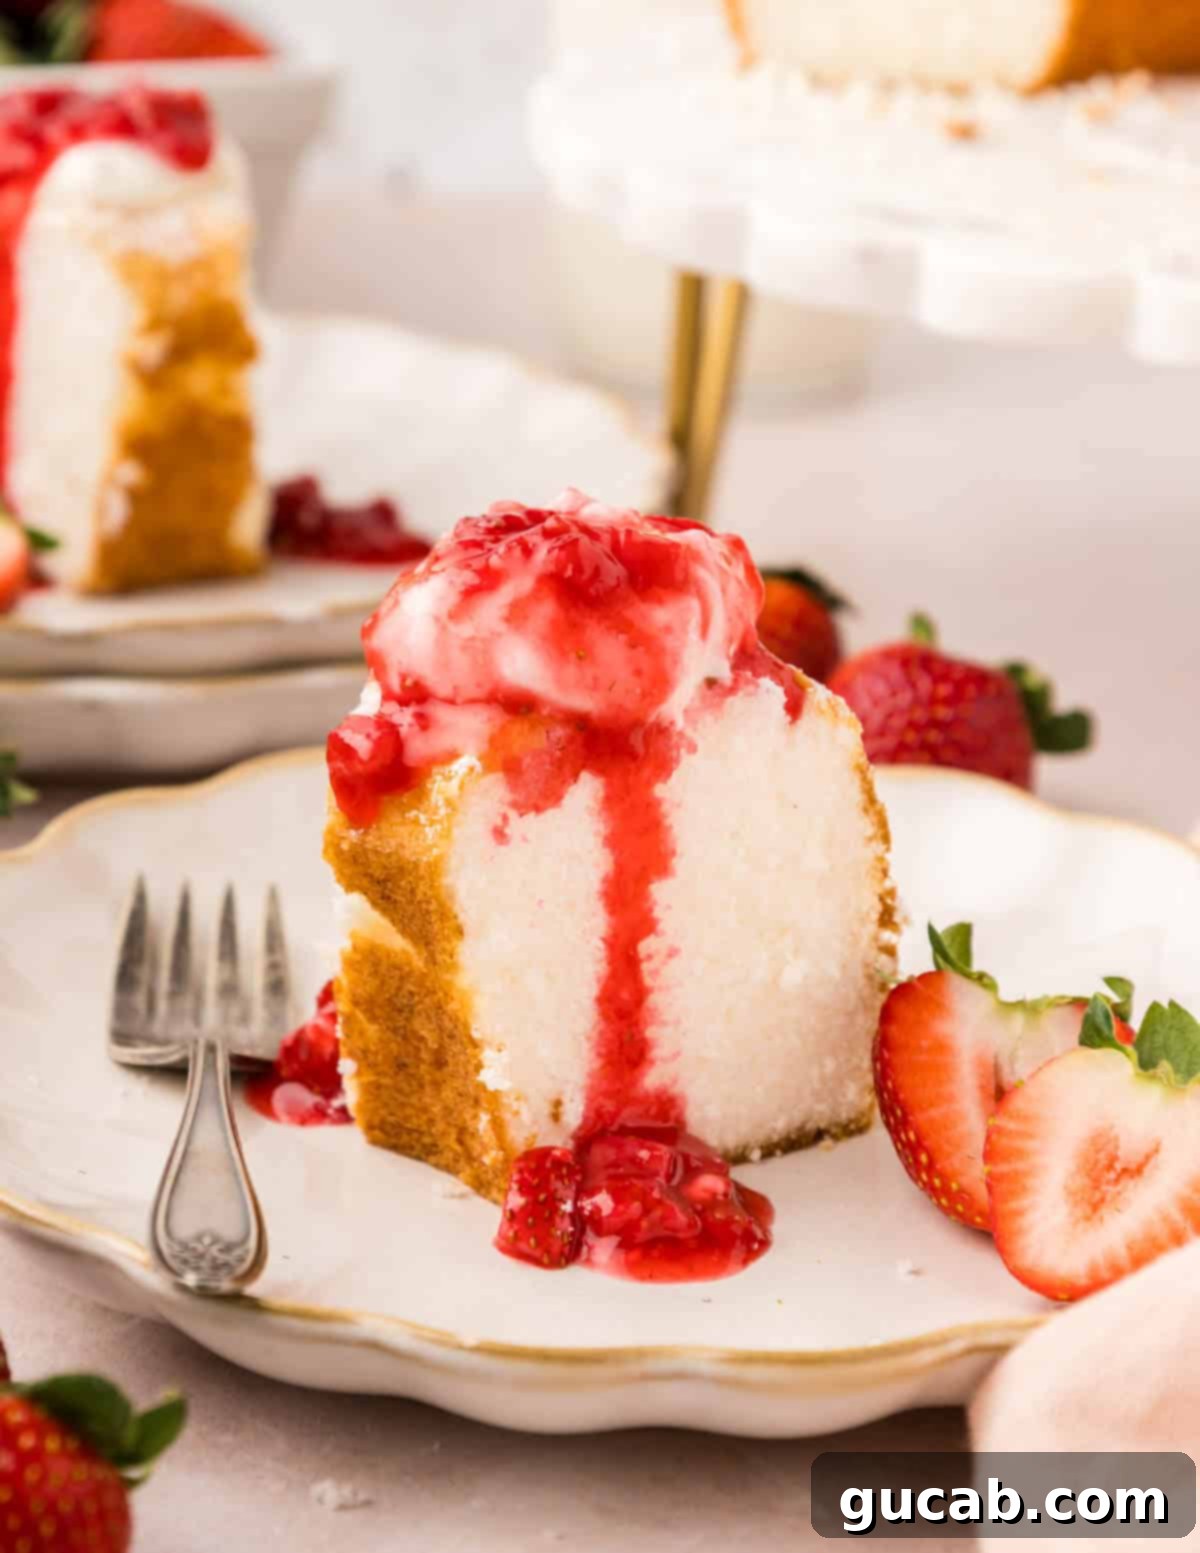
Storage & Freezing Tips:
Proper storage is key to keeping your homemade angel food cake fresh and delicious.
- Room Temperature Storage: Because angel food cake is fat-free, it tends to dry out faster than traditional butter-based cakes. To maintain its delicate moisture, store the cooled cake (unfrosted) in an airtight container at room temperature for up to 2 days. Avoid refrigerating it unless it’s already frosted with a perishable topping, as refrigeration can dry it out further.
- Freezing for Longer Freshness: Angel food cake freezes exceptionally well, making it perfect for preparing ahead or saving leftovers. For freezing, ensure the cake is completely cool. Wrap it tightly first in plastic wrap, then in aluminum foil to prevent freezer burn. It can be frozen for up to a month. To thaw, simply unwrap the cake and let it sit at room temperature for a few hours until soft.
Frequently Asked Questions (FAQ)
- Why did my angel food cake deflate?
Deflation is usually due to one of a few common issues: not whipping the egg whites to stiff enough peaks, over-folding the flour mixture (which collapses the air bubbles), using a greased pan (which prevents the cake from climbing), or cutting into the cake before it’s completely cool.
- Can I use a different pan for angel food cake?
While an angel food cake tube pan (with a removable bottom and feet) is highly recommended for its ability to allow the cake to climb and cool properly, you could theoretically use a large bundt pan if it’s ungreased. However, the results may vary, and it won’t be as tall or airy as one baked in a proper tube pan. Springform pans are generally not suitable as the batter is too thin and will leak.
- What can I do with the leftover egg yolks?
Don’t let those yolks go to waste! They’re perfect for making custards, crème brûlée, homemade ice cream, hollandaise sauce, or even a batch of rich lemon curd or chocolate pudding.
- Can I add other flavorings to my angel food cake?
Absolutely! While vanilla is classic, you can experiment with other extracts like almond or lemon. For a citrusy twist, add fresh lemon or orange zest to the sugar before sifting it with the flour. Just be mindful not to add too much liquid, as it can affect the meringue’s stability.
More Classic Desserts to Love:
- Brown Butter Chocolate Chip Cookies
- The Best Strawberry Cake Filling
Angel Food Cake
Carolyn
Pin Recipe
15
minutes
45
minutes
1
hour
Dessert
American
12
servings
153
kcal
Equipment
-
Stand mixer with the whisk attachment
-
Angel food cake pan (tube pan with removable bottom)
-
Fine-mesh sieve
Ingredients
-
1½
cups
fresh egg whites
(about 11 large eggs), at room temperature, see note 1 -
1
cup
cake flour
or all-purpose flour, sifted -
1½
cups
fine sugar
(superfine/caster sugar), see note 2 -
1½
teaspoons
cream of tartar -
2
teaspoons
vanilla extract -
½
teaspoon
kosher salt
Instructions
-
Preheat your oven to 350°F (175°C). Ensure your angel food cake pan is impeccably clean and completely ungreased. This is critical for the cake to climb.
-
Separate the egg whites from the yolks, carefully ensuring no yolk mixes with the whites. Save the egg yolks for another recipe. Let the separated egg whites come to room temperature.
-
In a bowl, sift ¾ cup of the fine sugar together with the cake flour at least two times. This aerates the flour and removes any lumps. Set this mixture aside.
-
In the bowl of a stand mixer fitted with the whisk attachment, beat the room-temperature egg whites, cream of tartar, and salt on medium speed until they become frothy.
-
Increase the speed to medium-high. While beating, gradually add the remaining ¾ cup of sugar, a tablespoon at a time, allowing it to dissolve. Once all sugar is added, mix in the vanilla extract.
-
Continue beating the egg whites until stiff, glossy peaks form (when you lift the whisk, the peaks should stand upright). Gently fold in the sifted flour mixture in thirds, being careful not to overmix or deflate the precious egg whites. Ensure all flour is just incorporated.
-
Carefully pour the light and airy batter into the ungreased angel food cake pan. Smooth the top gently with a spatula.
-
Bake for 40 to 45 minutes, or until the top is golden brown, cracked, and a toothpick inserted comes out clean. Avoid opening the oven door frequently.
-
Immediately upon removing the cake from the oven, invert the pan onto its built-in feet, a bottle, or a wire rack to cool completely. This prevents the cake from collapsing.
-
Once completely cool, run a thin, sharp knife around the outer edge and the center tube to loosen the cake. Gently remove it from the pan. Slice with a serrated knife for the best results. Serve immediately with your favorite toppings like whipped cream and fresh berries.
Notes
Note 2: Fine sugar (like caster or superfine sugar) dissolves much more easily into the egg whites than regular granulated sugar, contributing to a stable meringue and a consistently light batter that resists deflation. If superfine sugar isn’t available, pulse regular granulated sugar in a food processor for a few seconds until it’s finer, but be careful not to turn it into powdered sugar.
Nutrition
Calories:
153
kcal
Carbohydrates:
33
g
Protein:
5
g
Fat:
0.3
g
Saturated Fat:
0.03
g
Polyunsaturated Fat:
0.1
g
Monounsaturated Fat:
0.01
g
Sodium:
148
mg
Potassium:
123
mg
Fiber:
0.3
g
Sugar:
25
g
Vitamin A:
0.2
IU
Calcium:
4
mg
Iron:
0.1
mg
angel food cake, homemade cake, light cake, fluffy dessert
Tried this recipe?
Let us know how it was!
