Master the Art of Tear-Free Onion Chopping: Your Ultimate Guide to Crying-Free Kitchen Prep
For many home cooks and professional chefs alike, the simple act of preparing an onion can quickly turn into a tear-jerking ordeal. It’s a universal culinary challenge that often leaves us squinting, sniffling, and wiping away streams of tears, all for the sake of delicious flavor. While countless “hacks” and old wives’ tales promise a solution – from chewing gum to holding a piece of bread in your mouth – most fall short, adding more fuss than actual relief.
But what if I told you there’s a tried-and-true method, a single technique so effective that it can liberate you from the tyranny of onion tears forever? For twelve years now, I haven’t shed a single tear while cutting onions, and it’s not because I’ve banished these flavorful alliums from my kitchen. It’s because I discovered the secret, a simple understanding of onion anatomy that transforms the chopping experience.
Through countless kitchen experiments, conversations, and even a dive into scientific explanations, it became clear that this truly effective method isn’t common knowledge – and it absolutely should be! It’s time to cut through the myths and give you a real, practical solution that works every single time. Forget the complicated multi-step processes like boiling or ice-bathing your onions. This method is straightforward, efficient, and requires no extra equipment, just a sharp knife and a little know-how.
As with any good story, especially one involving a kitchen revelation, let’s start at the very beginning – understanding why onions bring on the waterworks in the first place.

Disclosure: This post may contain affiliate links. In other words, if you click a link and purchase something, I will receive a commission at no cost to you. I only recommend products I use and enjoy myself.
The Science Behind Your Tears: Why Onions Make You Cry
Why do we cry when we cut into an onion? The short answer: it’s all thanks to sulfur and a fascinating chemical reaction. Your eyes are responding to a potent irritant created when the onion’s cells are ruptured. Our eyes instinctively produce tears as a protective mechanism to wash away this irritant, and boom – it’s an all-out cry fest.
To elaborate, onions are experts at absorbing sulfur from the soil as they grow. This sulfur is stored in compounds that, once the onion’s cell walls are broken (by cutting or crushing), convert into amino acids. These amino acids then unite with specific enzymes already present in the onion to form unstable sulfenic acids. These sulfenic acids quickly rearrange themselves into a volatile gas called syn-propanethial-S-oxide. This particular chemical is what readily vaporizes into the air, travels up to your eyes, and causes that familiar burning sensation. Think of it as nature’s own onion tear gas, specifically designed to deter pests, and unfortunately, us too!
Different types of onions can produce varying amounts of these compounds. Sweeter onions, for instance, generally have less of the tear-inducing enzymes, making them slightly less potent, while red or yellow onions tend to be the biggest culprits. Understanding this underlying chemistry is key to appreciating why certain methods, particularly the one we’re about to unveil, are so effective.
Debunking Common Onion Crying Myths and Ineffective Tricks
Before diving into the solution, let’s clear up some of the most popular (and often frustratingly ineffective) methods people try. You’ve probably heard of a few, or even tried them yourself in desperation:
- Chewing Gum or Bread: The theory here is that keeping your mouth busy or directing airflow away from your eyes might help. While it might offer a tiny distraction, it does little to stop the volatile compounds from reaching your eyes.
- Lighting a Candle Nearby: Some believe the candle flame will burn off the irritants. In reality, a small flame isn’t powerful enough to neutralize the widespread gas emitted from a freshly cut onion. It’s largely ineffective.
- Wearing Goggles: This actually *can* work, but it’s often impractical and makes you look like you’re preparing for a chemistry experiment, not a meal. It’s an extra step and often uncomfortable.
- Freezing or Refrigerating the Onion: Cooling the onion can slow down the chemical reaction that produces the tear gas, offering some minimal relief. However, a frozen onion is much harder to cut, and a chilled onion still releases enough irritants to cause discomfort.
- Soaking the Onion in Water: This method can dilute some of the compounds, but it also alters the texture and flavor of the onion, making it less ideal for many recipes. Plus, you still have to cut it at some point, and the process will continue.
The common thread among these methods is that they either don’t address the core problem effectively, or they add inconvenient steps to your cooking process. The goal is to find a single, efficient, and genuinely tear-free solution.
The Secret to Tear-Free Onions: Understanding the Onion’s Anatomy
It’s really quite simple, and you don’t need to be Gordon Ramsay to cut an onion without crying. The key lies in understanding the onion’s basic structure. Every onion has two distinct ends: the stem end and the root end (which I often think of as the “hairy side”). This distinction is critical.
For whatever reason, the highest concentration of the tear-inducing enzymes and compounds is found nearest to the root end, and these compounds are most aggressively released when the cells around the root are severed. This is why many online tutorials that instruct you to lop off the stem first are actually doing you a disservice – you’re prematurely releasing the “tear gas” right into your face! Professional chefs often cry too, precisely because they might not be aware of this crucial anatomical detail.
Our method focuses on keeping the root end intact for as long as possible, using it as a natural “handle” and containing the most potent irritants until the very last cut. This strategic approach minimizes the release of the volatile compounds, allowing you to slice and dice in peace.

Your Step-by-Step Guide to Cutting Onions Without Crying
Ready to experience tear-free onion chopping? Here’s the ultimate method, broken down into easy-to-follow steps:
Essential Tools for the Job:
- A Sharp Knife: This is paramount for clean cuts and safety. A dull knife is more likely to slip and crush cells, releasing more irritants. A Chef’s knife or Santoku knife are excellent choices.
- Stable Cutting Board: A non-slip surface is essential for safe and efficient chopping.
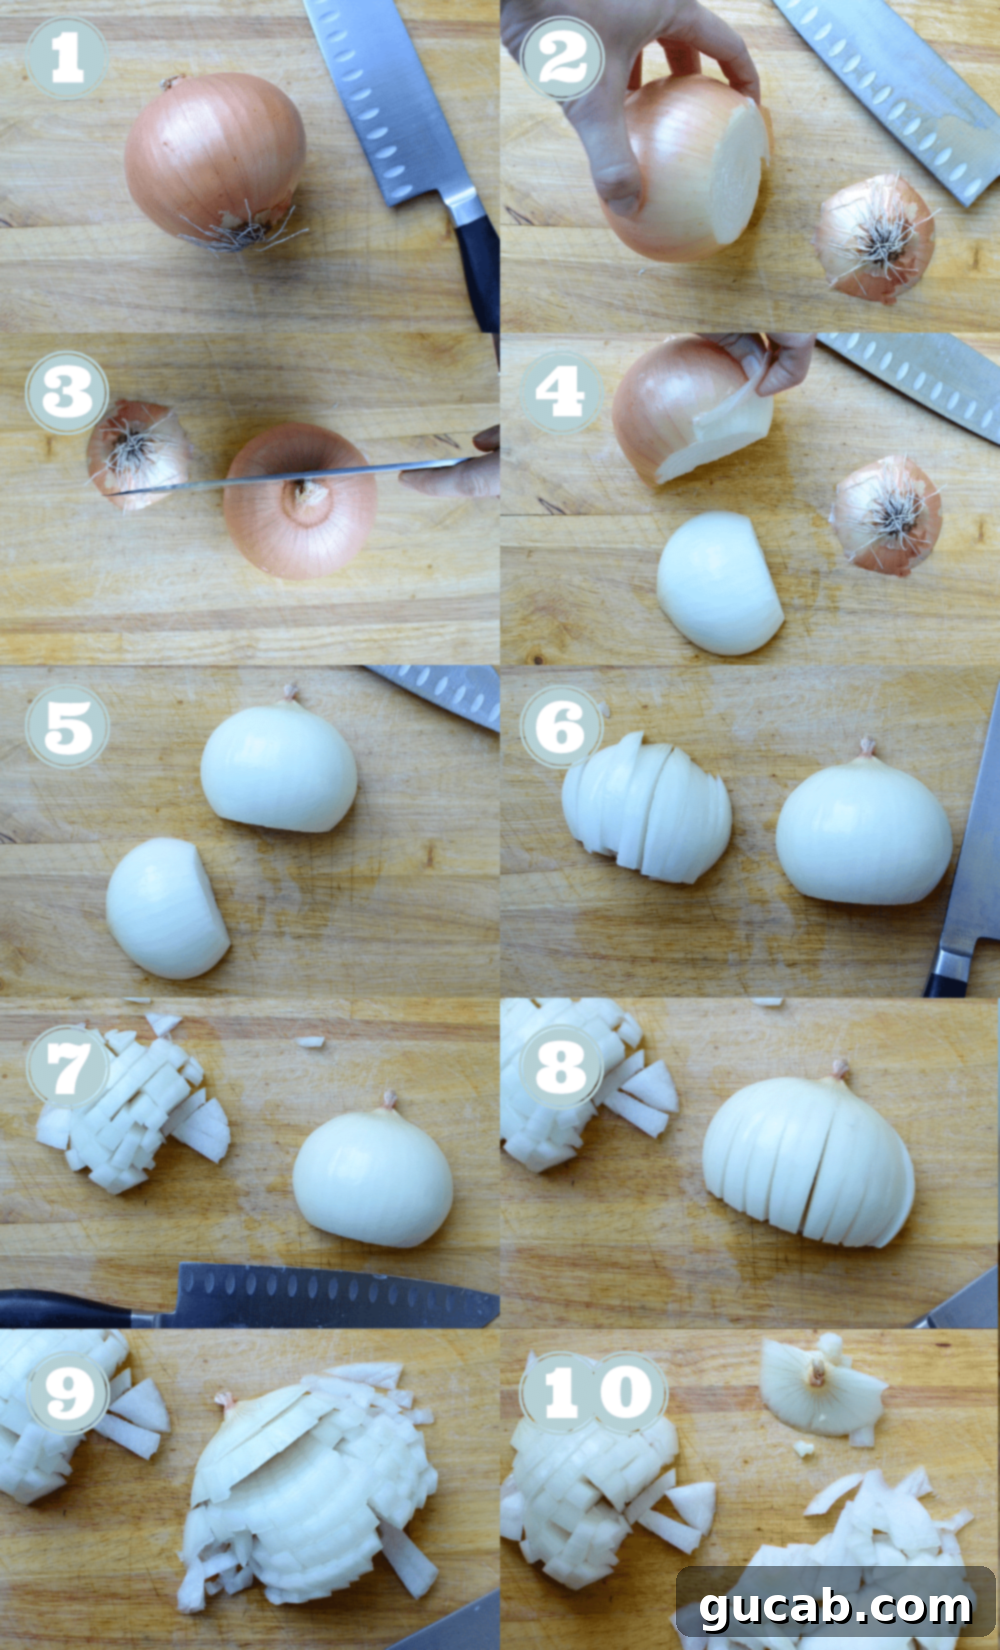
The Tear-Free Method, Illustrated:
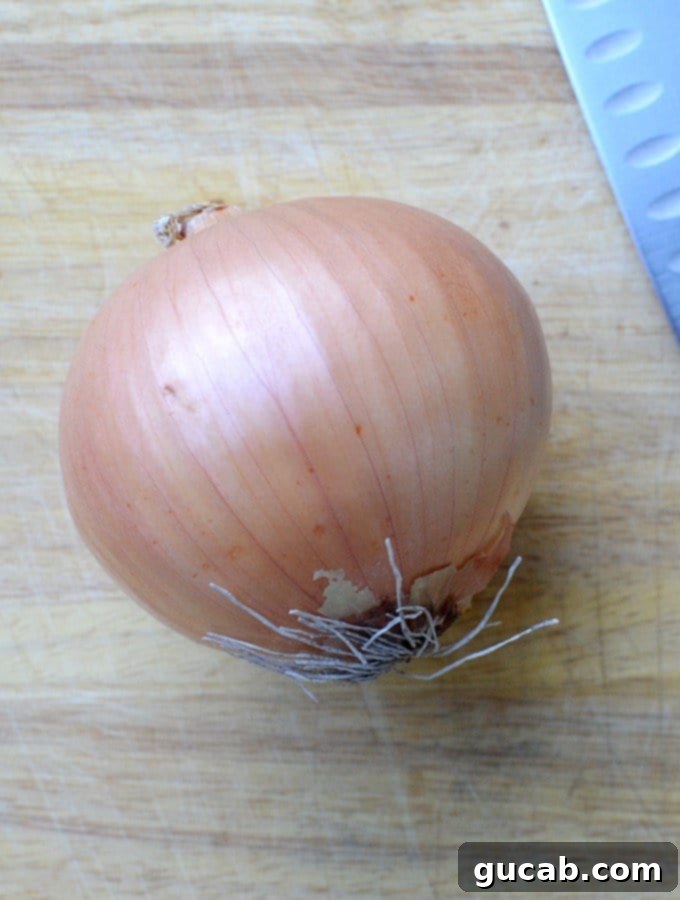
- Prepare the Onion: Place the onion on your cutting board. Identify the “hairy” root end and the stem end.
- The First Cut (The Hairy End): Using your sharp knife, carefully cut off just the very tip of the *hairy root end* of the onion. This is a small slice, just enough to remove the root hairs and provide a stable flat surface. Place the onion cut-side down.
- Halving the Onion: With the onion stable on its newly flattened root end, cut the onion lengthwise (from stem to root) down the center. You’ll now have two halves, each with a stem end still attached to a piece of the root.
- Peel Both Sides: With the cut sides facing up, carefully peel away the outer papery layers from both halves of the onion. Keep the stem and root ends mostly intact as you peel. If the root end is looking a bit messy, you can trim off just the very outermost, dead skin without cutting deeply into the bulb.
-
Precision Slicing for Dicing (Lengthwise Cuts): Take one half of the onion, cut-side down. With your knife, make parallel cuts lengthwise from the stem end, but *do not cut all the way through the root end*. The root end acts as a hinge, holding the onion slices together. The spacing of these cuts will determine your dice size:
- For small dice: aim for ¼ inch apart.
- For medium dice: aim for ½ inch apart.
- For large dice: aim for ¾ to 1 inch apart.
Maintain a “claw grip” with your non-dominant hand to protect your fingertips.
- Perpendicular Cuts (Completing the Dice): Now, rotate the onion half 90 degrees. Make parallel cuts perpendicular to your previous cuts, again without cutting through the root end. This will create your desired dice. The root end will still hold everything together, making the process cleaner and safer.
- The Final Cut (The Stem End): Once you’ve diced nearly all of the onion, you’ll be left with a small portion still attached to the root end. This is where the majority of the tear-inducing compounds are concentrated. Make your final cut to sever this remaining piece of onion from the stem/root.
- Dispose Immediately: As soon as you’ve cut off the root end, quickly toss it into the garbage or compost. This prevents the concentrated irritants from lingering in the air. Take that, sulfur!
- Repeat: Repeat steps 5-8 with the other half of the onion.
Tips for Perfect Onion Prep Every Time
Beyond the core method, a few additional tips can enhance your onion chopping experience:
Knife Safety 101:
- Always Use a Sharp Knife: A sharp knife requires less pressure, makes cleaner cuts, and is less likely to slip, significantly reducing the risk of injury. It also crushes fewer cells, meaning less tear-inducing gas is released.
- Master the Claw Grip: When slicing, curl your fingertips inward, using your knuckles as a guide against the blade. This protects your fingers from accidental cuts.
- Keep Your Board Stable: Place a damp cloth or paper towel under your cutting board to prevent it from sliding around during chopping.
Achieving Different Dice Sizes:
The beauty of this method is its versatility. By adjusting the spacing of your initial cuts (Step 5) and perpendicular cuts (Step 6), you can easily achieve various dice sizes:
- Fine Dice: Cuts ¼ inch or less.
- Small Dice: Cuts ¼ inch.
- Medium Dice: Cuts ½ inch.
- Large Dice: Cuts ¾ to 1 inch.
Storing Leftover Onions:
If you only need half an onion, store the unused portion properly to maintain freshness and minimize odor transfer in your fridge. Wrap the cut side tightly with plastic wrap or place it in an airtight container. Use it within a few days for best quality.
Choosing the Best Onions:
Always select onions that are firm to the touch, feel heavy for their size, and have dry, papery outer skins. Avoid onions with soft spots, sprouts, or any signs of mold, as these indicate they are past their prime.
Beyond Tears: The Benefits of Mastering Onion Prep
Learning this simple, tear-free method goes beyond just avoiding a few sniffles. It can genuinely transform your cooking experience:
- Enjoy Cooking More: Removing the irritation makes onion prep a pleasure, not a dreaded chore.
- Faster Prep: Without stopping to wipe tears, your mise en place becomes much more efficient.
- Less Irritation: No more burning eyes or runny noses, allowing you to focus on your recipe.
- Improved Culinary Confidence: Mastering a fundamental kitchen skill boosts your overall cooking prowess.
Conclusion
Cutting onions without crying isn’t a myth or a complicated secret reserved for professional chefs. It’s a simple, anatomical trick that, once learned, will change your kitchen life forever. By strategically keeping the root end intact until the very last moment, you effectively minimize the release of those pesky tear-inducing compounds, allowing you to chop with clarity and comfort.
Say goodbye to ineffective hacks and hello to truly tear-free onion prep. Practice this method a few times, and it will quickly become second nature. You’ll wonder how you ever managed without it! Enjoy the process of creating delicious meals, free from watery eyes and sniffles.
If you enjoyed this simple and easy method for how to cut an onion, you can also check out my simple method on how to cook perfect white rice to further enhance your culinary skills.
