The Ultimate Gluten-Free Coffee Cake: Moist, Flavorful, and Easy to Make
There’s nothing quite like the comforting aroma of a freshly baked coffee cake, especially when it’s perfectly paired with your favorite cup of coffee. Whether you prefer a steaming hot brew on a chilly morning or a refreshing iced coffee during warmer months, this incredible gluten-free coffee cake with a vibrant triple berry swirl is designed to elevate your coffee break. Forget dry, crumbly gluten-free pastries; this recipe delivers an exceptionally moist, rich, and utterly delightful experience that will have everyone asking for seconds, even those who don’t follow a gluten-free diet.

Disclosure: This post may contain affiliate links. In other words, if you click a link and purchase something, I will receive a commission at no cost to you. I only recommend products I use and enjoy myself.
For many, coffee cake evokes memories of cozy mornings, family gatherings, or a sweet escape in the middle of a busy day. Achieving that perfect balance of a tender cake, a sweet streusel topping, and a delightful filling can be a challenge, especially when baking gluten-free. But fear not! This recipe is a game-changer. It combines the classic comfort of a coffee cake with a bright, tart berry swirl that cuts through the sweetness beautifully, all while maintaining an incredibly moist and tender crumb thanks to a secret ingredient we’ll explore. It’s a testament that gluten-free baking can be just as, if not more, delicious than its traditional counterparts.
Why This Gluten-Free Sour Cream Coffee Cake is Truly Delightful
What makes this gluten-free coffee cake truly stand out? It’s a symphony of textures and flavors. The base is a super moist sour cream cake, known for its rich, tender crumb that simply melts in your mouth. Layered within is a tart triple berry swirl, providing a burst of fruity flavor that perfectly complements the sweet cake and the crunchy streusel topping. This isn’t just a basic coffee cake; it’s an elevated baking experience designed to impress.
The Magic of Sour Cream
Sour cream is the unsung hero in many baking recipes, and in this coffee cake, its role is pivotal. The acidity in sour cream reacts with the baking soda and baking powder, helping the cake rise and achieve a wonderfully light texture. More importantly, it adds incredible moisture and a subtle tang that enriches the overall flavor profile without being overtly “sour.” This results in a cake that stays fresh longer, boasts a superior texture, and has a depth of flavor that a plain milk-based cake might lack. If you don’t have sour cream, plain Greek yogurt (as used in the recipe card below) makes an excellent substitute, offering similar benefits in terms of moisture and tang.
The Delightful Triple Berry Swirl
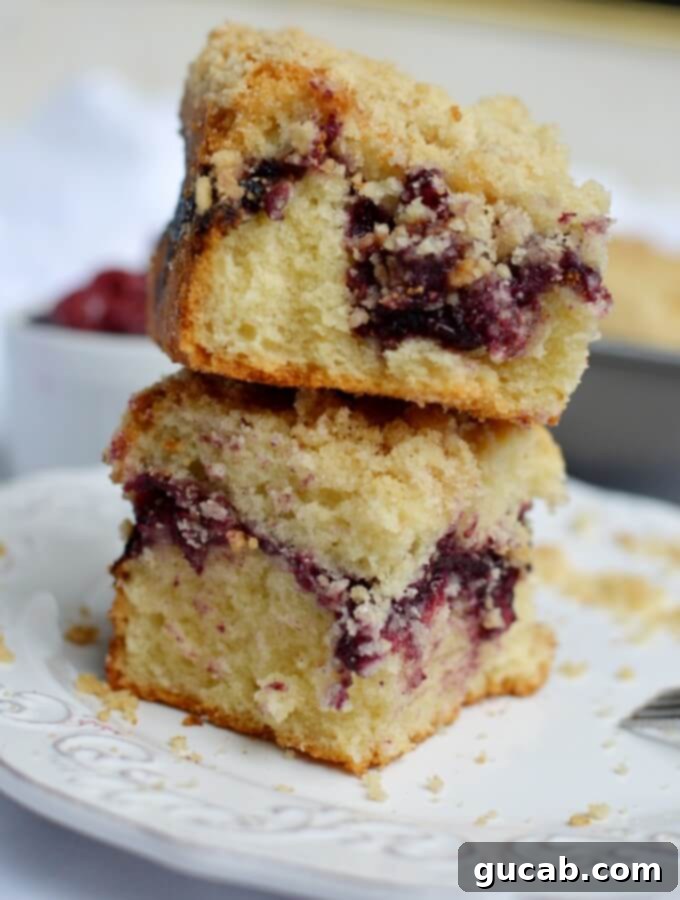
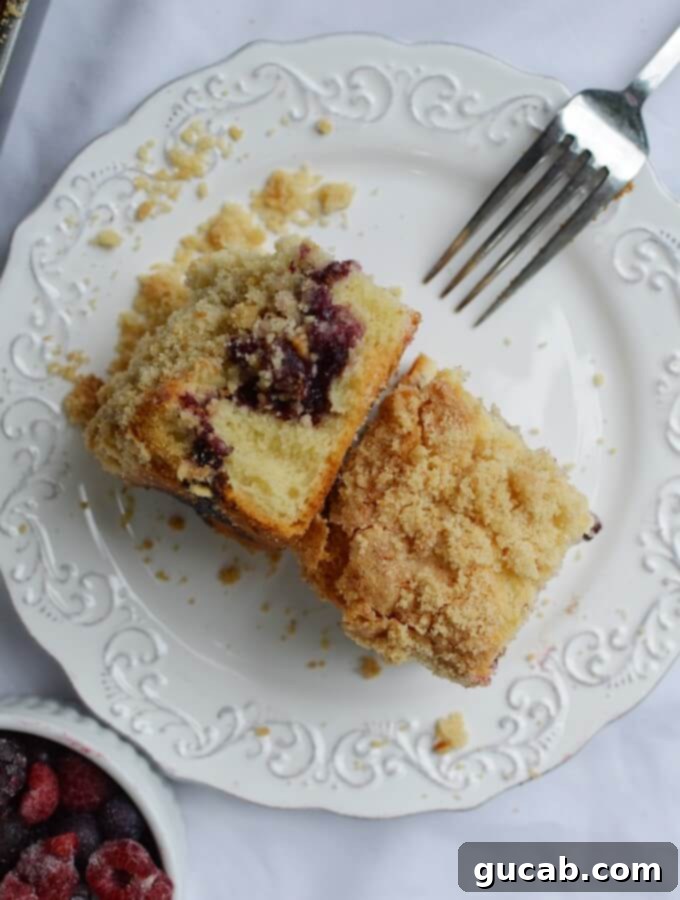
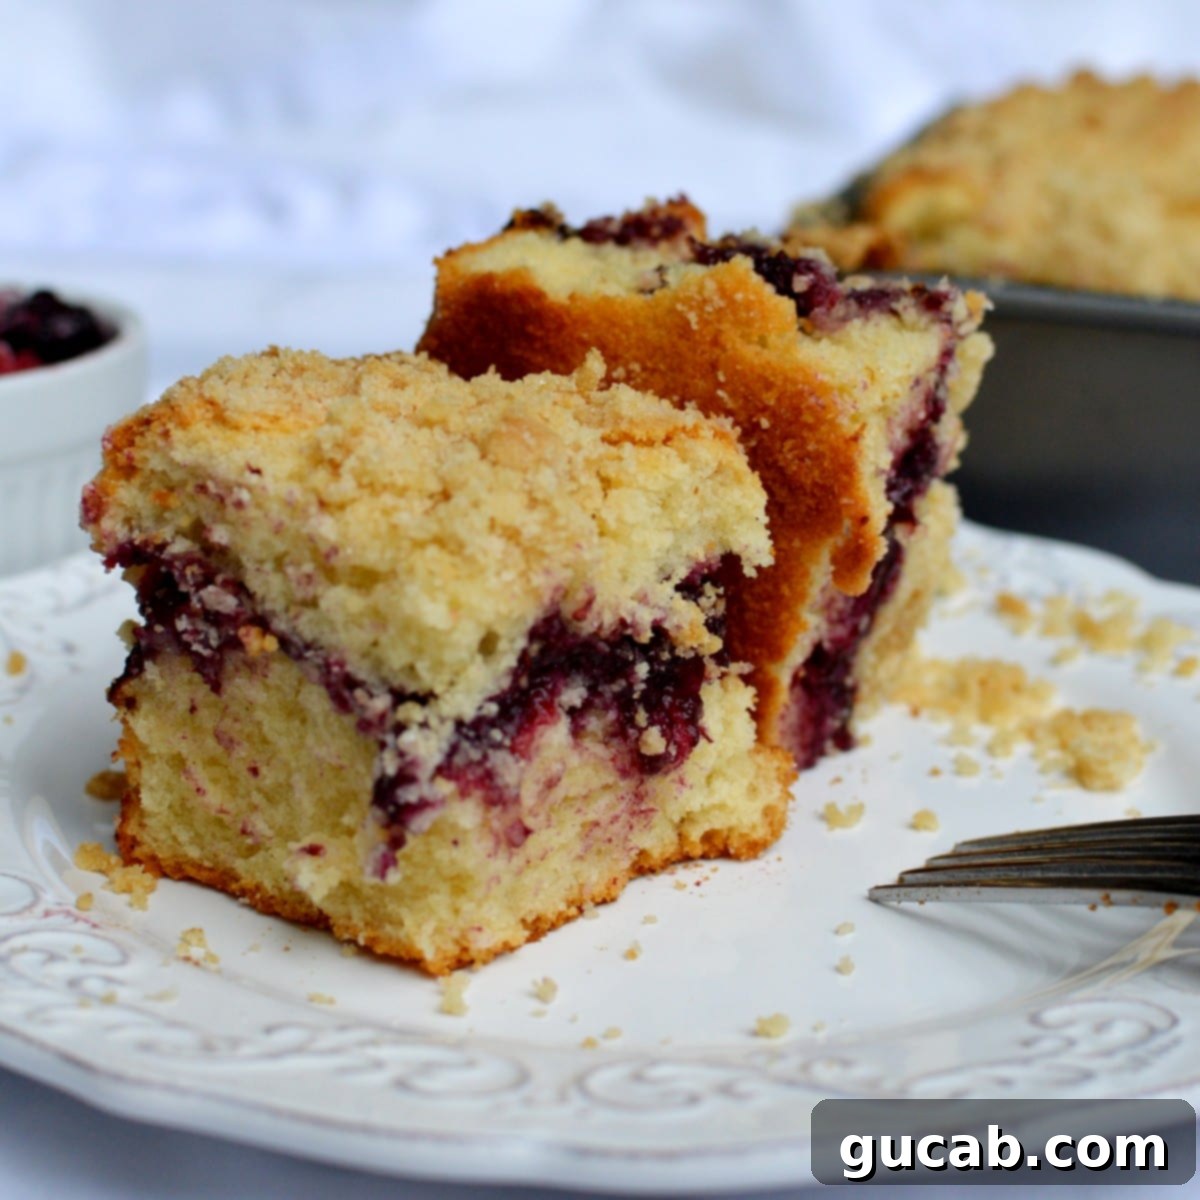
To add a unique spin to this classic, I’ve incorporated a tart triple berry swirl into the center. The combination of sweet crumb topping and bright, juicy berries creates a harmonious flavor profile that keeps every bite exciting. This swirl isn’t just about flavor; it also adds a beautiful visual element to the cake when sliced.
One of the common challenges when baking with berries, especially frozen ones, is their tendency to release a significant amount of water during cooking. This can lead to a dense, mushy, or undercooked cake. That’s why, when simply folding berries into a batter, fresh berries are often preferred. However, for this recipe, the berries are cooked down into a luscious swirl, which addresses this issue perfectly. This method offers two distinct advantages:
- You don’t need fresh berries. I often use a convenient frozen bag of raspberries, blueberries, and blackberries. This means you can enjoy this cake any time of year, regardless of berry seasonality. While you can experiment, I generally recommend avoiding strawberries for this particular swirl, as their water content and texture can sometimes differ.
- Swirls taste amazing! Cooking the berries beforehand concentrates their flavor, creating a rich, jam-like filling that permeates the cake with bursts of fruity goodness. The slight tartness of the berries provides a fantastic contrast to the sweet cake and topping, making each forkful a balanced treat.

Mastering Your Gluten-Free Coffee Cake: A Step-by-Step Guide
Baking can be incredibly rewarding, and a well-organized approach ensures a smooth and enjoyable process. To enhance your baking mojo and avoid any last-minute scrambling, I always recommend preparing your components in a logical order. For this coffee cake, we’ll start with the crumb topping, then move to the berry swirl, and finally, the cake batter. This methodical approach will set you up for success.
Crafting the Perfect Crumb Topping
The crumb topping, or streusel, is an essential part of any classic coffee cake. It provides a delightful texture contrast and an extra layer of sweetness. To make it, you’ll combine sugar, brown sugar, and gluten-free flour. Incorporate cold, diced butter until the mixture resembles coarse crumbs. This can be done quickly in a food processor or, if you prefer a more tactile experience, by hand in a bowl, working the butter into the dry ingredients with your fingertips. The key is to use cold butter to prevent it from melting too quickly, which ensures distinct crumbs rather than a paste. Once prepared, set your beautiful crumb mixture aside.
Developing the Vibrant Berry Swirl
Next, it’s time to create the star of the show: the triple berry swirl. In a medium saucepan, combine your chosen frozen berries (raspberries, blueberries, blackberries work wonderfully), fresh lime juice for an extra zing, a splash of water, and a touch of sugar. Cook this mixture over medium-high heat, stirring occasionally until it reaches a boil. Once boiling, reduce the heat to medium and let it simmer for about 10 minutes. At this point, the mixture should have begun to thicken noticeably. Reduce the heat further to medium-low and continue cooking for another 7 minutes, stirring periodically to prevent sticking. This extended cooking time concentrates the berry flavors and ensures the swirl has the perfect jam-like consistency. Remove it from the heat and allow it to cool completely before assembly. A cool swirl is crucial to prevent it from thinning the cake batter.
Mixing the Light & Fluffy Cake Batter
While your berries are simmering and cooling, you can expertly prepare the cake batter. In a stand mixer fitted with the paddle attachment, beat room-temperature butter, kosher salt, granulated sugar, and brown sugar on medium speed for a full 4 minutes. This creaming process incorporates air, making the batter light and fluffy, which translates to a tender cake. Simultaneously, measure out your whole milk and Greek yogurt together in one container, and in a separate medium bowl, whisk your gluten-free all-purpose flour with baking powder to ensure they are well combined.
Once your butter and sugar mixture is light, add your eggs one at a time, beating well after each addition and scraping down the sides of the bowl to ensure everything is thoroughly incorporated. This prevents the batter from separating. Now, it’s time to add your wet and dry ingredients alternately. Begin by adding about one-third of the flour mixture to the stand mixer, mixing until just combined. Follow with one-third of the milk and yogurt mixture. Repeat this process, alternating between the remaining flour and milk mixtures, until both are fully incorporated and the batter is smooth and thickened. Be careful not to overmix, as this can lead to a tough cake.
Assembling Your Coffee Cake
With all your components ready, it’s time to assemble this masterpiece. Prepare an 8×8 inch square pan by greasing it thoroughly (a nonstick cooking spray like Pam works great). Scoop approximately half of your prepared cake batter into the greased pan, spreading it evenly across the bottom. Next, take your cooled berry mixture and spread it uniformly over the layer of cake batter. Then, gently spoon the remaining cake batter over the berry swirl, using a spatula to carefully cover the berry layer completely and smooth the top. Finally, sprinkle your crumb mixture evenly over the entire surface of the cake batter.
Baking to Perfection
Preheat your oven to 350°F (175°C). Carefully place the assembled coffee cake into the preheated oven and bake for approximately 55 minutes. The exact baking time can vary slightly depending on your oven, so keep an eye on it. To test for doneness, insert a sharp knife or a wooden toothpick into the center of the cake. If it comes out clean with no wet batter attached, your coffee cake is perfectly baked. Remove it from the oven and allow it to cool on a wire rack before slicing and serving. Cooling is crucial for the cake to set properly and for the flavors to fully develop.
Essential Tips for Gluten-Free Baking Success
Baking gluten-free doesn’t have to be intimidating. With a few key considerations, you can achieve results that are just as good, if not better, than traditional baked goods. This section offers additional insights to ensure your gluten-free coffee cake is a resounding success every time.
Choosing the Right Gluten-Free Flour
The choice of gluten-free flour blend is paramount to the success of your baked goods. I almost exclusively rely on Bob’s Red Mill 1:1 All Purpose Gluten-Free Flour for my recipes. This particular blend is fantastic because it consistently delivers a perfect texture with no grittiness or chalkiness, which can often be a concern with other gluten-free flours. More importantly, it helps avoid that “strange gluten-free aftertaste” that can sometimes plague gluten-free creations. The beauty of this specific gluten-free all-purpose flour is that it already contains xanthan gum. This is a crucial ingredient in gluten-free baking, as it mimics the elasticity and binding properties of gluten, providing structure and preventing your baked goods from falling apart. Since it’s pre-mixed, you don’t need to worry about adding it separately, simplifying your baking process.
Versatile Baking Options: Muffins & Loaves
While this recipe is written for a delightful coffee cake in a square pan, its versatility means you can easily adapt it into other forms. This coffee cake batter and berry swirl would also be fantastic as gluten-free coffee cake muffins or a gluten-free coffee cake loaf. If you choose to make muffins, adjust baking time down to about 20-25 minutes, or until a toothpick comes out clean. For a loaf, it might take a similar amount of time to the square cake, but keep an eye on it. If you’re a true muffin enthusiast (like me!), you might also enjoy these other gluten-free delights: check out my gluten-free pumpkin muffins and gluten-free chocolate muffins.
Storage and Freezing for Lasting Enjoyment
This recipe yields a generously sized, rather tall coffee cake, making it perfect for sharing! I often enjoy gifting baked goods to my wonderful neighbors, and this coffee cake is always a hit. But if gifting isn’t your style, or if you simply want to enjoy it over time, it also freezes exceptionally well, ensuring you always have a delightful treat on hand.
To freeze, first allow the coffee cake to cool completely. Then, cut it into individual squares or slices, making them easy to grab and thaw. Arrange the cut pieces on a baking sheet lined with parchment paper and place them in the freezer until solid. Once frozen, transfer the pieces into a gallon-sized freezer bag or an airtight container, removing as much air as possible to prevent freezer burn. You can then pull one out anytime you need an afternoon pick-me-up, a quick breakfast treat, or a last-minute dessert. Thaw individual pieces at room temperature for an hour or so, or gently warm them in the microwave for a few seconds for that freshly baked feel.

Gluten Free Coffee Cake with Triple Berry Swirl
Carolyn
Pin Recipe
Equipment
-
Stand mixer
Ingredients
For the Cake:
- ½ Cup unsalted butter, at room temperature
- ¾ t. kosher salt
- ¾ Cup granulated sugar
- ¼ Cup light brown sugar
- 2 t. baking powder
- 2 large eggs
- ½ Cup plain Greek yogurt (or sour cream)
- ¾ Cup whole milk
- 2 ½ Cup Bob’s Red Mill 1:1 All Purpose Gluten-Free Flour
For the Triple Berry Filling:
- 3 Cup frozen mixed berries (raspberries, blackberries, and blueberries)
- 1 T. fresh lime juice
- ¼ Cup water
- 1 T. granulated sugar
For the Crumb Topping:
- ½ Cup granulated sugar
- ⅓ Cup light brown sugar
- ½ Cup Bob’s Red Mill 1:1 All Purpose Gluten-Free Flour
- 4 T. cold unsalted butter, cut into small pieces
Instructions
-
Preheat your oven to 350 degrees Fahrenheit (175°C). Lightly spray an 8×8 inch square baking pan with nonstick cooking spray.
-
Prepare the Crumb Topping: In a medium bowl, combine granulated sugar, brown sugar, and gluten-free flour. Add the cold, diced butter. Using your fingertips, a pastry cutter, or a food processor, work the butter into the flour mixture until it resembles coarse crumbs and the butter is fully incorporated. Set this crumb mixture aside.
-
Make the Triple Berry Filling: In a medium saucepan, add the frozen mixed berries, lime juice, water, and granulated sugar. Cook over medium-high heat, stirring occasionally, until the mixture comes to a boil. Once boiling, reduce the heat to medium and let it simmer for 10 minutes, stirring occasionally. The mixture should begin to thicken. Reduce heat to medium-low and continue to cook for 7 more minutes, stirring periodically. Remove from heat and allow the berry filling to cool completely.
-
Start the Cake Batter: While the berries are cooling, in the bowl of a stand mixer fitted with the paddle attachment, beat the room-temperature butter, kosher salt, granulated sugar, and brown sugar on medium-high speed for 4 minutes, until the mixture is light and fluffy.
-
In a small bowl, whisk together the gluten-free flour and baking powder. In a separate small bowl or measuring cup, combine the whole milk and Greek yogurt (or sour cream). Set both aside.
-
Add the eggs to the butter mixture one at a time, beating well after each addition until fully incorporated. Scrape down the sides of the bowl with a spatula after each egg.
-
Alternately add the dry and wet ingredients to the mixer: Add one-third of the flour mixture and beat until just incorporated. Then add one-third of the milk and yogurt mixture and beat until combined. Continue this process, alternating until all the flour and milk mixtures are gone, and the batter looks thick and smooth. Do not overmix.
-
Assemble the Cake: Scoop half of the cake batter into the prepared 8×8 inch pan and spread it evenly. Spread the cooled berry filling evenly over the batter. Carefully spoon the remaining cake batter over the berry layer and gently spread it to cover the berries completely. Finally, sprinkle the reserved crumb topping evenly over the entire surface of the cake.
-
Bake: Bake for approximately 55 minutes, or until a sharp knife or wooden toothpick inserted into the center of the cake comes out clean. Let the cake cool on a wire rack before slicing and serving.
We hope you love this gluten-free coffee cake as much as we do. It’s a recipe designed to bring joy and deliciousness to your kitchen, proving that going gluten-free doesn’t mean compromising on taste or texture. Happy baking!
