Mastering Homemade Falafel: A Step-by-Step Guide for Crispy & Flavorful Bites

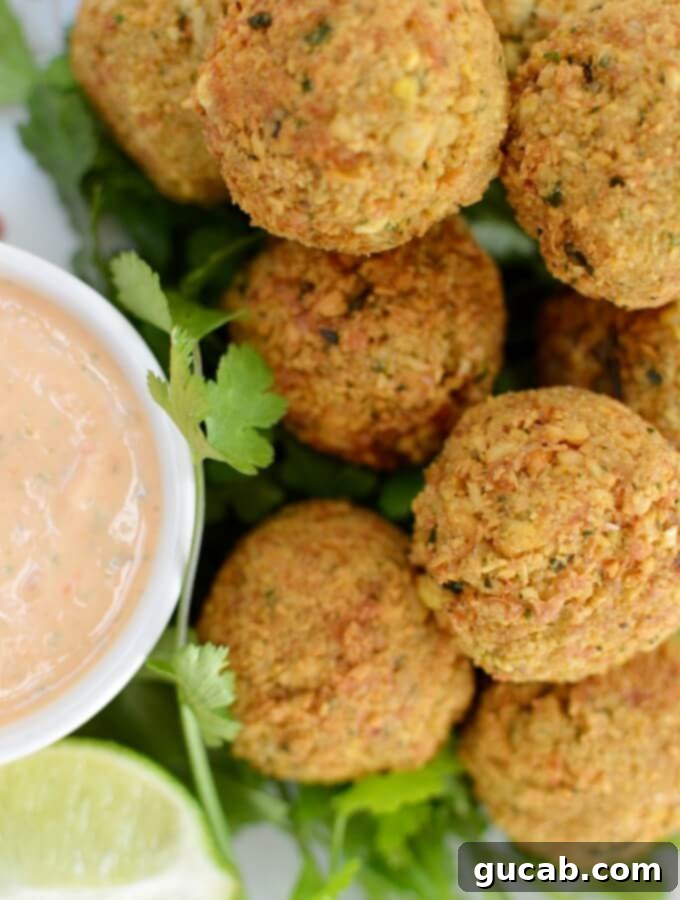
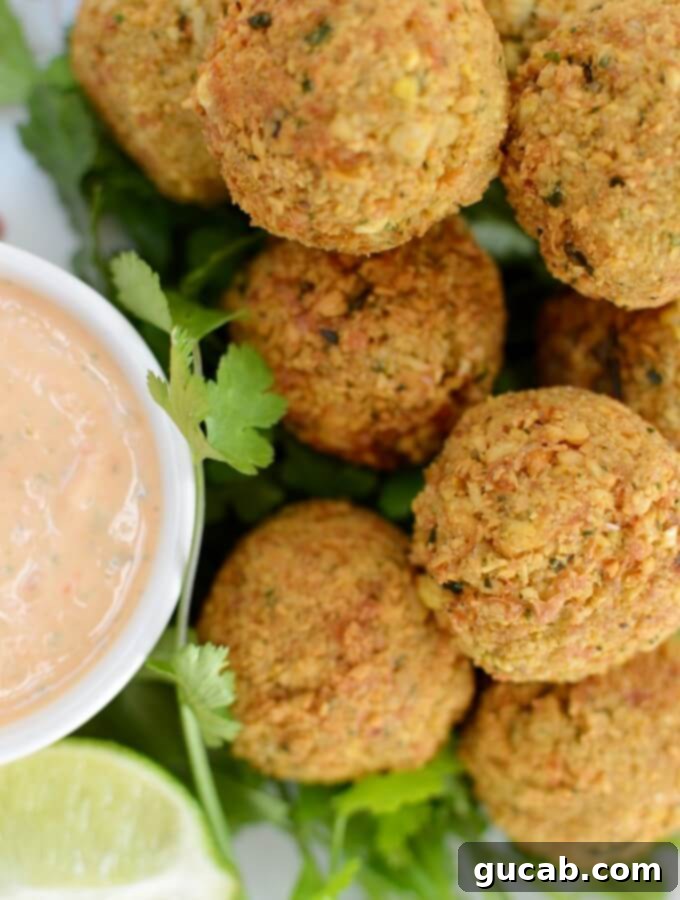
There’s nothing quite like the savory aroma and delightful crunch of a perfectly made falafel. This iconic Middle Eastern street food, crafted from ground chickpeas and a vibrant medley of fresh herbs and spices, offers a culinary journey that’s both satisfying and surprisingly simple to recreate in your own kitchen. Forget soggy, bland versions; our comprehensive guide will walk you through every step to ensure your homemade falafels are incredibly crispy on the outside and tender, flavorful on the inside.
Disclosure: This post may contain affiliate links. In other words, if you click a link and purchase something, I will receive a commission at no cost to you. I only recommend products I use and enjoy myself.
The Journey to Authentic Falafel: A Personal Touch
Before my diagnosis with Celiac disease, my husband Matt and I cherished our regular dinner dates at a quaint, unpretentious Mediterranean cafe. Despite the mild English spoken by the staff, their proficiency in crafting exquisite tabouleh and, more importantly, unforgettable falafels, was undeniable. The memory of those perfectly seasoned, wonderfully crisp falafels has stayed with me as a benchmark of culinary delight. Since I can no longer freely enjoy restaurant-made falafels due to gluten concerns, it became a personal quest to master this beloved dish at home. My goal was to develop a recipe that was just as delicious, easy to make, and flexible enough to accommodate dietary needs like being gluten-free.
This recipe isn’t just about recreating a dish; it’s about reclaiming a cherished culinary experience and bringing the authentic flavors of the Middle East right to your dining table. It’s for anyone who loves the vibrant, aromatic taste of falafel, appreciates fresh ingredients, and wants to experience the immense satisfaction of creating something truly special from scratch.
The Secret to Superior Falafel: Dried Chickpeas vs. Canned
For a long time, the idea of soaking dried beans felt like an unnecessary ambition. Why invest the extra time and effort when canned beans offer such immediate convenience? As someone who strongly appreciates whole foods and is always mindful of cost-effectiveness – I am frugal to a fault – I completely understood the appeal of a quick pantry solution.
However, when it comes to crafting truly exceptional falafel, I wholeheartedly recommend starting with dried chickpeas that you soak yourself. This seemingly small but crucial step is the undeniable key to achieving that signature crispy exterior and light, fluffy interior that defines an authentic, restaurant-quality falafel. The difference in texture is profound and truly worth the minimal extra effort. Soaking dried chickpeas allows them to rehydrate to a semi-firm state, which is ideal for grinding. Unlike canned chickpeas, which are already fully cooked and soft, raw soaked chickpeas create a coarser mixture that fries up beautifully, preventing the falafels from becoming mushy, dense, or heavy. Plus, there’s a certain gratifying charm in watching those humble dried beans double in size overnight!
The soaking process itself is incredibly straightforward and requires virtually no active time. You simply cover the dried chickpeas with plenty of cold water, let them rest for 18-24 hours (or overnight), and then drain them thoroughly. Once drained, they can be covered and refrigerated until you’re ready to make your falafel. This preparation genuinely adds only a couple of minutes to your hands-on prep time, yet yields vastly superior results in terms of flavor and texture.
That being said, if time is truly of the essence and you find yourself with only a can of chickpeas in the pantry (we’ve all been there!), don’t despair. Canned chickpeas will work as a substitute. Just be aware that the internal texture of your falafels will be a little softer and potentially less airy. They’ll still be delicious, but for that truly authentic, crispy, and fluffy falafel experience, dried chickpeas are undoubtedly the optimal choice.
Crafting the Perfect Falafel Mixture: Tips for Success
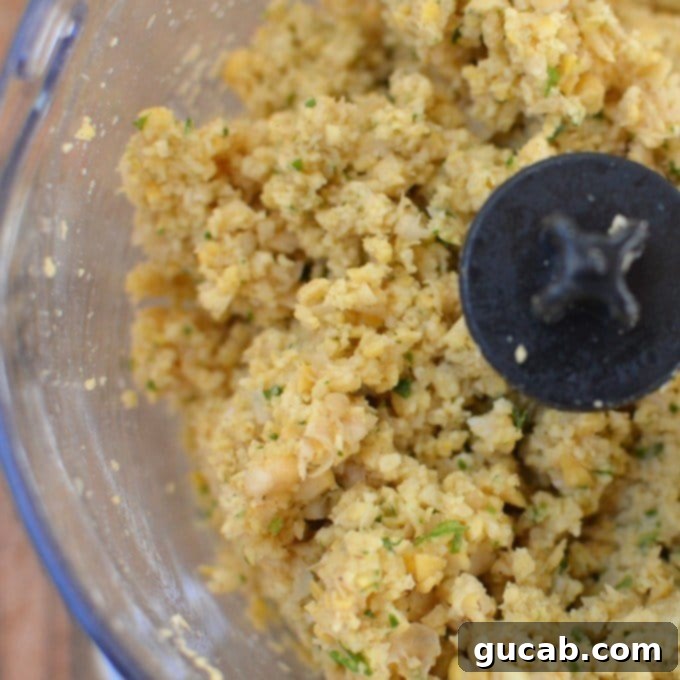
While the ingredients list for falafel is relatively simple, the success of your homemade falafel largely depends on the preparation of the mixture and the careful forming of the balls. The ultimate goal is to achieve a finely ground, yet slightly coarse texture – reminiscent of fine breadcrumbs, not a smooth paste like hummus.
The Grind:
A good quality food processor is an indispensable tool for this recipe. You will be combining your thoroughly drained and soaked chickpeas with garlic, fresh parsley, and a blend of aromatic spices. Process the mixture in pulses until it’s finely ground but still retains some discernible texture. It’s crucial not to over-process, as this can lead to a pasty consistency that results in dense, heavy falafels. Conversely, under-processing will leave large chunks of chickpeas, preventing the mixture from binding properly. To ensure even grinding, stop and scrape down the sides of the food processor bowl periodically with a small spatula.
Forming the Falafel Balls:
Once your mixture has reached the perfect consistency, forming the falafels requires a delicate touch. You want to gently shape them into small balls or patties. A common mistake is trying to pack them too hard with your fingers, which can cause them to crumble and fall apart during frying. A small portion scoop (often used for cookies or small ice cream servings) is incredibly helpful for achieving consistent sizing and gentle shaping. This uniformity ensures even cooking and a beautiful presentation. Aim for a mixture that feels cohesive but isn’t overly sticky or excessively dry, as exemplified in the image below. You’ll know the consistency is right when you can gently compress a spoonful of the mixture into a firm shape without it immediately disintegrating.

Essential Falafel Ingredients: The Flavor Foundation
A truly great falafel relies on a harmonious balance of fresh and aromatic ingredients. Here’s a closer look at what you’ll need to create this Middle Eastern delight:
- Chickpeas (Garbanzo Beans): As previously emphasized, dried and properly soaked chickpeas are the foundation for the best texture and flavor. If using canned, ensure they are thoroughly drained and patted dry to remove excess moisture.
- Fresh Garlic: Provides a pungent, aromatic kick that is absolutely fundamental to falafel’s classic flavor profile.
- Kosher Salt: Essential for seasoning, enhancing, and balancing the flavors of all the other ingredients. Kosher salt is preferred for its pure taste and easy dissolution.
- Cumin: This warm, earthy, and slightly pungent spice is a cornerstone of Middle Eastern cuisine and absolutely crucial for imparting that authentic falafel flavor. You might also consider adding a pinch of ground coriander for an extra layer of fragrant complexity, or a touch of cayenne pepper for a subtle heat.
- Fresh Parsley: Contributes a vibrant, fresh, and slightly peppery herbaceous note, along with helping to create the falafel’s characteristic green hue. Many authentic recipes also include fresh cilantro for a more intense, bright herby flavor.
- Lemon Juice: A splash of fresh lemon juice is key. It brightens the overall flavors and adds a slight tang that beautifully cuts through the richness of the fried chickpea fritters.
- Baking Powder: This often-overlooked ingredient is a secret weapon for achieving lighter, fluffier falafels. It helps create a slightly airy and tender texture inside, contrasting wonderfully with the crispy exterior.
- All-Purpose Flour: Acts as a binding agent, helping the falafel mixture hold its shape during frying. For those with gluten sensitivities or Celiac disease, a 1:1 gluten-free all-purpose flour blend (such as Bob’s Red Mill Gluten-Free 1-to-1 Baking Flour) works perfectly as a direct substitute.
- Canola Oil (for frying): A neutral-flavored oil with a high smoke point is ideal for deep frying falafel. Other excellent options include vegetable oil or peanut oil, which also perform well under high heat.
Mastering the Fry Technique: For Golden, Crispy Falafels
Frying food can sometimes feel daunting, but mastering the technique for falafels is crucial for achieving that irresistible golden, crispy exterior without a heavy, greasy interior. The key to success lies almost entirely in precise oil temperature control.
Oil Temperature is King:
It is absolutely critical that your cooking oil is at the correct temperature before you begin adding the falafels. The optimal temperature is typically around 375°F (190°C). If the oil isn’t hot enough, the falafels will absorb too much oil, resulting in a greasy, heavy, and unpleasantly soft product. Conversely, if the oil gets too hot, the exterior will brown and crisp up too quickly, leaving the interior undercooked and potentially dry. A reliable deep-fry thermometer is an indispensable tool here to ensure consistent results.
The Frying Process:
You want to fry each side quickly – usually only about one minute per side, or until the falafel achieves a beautiful golden-brown color and a visibly crispy crust. This rapid frying technique ensures a beautifully crisp crust forms quickly, sealing in moisture and allowing the interior to cook through without drying out. Always work in small batches to avoid overcrowding the pot, which can significantly drop the oil temperature. If the oil temperature dips, allow it a moment to recover before adding the next batch. Conversely, if it gets too hot, you can quickly bring the temperature down by adding a little more fresh oil to the pot, or by briefly removing the pot from the heat source.
Safety First:
When deep frying, always exercise extreme caution. Use a heavy-bottomed pot like a Dutch oven, fill it only about one-third to halfway with oil (never more to prevent boil-overs), and crucially, never leave hot oil unattended. Keep a lid nearby in case of a grease fire (though unlikely if temperature is properly controlled), and always have a fire extinguisher or baking soda handy as a precaution.
Serving Suggestions for Your Homemade Falafel
Once you taste these absolutely friggin’ amazing homemade falafels, you’ll undoubtedly agree that the extra effort involved is entirely worth it. Their incredible versatility makes them perfect for a wide variety of meals, snacks, and entertaining options.
- The Classic Pita Sandwich: Arguably the most traditional and beloved way to enjoy falafel! Stuff them generously into warm pita bread with a medley of fresh ingredients like chopped tomatoes, cucumbers, pickled turnips, crisp lettuce, and a generous drizzle of creamy tahini sauce or our personal favorite, a cool and refreshing tzatziki sauce.
- Healthy Falafel Salad Bowl: For a lighter, fresher option, serve your crispy falafels atop a bed of mixed greens. Add your favorite Mediterranean vegetables such as bell peppers, red onions, and olives, then drizzle with a bright lemon-tahini dressing, perhaps with some crumbled feta cheese.
- Mezze Platter Extravaganza: Elevate your entertaining by including falafels as a star component of a larger mezze (appetizer) spread. Pair them alongside classic dips like hummus, smoky baba ghanoush, marinated olives, fresh vegetable sticks, and plenty of warm flatbread.
- Simple Appetizer with Dips: Enjoy them purely as a delightful snack or appetizer, perfect for dipping. Offer a selection of dips such as traditional hummus, a cooling tzatziki, a spicy chili sauce, or a refreshing garlic yogurt dip.
- Modern Wrap or Grain Bowl: For a contemporary twist, wrap falafels in a large, crisp lettuce leaf with fresh veggies for a low-carb option, or create a satisfying falafel grain bowl with fluffy rice, quinoa, and an assortment of your favorite toppings and sauces.
However you choose to enjoy them, these homemade falafels are guaranteed to impress with their authentic flavor and perfect, irresistible texture. They are a true testament to the joy of cooking from scratch.

Homemade Falafel Recipe
Carolyn
Pin Recipe
Equipment
-
Food processor
-
Dutch Oven or Deep fryer
Ingredients
- 8 oz dried chickpeas
- ¾ t. minced garlic
- 1 t. kosher salt
- ¾ t. cumin
- ¼ C. loose leaf parsley
- ½ t. lemon juice
- 1 t. baking powder
- 2 tbsp all purpose flour*
- Canola Oil for frying
Instructions
-
In a large bowl, soak 1 ¼ cup dried chickpeas with 2 cups of water for 24 hours. Drain, cover and refrigerate in a small bowl until ready for use.
-
Heat 2 inches of oil in a dutch oven until the temperature on a thermometer reaches 375 Fahrenheit. While the oil comes to temperature in a food processor process 2 cups chickpeas, minced garlic, salt, cumin, parsley, lemon juice, baking powder, and all purpose flour until the mixture is very fine.
-
Stop and scrape the the mixture with a small spatula periodically if necessary.Using a small portion scoop, form rounded scoops into balls gently using your fingers. If you form them too hard they will fall apart.
-
Once the temperature reaches 375 degrees, place half of your falafels into the hot oil and fry 1 minute. Using a spider or small skimmer, turn falafels gently and fry 1 minute on the other side.
-
Immediately remove falafels with spider and place on paper towel lined plate. Enjoy once immediately cooled. Serve with tzatziki or your favorite sauce.
Notes
- You can also use 2 cups of canned chickpeas if you don’t have time to soak them.
