The Ultimate Guide to Baking Perfect Gluten-Free Madeleines: Light, Airy & Delicious French Shell Cakes
Imagine a delicate, shell-shaped cake with a crisp, sugary exterior and a soft, tender crumb. Now imagine it’s perfectly gluten-free! These perfect gluten-free madeleines are an absolute dream – light, sweet, and incredibly satisfying. Madeleines are truly iconic French butter cakes, traditionally baked in a distinctive madeleine pan to achieve that beautiful scalloped shell and signature “hump” they are famously known for. Often perceived as challenging, this recipe demystifies the process, making these elegant treats accessible to all.

After countless hours spent baking and meticulously testing in pursuit of the perfect madeleine recipe, I finally achieved a version that is not only exceptionally light and moist but also incredibly delicious and completely gluten-free. This recipe makes a few strategic changes to the traditional madeleine method, ensuring a foolproof result every time. Read on to discover the specific techniques I employed and how you can easily replicate these delightful French treats in your own kitchen!
Disclosure: This post contains affiliate links. In other words, if you click a link and purchase something, I will receive a commission at no cost to you. I only recommend products I use and enjoy myself.
Looking to jump straight to a specific section? Use the links below:
- What is a Madeleine?
- Why Gluten-Free Madeleines?
- Key Ingredients for this Recipe
- Step-by-Step: How to Make Gluten-Free Madeleines
- Important Tips for Madeleine Success
- Variations and Decorating Ideas
What is a Madeleine? A Dive into French Patisserie
French madeleines are charmingly small sponge cakes, distinguished by their unique shell shape and delicate texture. They are incredibly rich, thanks to a substantial amount of butter, which gives them their characteristic melt-in-your-mouth quality. Originating from the Lorraine region of France, madeleines are more than just a cake; they are a symbol of French culinary elegance, famously immortalized in Marcel Proust’s “Remembrance of Things Past.”
The traditional method for making madeleines involves a specific sequence designed to create their signature lightness and “hump.” This usually starts with vigorously beating eggs and sugar together until the mixture significantly thickens and lightens in color. This stage is often referred to as the “ribbon stage” because, when lifted, the batter should fall back into the bowl in thick ribbons that hold their shape on the surface for a few moments before dissolving. Subsequently, the dry ingredients are gently folded into this aerated egg mixture, followed by melted and perfectly cooled butter. The batter then rests in the fridge, a crucial step for flavor development and achieving that iconic hump, before being baked until golden and perfectly puffed.
Why Gluten-Free Madeleines? The Art of GF Baking
For those with gluten sensitivities or celiac disease, enjoying classic French pastries can often be a challenge. Traditional madeleines rely on wheat flour for their structure, which can make creating a gluten-free version difficult. Common issues with GF baking include dry, crumbly textures or a lack of the desired rise. My journey to perfect these gluten-free madeleines focused on overcoming these hurdles, ensuring that everyone can experience the joy of these delicate cakes without compromise. By carefully balancing ingredients and slightly adapting the method, we achieve a madeleine that rivals its gluten-containing counterpart in taste and texture. This recipe proves that dietary restrictions don’t mean sacrificing flavor or elegance.

Key Ingredients for these Delicious Gluten-Free Madeleines:
Creating perfect madeleines starts with high-quality ingredients and understanding their role in the recipe. Here’s what you’ll need for this gluten-free delight:
- Eggs: The foundation of any great madeleine! For optimal whipping and volume, it’s essential that your eggs are at room temperature. Take them out of the fridge at least thirty minutes, or even an hour, before you plan to start baking. Room temperature eggs whip up lighter and faster, incorporating more air for that airy texture.
- Brown Sugar: While not typically found in classic madeleine recipes, I’ve found that a touch of brown sugar adds a wonderful depth of flavor and extra moisture that truly enhances these gluten-free madeleines. Its slight caramel notes perfectly complement the buttery richness.
- Granulated Sugar: Of course! This provides the primary sweetness and also aids in creating the light, airy texture when whipped with the eggs.
- Gluten-Free Flour: The star of our GF adaptation. I consistently use Bob’s Red Mill 1:1 Gluten-Free All-Purpose Flour. It’s my absolute favorite due to its excellent taste, consistent texture, and reliable performance in baking, requiring no additional xanthan gum. If using another blend, ensure it contains xanthan gum or add 1/4 teaspoon per cup of flour.
- Baking Powder: Our essential leavening agent. This helps give the madeleines their characteristic rise and contributes to the coveted “hump” on top.
- Kosher Salt: A pinch of salt is crucial for balancing the sweetness and enhancing all the other flavors in the madeleines.
- Unsalted Butter: The heart of a French butter cake! Make sure to melt it first and then set it aside to cool completely. We want to add the butter when it’s still in a liquid state but not warm, as warm butter could deflate the egg mixture.
- Orange Zest: (Optional but highly recommended) I often include fresh orange zest in my gluten-free madeleines. It imparts a wonderfully bright, aromatic citrus flavor that elevates the entire cake. Lemon or lime zest can also be used for a different citrus note, or you can omit it entirely if you prefer a pure vanilla-butter flavor.
Madeleines, much like French macarons, have a reputation for being challenging. However, they are less “difficult” and more “technical,” requiring precision and adherence to specific steps. Unlike some more forgiving desserts, you can’t really fudge the recipe here. But don’t be intimidated! With the right ingredients and careful attention to the method, you’ll be baking perfect gluten-free madeleines in no time.
Step-by-Step: How to Make These Perfect Gluten-Free Madeleines:
Follow these instructions closely to achieve light, airy, and beautifully shaped gluten-free madeleines:
- Prepare the Madeleine Pan: This is a critical first step for perfect madeleines! Generously brush your madeleine pan with softened or melted butter, ensuring every crevice is coated. Then, lightly sprinkle each mold with granulated sugar. Gently tap the back of the pan over the sink to remove any excess sugar. This butter-and-sugar coating not only helps prevent sticking but also creates a delightful, slightly crisp, and sweet crust on your madeleines. For best results, you can chill the prepared pan while you make the batter.
- Whip Eggs and Sugars to the Ribbon Stage: In a large mixing bowl (preferably using a stand mixer with a whisk attachment or a hand mixer), combine your two room temperature eggs with both the brown sugar and granulated sugar. Beat this mixture on medium-high speed for a full five minutes. The goal is for the mixture to become pale yellow, thick, and fluffy. When you lift the whisk, the batter should fall in slow, thick ribbons that hold their shape on the surface for a few seconds before slowly melting back into the mixture – this is the crucial “ribbon stage.” This step incorporates a significant amount of air, which is essential for the madeleines’ light texture and rise.
- Gently Fold in the Dry Ingredients: In a separate small bowl, measure out your gluten-free flour, baking powder, and kosher salt. Whisk these dry ingredients together thoroughly to ensure they are well combined. Now, add about half of this dry mixture to your whipped egg and sugar batter. Using a rubber spatula, gently fold it in with an upward motion, being careful not to deflate the air you’ve built up. Repeat with the remaining half of the flour mixture until just combined. Overmixing at this stage can lead to tough madeleines. If using orange zest, fold it in with the dry ingredients.
- Incorporate the Melted Butter: Ensure your melted butter has cooled completely but is still in a liquid state. Slowly pour the cooled butter into the batter. Again, using your rubber spatula, gently fold the butter in until the batter appears smooth and shiny. Do not whisk vigorously; gentle folding ensures the butter is incorporated without losing the delicate air from the egg mixture.
- Rest the Batter: Cover the bowl with plastic wrap and place the batter in the fridge for a minimum of 15 minutes. While 15 minutes is the minimum, an hour or even overnight can yield an even better “hump.” Chilling the batter allows the gluten-free flour to fully hydrate and the butter to firm up slightly. When the cold batter hits the hot oven, the butter melts rapidly, releasing steam and creating that signature madeleine hump.
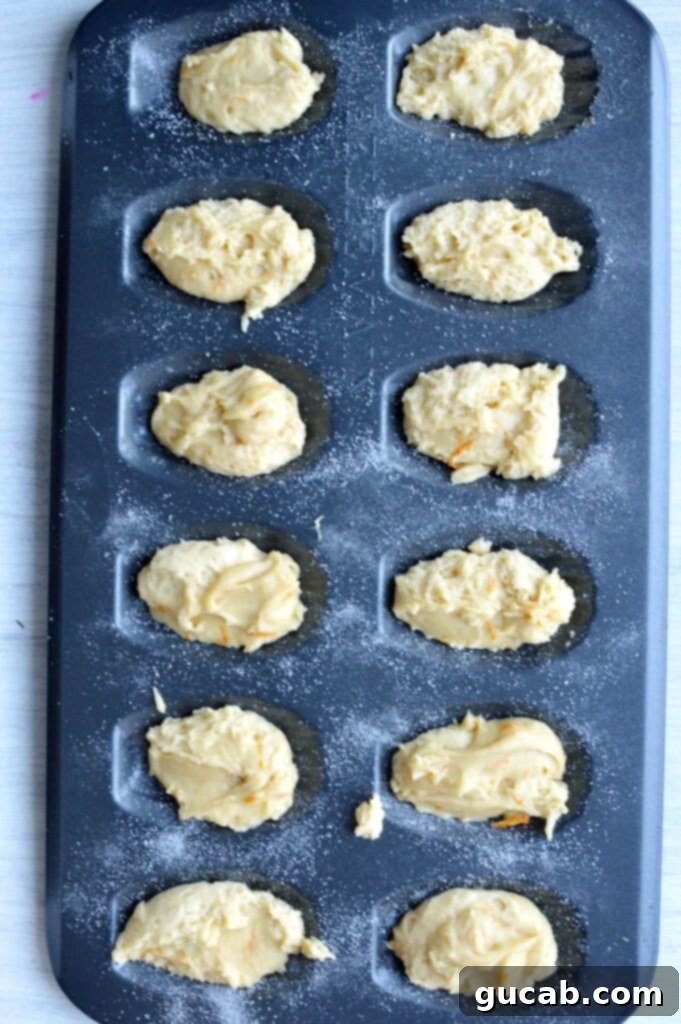
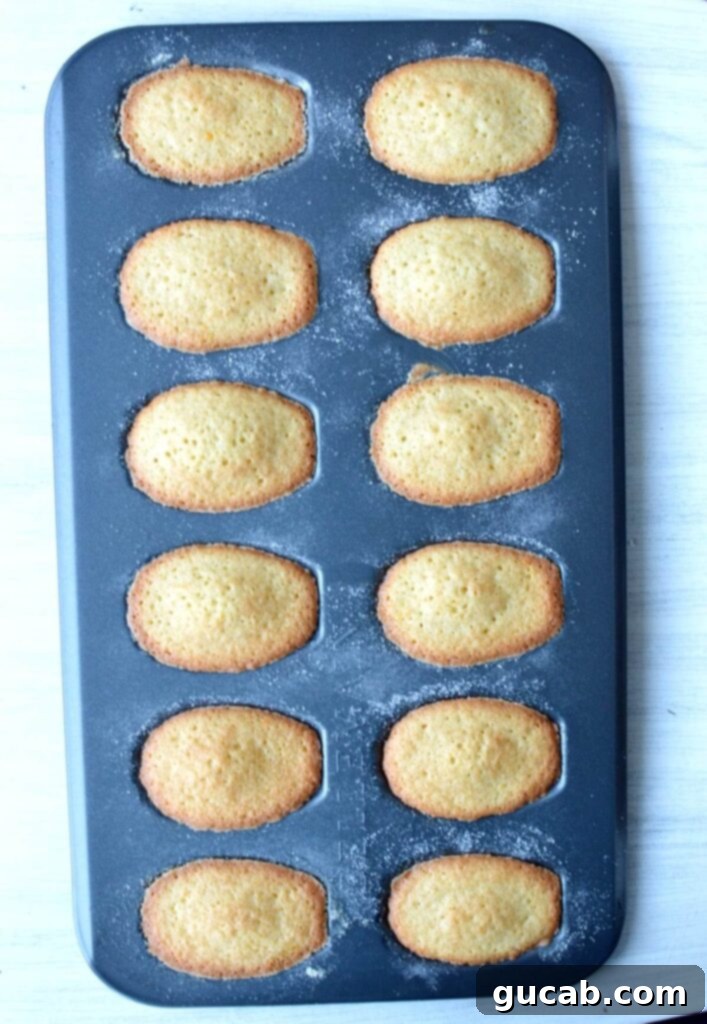
- Fill and Bake: While the batter rests, preheat your oven to 350°F (175°C). Retrieve your prepared and chilled madeleine pan. This recipe yields approximately 24 madeleines. Using a small spoon or a mini ice cream scoop, carefully spoon the batter into each mold. It’s crucial not to overfill the molds – they should be no more than two-thirds full. I specifically designed this recipe with slightly less flour than many traditional madeleine recipes to prevent dryness, a common issue with gluten-free versions. Because of this, overfilling will cause them to spread more and you might lose that perfect scalloped shape. Refer to the image below for the ideal batter level. Bake for about 10 minutes, or until the edges are golden brown and the centers bounce back gently when lightly pressed.
- Cool and Enjoy: Once baked, let the madeleines cool in the pan for a few minutes until they are firm enough to handle without breaking. Gently remove them from the molds and transfer them to a wire cooling rack to cool completely.

Important Tips for Gluten-Free Madeleine Success:
Mastering madeleines is all about attention to detail. Keep these crucial tips in mind for consistently perfect results:
- Temperature is Key: Always remember that eggs should be at room temperature for optimal whipping, and butter should be melted but completely cool before being folded into the batter. These precise temperatures prevent the batter from seizing or deflating.
- Avoid Overfilling Molds: It’s truly better to add slightly less batter to the molds than too much. Overfilling is the most common reason for losing the distinctive scalloped madeleine shape and that coveted hump. Aim for no more than two-thirds full.
- Don’t Skip Resting the Batter: While you *can* bake madeleines without resting the batter, this step significantly contributes to the famous “hump” and a more developed flavor. Resting allows the flour to fully hydrate and the butter to chill, creating a thermal shock in the oven that promotes the rise.
- Handle with Care After Baking: Madeleines are delicate when hot. Wait until the cakes are cool enough to handle comfortably before attempting to remove them from the pan and transfer them to a cooling rack. If you try to remove them straight out of the oven, they are likely to break apart.
- Enjoy Them Fresh: Madeleines are one of those magical desserts that taste unequivocally best the day they are made, ideally still slightly warm from the oven. Their crisp edges and tender interior are at their peak. This is high praise coming from me, as I’m usually all about freezing desserts for later! If you must store them, an airtight container at room temperature for a day is best, but eat them quickly.
- Preheat Your Oven Thoroughly: Ensure your oven is fully preheated to the correct temperature before placing the madeleines inside. A consistent, hot oven helps create that initial burst of steam needed for the hump.
- Invest in a Good Madeleine Pan: A non-stick madeleine pan is highly recommended. Metal pans tend to conduct heat better and give a crispier edge.
Elevate Your Madeleines: Variations and Decorating Tips:
Beyond the classic, madeleines offer a fantastic canvas for creativity. While my recipe includes a lovely orange zest, you can easily customize the flavor profile.
I absolutely adore adding orange zest to these gluten-free madeleines because it imparts the most wonderfully bright and aromatic citrus flavor. However, feel free to experiment: you can use lemon zest instead for a more classic French patisserie feel, or even lime zest for a tropical twist. If citrus isn’t your preference, you can leave it out entirely and let the rich butter and vanilla (if adding a touch) shine through.
One of the things I love most about madeleines is how inherently beautiful they look, and they become even more stunning when dipped and decorated. You can easily elevate their presentation by dipping them in melted chocolate, a simple water icing, or even melted white chocolate.
Water icing, also known as glacé icing, is incredibly simple to make: it’s just powdered sugar mixed with a very small amount of water or lemon juice. The consistency should be thick enough to coat, similar to honey, but still pourable.

Here are a few fun and beautiful decorating variations to inspire you:
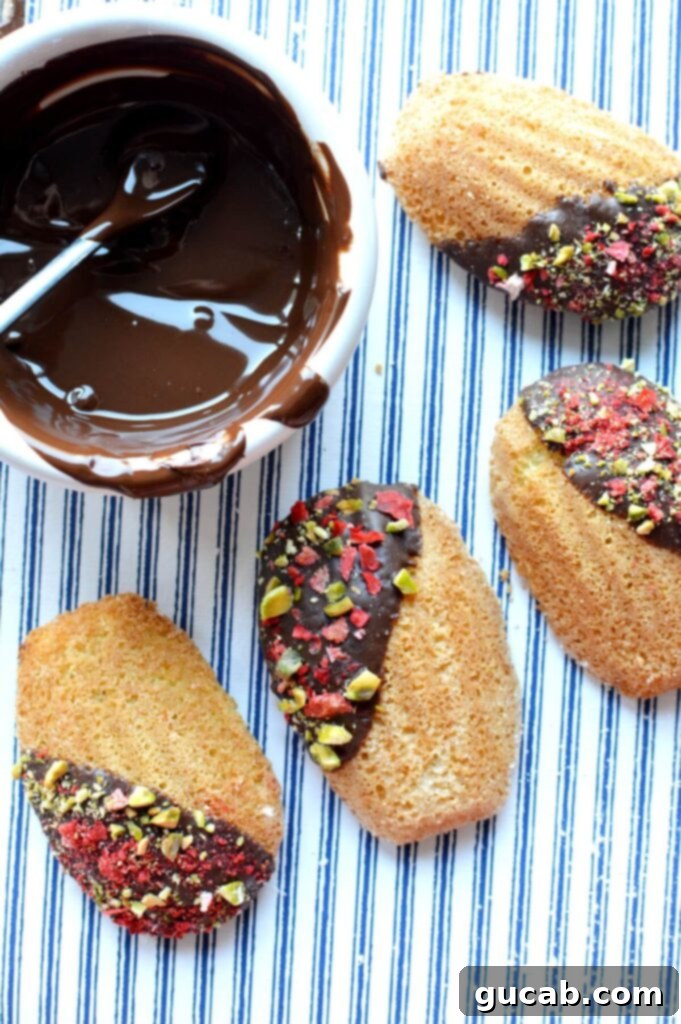
- Decadent Dark Chocolate Trio: Dip in rich melted dark chocolate, then sprinkle with finely chopped pistachios and vibrant chopped dried strawberries for a stunning contrast in flavor and color.
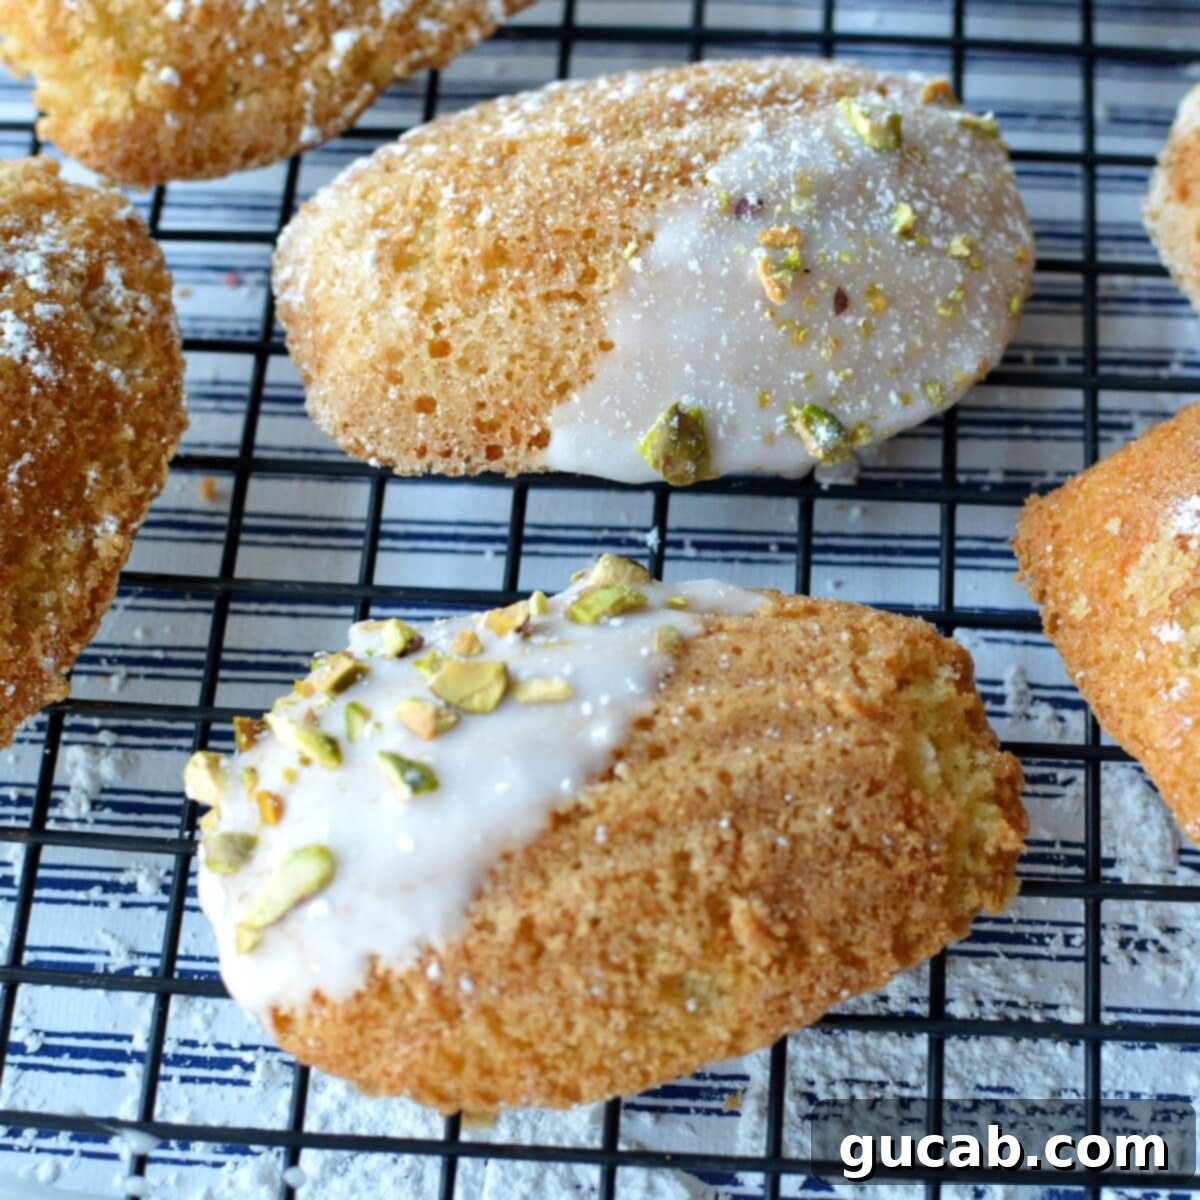
- Simple Elegance: A dip in classic water icing, finished with a scattering of bright green pistachios.
- Double Chocolate Dream: Dip in melted dark chocolate, then top with crunchy cocoa nibs and small shards of chopped dark chocolate for intense chocolate flavor and texture.
- Nutty Indulgence: Melted dark chocolate paired with finely chopped almonds creates a classic and satisfying combination.
- Playful & Festive: Water icing can be colored with food gel for a pop of fun, then adorned with colorful sprinkles. Perfect for celebrations!
The combinations for decorating are truly endless, which is precisely why they’re so much fun to customize! To decorate, simply dip one side of the madeleine into your chosen coating, letting any excess drip off gently. Immediately sprinkle with your desired topping, then place the decorated madeleine on a Silpat mat or parchment paper to set and dry. This usually takes about 10-15 minutes, depending on the coating.
If you love these gluten-free madeleines and are looking for more delicious gluten-free treats, be sure to check out some of my other popular gluten-free dessert recipes. You might enjoy my fudgy one-bowl gluten-free brownies, classic gluten-free chocolate chip cookies, or the luxurious best chocolate mousse recipe. Happy baking!
Enjoy every delightful bite!

Gluten Free Madeleines
By Carolyn
Pin Recipe
12 minutes
10 minutes
Dessert
French
24
madeleines
Equipment
-
Madeleine pan
-
Hand mixer (or stand mixer)
-
Large Bowl
-
Rubber Spatula
Ingredients
-
2
large
Eggs, room temperature -
¼
cup
Brown Sugar, packed -
⅓
cup
Granulated Sugar -
¾
cup + 1 tbsp
Bob’s Red Mill 1:1 Gluten Free All Purpose Flour -
1
tsp
Baking powder -
¼
tsp
Kosher salt -
1
tsp
Orange zest (or lemon zest) -
8
tbsp
Unsalted Butter, melted and cooled
For the pan:
-
2
tbsp
Melted Butter - Granulated Sugar for sprinkling
Instructions
-
Melt the 8 tablespoons of butter in a microwave-safe bowl or small saucepan until just liquid, then set aside to cool completely.
-
Zest your orange (or lemon) and set aside. In a separate small bowl, measure the gluten-free flour, baking powder, and kosher salt. Whisk these dry ingredients together thoroughly.
-
In a large bowl, using a stand mixer with a whisk attachment or a hand mixer, whip the two room temperature eggs with the brown sugar and granulated sugar for a full 5 minutes on medium-high speed. The mixture should become very pale, thick, and fluffy, reaching the “ribbon stage.”
-
Add half of the whisked dry ingredients and the orange zest to the egg mixture. Use a rubber spatula to gently fold it in until just combined. Once incorporated, fold in the remaining half of the dry ingredients until no streaks of flour remain, being careful not to overmix or deflate the batter.
-
Gently fold in the completely melted and cooled butter until the batter looks smooth and shiny. Again, avoid overmixing.
-
Cover the bowl with plastic wrap and place the batter in the fridge for at least 15 minutes (or up to an hour for a more pronounced hump). Meanwhile, preheat your oven to 350°F (175°C). Prepare your madeleine pan by brushing each mold generously with the 2 tablespoons of melted butter, then sprinkle with granulated sugar. Invert the pan and gently tap it over the sink to remove any excess sugar.
-
Using a small spoon or scoop, fill each madeleine mold no more than two-thirds of the way full. Bake for 10-12 minutes, or until the edges are golden brown and the centers bounce back when gently pressed.
-
Let the madeleines cool in the pan for a few minutes until firm enough to handle. Gently unmold them and transfer to a wire cooling rack. Repeat the process with any remaining batter.
-
Enjoy your perfectly baked gluten-free madeleines immediately for the best taste and texture!
Notes
gluten free, madeleines, French dessert, butter cakes
Tried this recipe?
Let us know how it was!
