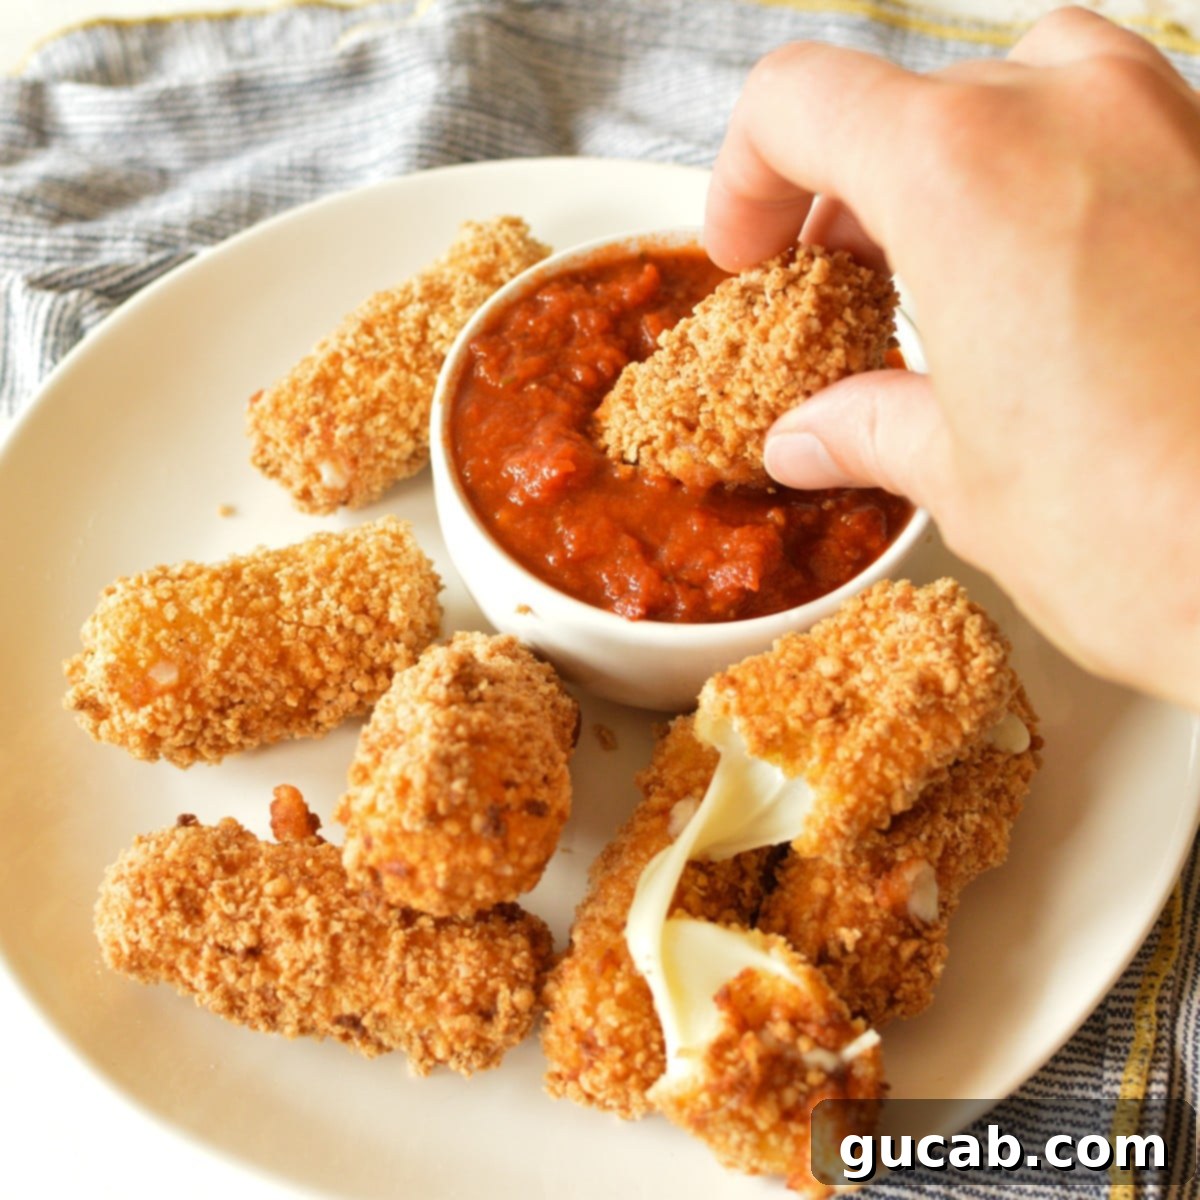
Ultimate Guide to Crispy Homemade Gluten-Free Mozzarella Sticks: Your Favorite Appetizer Made Safe and Delicious!
There’s an undeniable magic to mozzarella sticks – that golden-brown, irresistibly crispy exterior giving way to a luxuriously gooey, melted mozzarella center. They’re the quintessential appetizer or snack, perfect for game day, parties, or simply satisfying a cheesy craving. But for those navigating a gluten-free lifestyle, finding truly delicious, safe, and easily accessible options can be a real challenge. Many store-bought versions contain gluten, and restaurant options often carry a high risk of cross-contamination from shared fryers. This is why mastering homemade gluten-free mozzarella sticks is an absolute game-changer, promising all the beloved qualities without any of the worry.
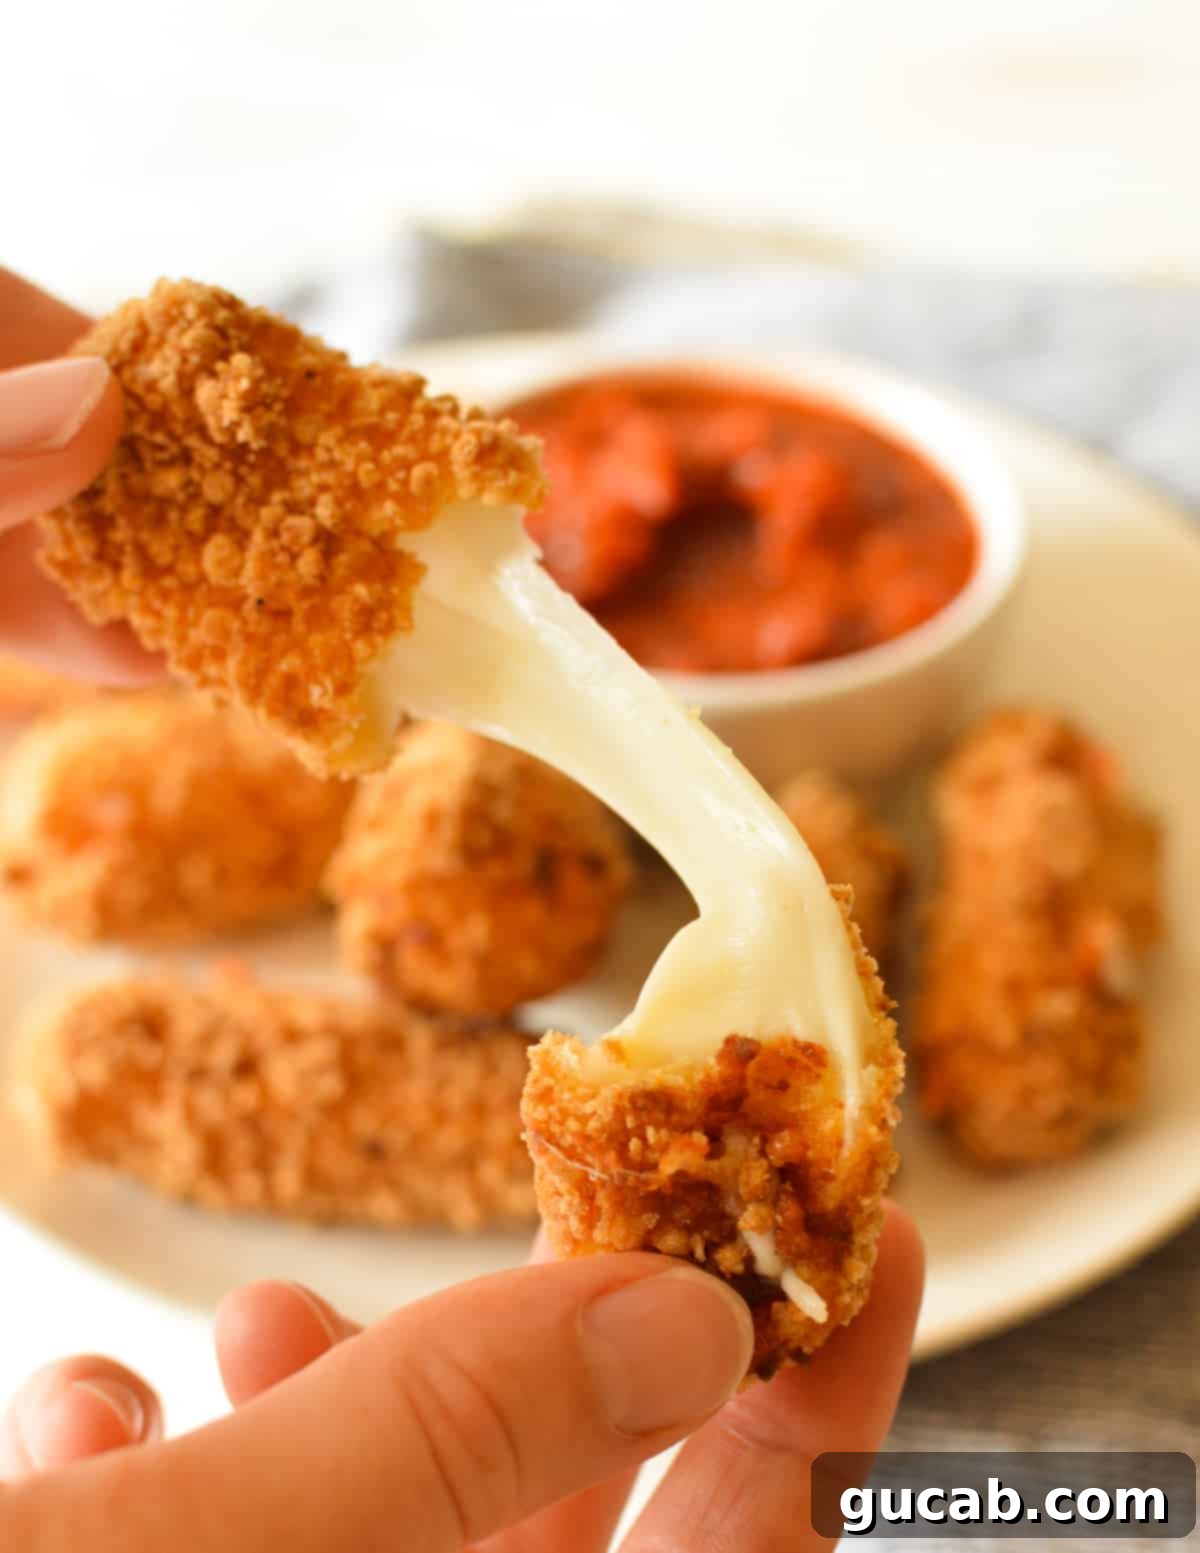
As a self-proclaimed “cheese-aholic,” I understand the deep satisfaction that comes from a perfectly executed fried cheese. It’s a badge I wear with honor! For too long, the joy of crispy, melted cheese was often off-limits in the gluten-free world. Driven by this cheesy passion and a desire to bring this classic back into my kitchen, I donned my apron and embarked on a mission to create the ultimate gluten-free mozzarella stick recipe. The results, I’m thrilled to report, not only exceeded my wildest cheesy dreams but also taught me invaluable tips and tricks for achieving that elusive crispy exterior and epic cheese pull while preventing any dreaded cheese leakage.
Making truly exceptional fried food, especially fried cheese, is an art form that balances precision with technique. The temperature of your oil, the consistency of your breading, and even the handling of the cheese itself all play critical roles. If the oil isn’t hot enough, you’re left with a greasy, soggy mess that disappoints rather than delights. Conversely, if the oil is too hot, the breading will burn before the cheese has a chance to properly melt and become gooey. When it comes to the specific alchemy of fried cheese, two elements are absolutely essential for perfection:
- A perfectly crispy, golden-brown exterior that shatters with every bite.
- A supremely melty, hot, and stretchy cheese-pull center that oozes with every tug.
And then there’s the cardinal rule: the cheese must remain securely encased within its breadcrumb fortress. Cheese leakage is, without a doubt, a mega buzzkill – a culinary catastrophe that can ruin an otherwise perfect snack. But don’t fret, fellow cheese enthusiasts! Through careful experimentation and a bit of trial and error, I’ve cracked the code on how to prevent this common dilemma, ensuring your homemade gluten-free mozzarella sticks are nothing short of perfection, every single time.
Disclosure: This post contains affiliate links. In other words, if you click a link and purchase something I will receive a commission at no cost to you. I only recommend products I use and enjoy myself.
Essential Ingredients for Your Gluten-Free Mozzarella Sticks
Let’s talk about the star players invited to this cheesy party! Crafting the perfect gluten-free mozzarella stick requires a thoughtful selection of ingredients, each contributing to that irresistible texture and flavor. Here’s what you’ll need to gather to ensure your homemade sticks are a resounding success:
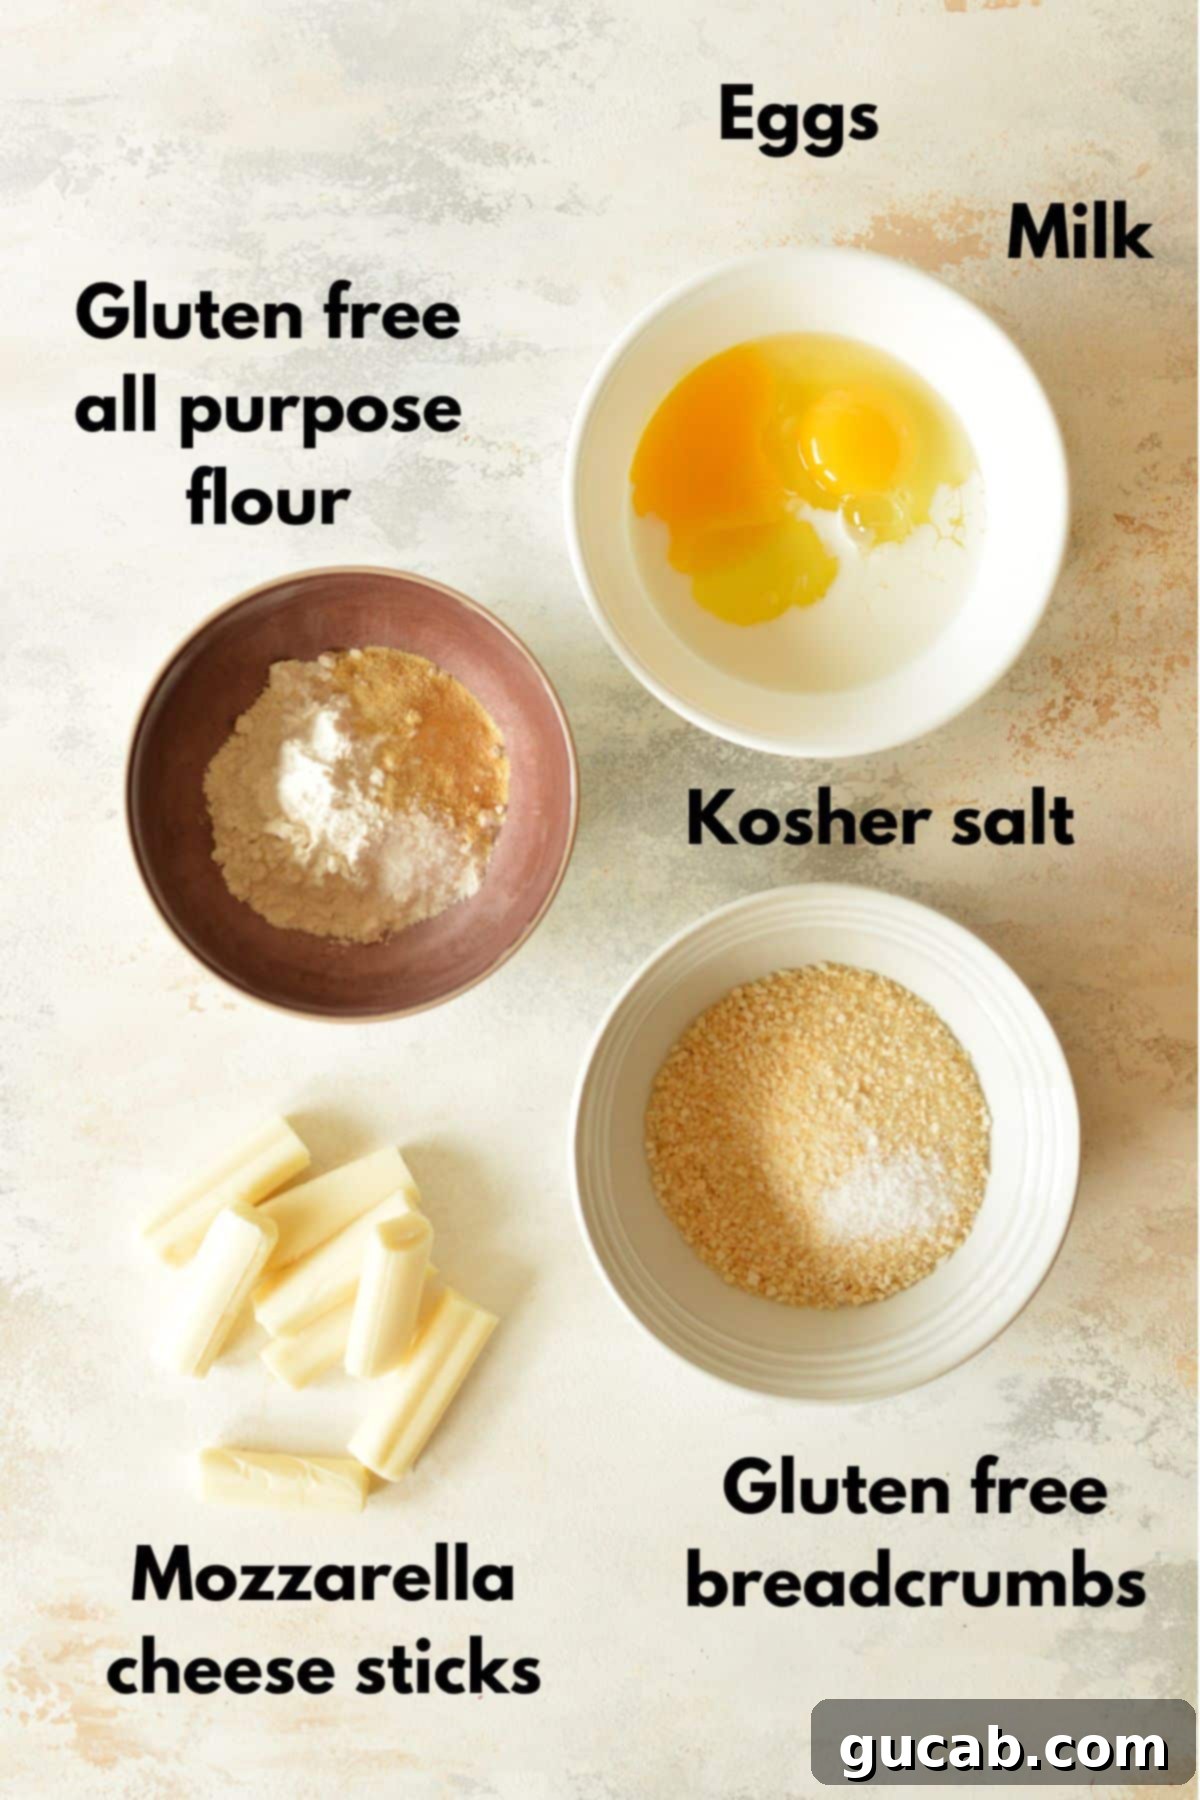
- Canola Oil or Other Neutral High-Smoke Point Oil: This is your frying medium. Any neutral-flavored oil with a high smoke point will work beautifully. Canola oil and vegetable oil are excellent, readily available choices. Other good options include sunflower, peanut, or grapeseed oil. The high smoke point is crucial to prevent the oil from burning and imparting off-flavors to your mozzarella sticks, ensuring a clean, crisp fry.
- Gluten-Free Breadcrumbs: These are vital for creating that signature crispy coating. I personally used 4C Plain Gluten Free Breadcrumbs, but the market offers many fantastic brands. Feel free to use your favorite. For an extra layer of crunch, consider using gluten-free panko breadcrumbs, which are known for their light, airy texture and exceptional crispiness. Whichever brand you choose, ensure it’s certified gluten-free to avoid cross-contamination.
- Gluten-Free All-Purpose Flour: This forms the initial layer of your breading, creating a dry surface that allows the egg wash to adhere properly, which in turn helps the breadcrumbs stick securely. I prefer Bob’s Red Mill 1:1 All Purpose Gluten-Free Flour because of its consistent results, but any high-quality 1:1 gluten-free blend should perform well. This flour layer is a crucial step in preventing cheese leakage.
- Eggs: Whisked eggs act as the “glue” that binds the flour to the breadcrumbs, creating a robust coating that seals in the cheese. They create a sticky surface that is essential for a thick, even breading layer.
- Milk: A splash of milk, dairy or non-dairy, is added to the eggs to help thin them slightly. This prevents the egg wash from being too thick or “gloppy,” ensuring a smoother, more even coating on the cheese sticks.
- Seasoning (Kosher Salt, Onion Powder, Garlic Powder): Don’t underestimate the power of seasoning! While mozzarella is delicious on its own, a touch of salt and other spices truly elevates the flavor of the finished product. Salt enhances the natural taste of the cheese and balances the richness. Onion powder and garlic powder add a savory depth that complements the cheese beautifully. You could also experiment with a pinch of Italian seasoning for an herby twist.
- Mozzarella Cheese Sticks: The undeniable star of the show! There’s a very good reason why string cheese sticks are almost exclusively made from mozzarella. Its unique composition allows it to melt into that famously gooey, stretchy, and satisfying “cheese pull” that we all adore. Opt for low-moisture, part-skim mozzarella string cheese for the best results, as these hold their shape well before melting and provide that perfect texture.
Crafting Your Homemade Gluten-Free Mozzarella Sticks: A Step-by-Step Guide
Making these gluten-free mozzarella sticks is a rewarding process, and with a few key techniques, you’ll be enjoying perfectly crispy, gooey results in no time. Follow these steps carefully to ensure success.
Step 1: Set Up Your Breading Station
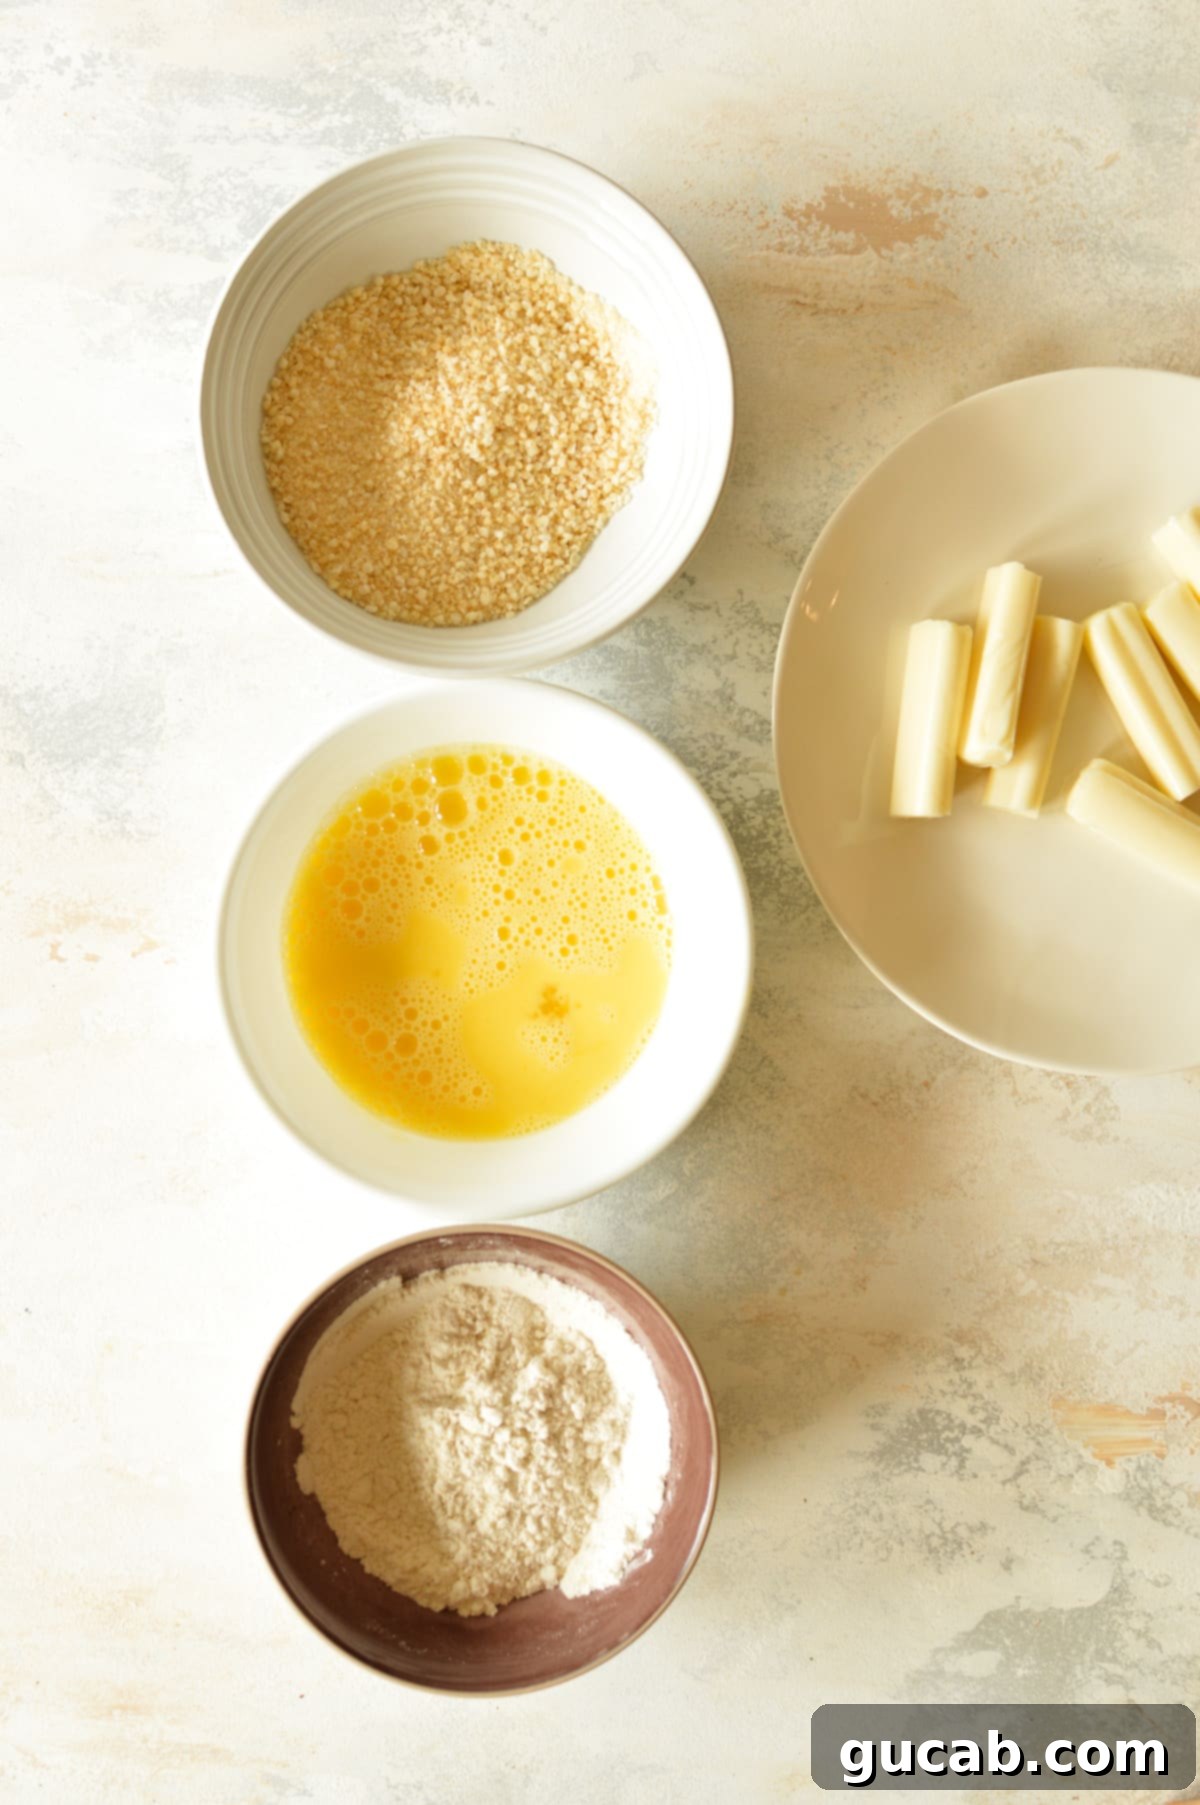
Preparation is key for a smooth breading process. Begin by taking your mozzarella cheese sticks and cutting each one in half crosswise. This creates perfect bite-sized portions that are easier to handle and fry. Next, prepare your three essential breading bowls:
- In the first bowl, combine your gluten-free all-purpose flour, onion powder, garlic powder, and ¼ teaspoon of kosher salt. Stir these ingredients thoroughly to ensure the spices are evenly distributed throughout the flour. This will be your dry dredge.
- In the second bowl, whisk together the eggs and milk until they are well combined and uniform in consistency. This is your wet binder.
- In the third and final bowl, combine the gluten-free breadcrumbs with ½ teaspoon of kosher salt. Mix well. This will be your final crispy coating.
Arrange these three bowls in a neat assembly line: flour first, then the egg wash, and finally the breadcrumbs. This setup allows for an efficient and less messy breading process.
Step 2: Dredge and Double-Coat the Cheese Sticks
This “double-dip” method is crucial for creating a strong seal around the cheese, preventing leakage during frying. Work with one cheese stick piece at a time:
- First Flour Coat: Place a cheese stick into the flour mixture, rolling it around until it’s completely and evenly coated. Gently tap off any excess flour – you want a thin, even layer, not clumps.
- First Egg Wash: Next, carefully transfer the floured cheese stick into the egg mixture. Roll it to ensure every surface is coated. Lift it out, allowing any excess egg to drip back into the bowl.
- First Breadcrumb Coat: Immediately place the egg-dipped stick into the breadcrumbs. Roll and gently press the breadcrumbs onto all sides of the cheese stick until it’s thoroughly coated. Let any loose excess breadcrumbs fall off.
- Second Egg Wash (The Secret Seal): This is the critical step for leakage prevention! Place the breaded cheese stick back into the egg mixture for a second dip. Ensure it’s fully coated. Don’t worry, this is the last time for the egg!
- Second Breadcrumb Coat (Reinforcement): Finally, transfer the stick back into the breadcrumbs for a second, thorough coating. Ensure every inch, including the ends, is completely sealed with breadcrumbs. This double layer creates an impenetrable barrier for the melting cheese.
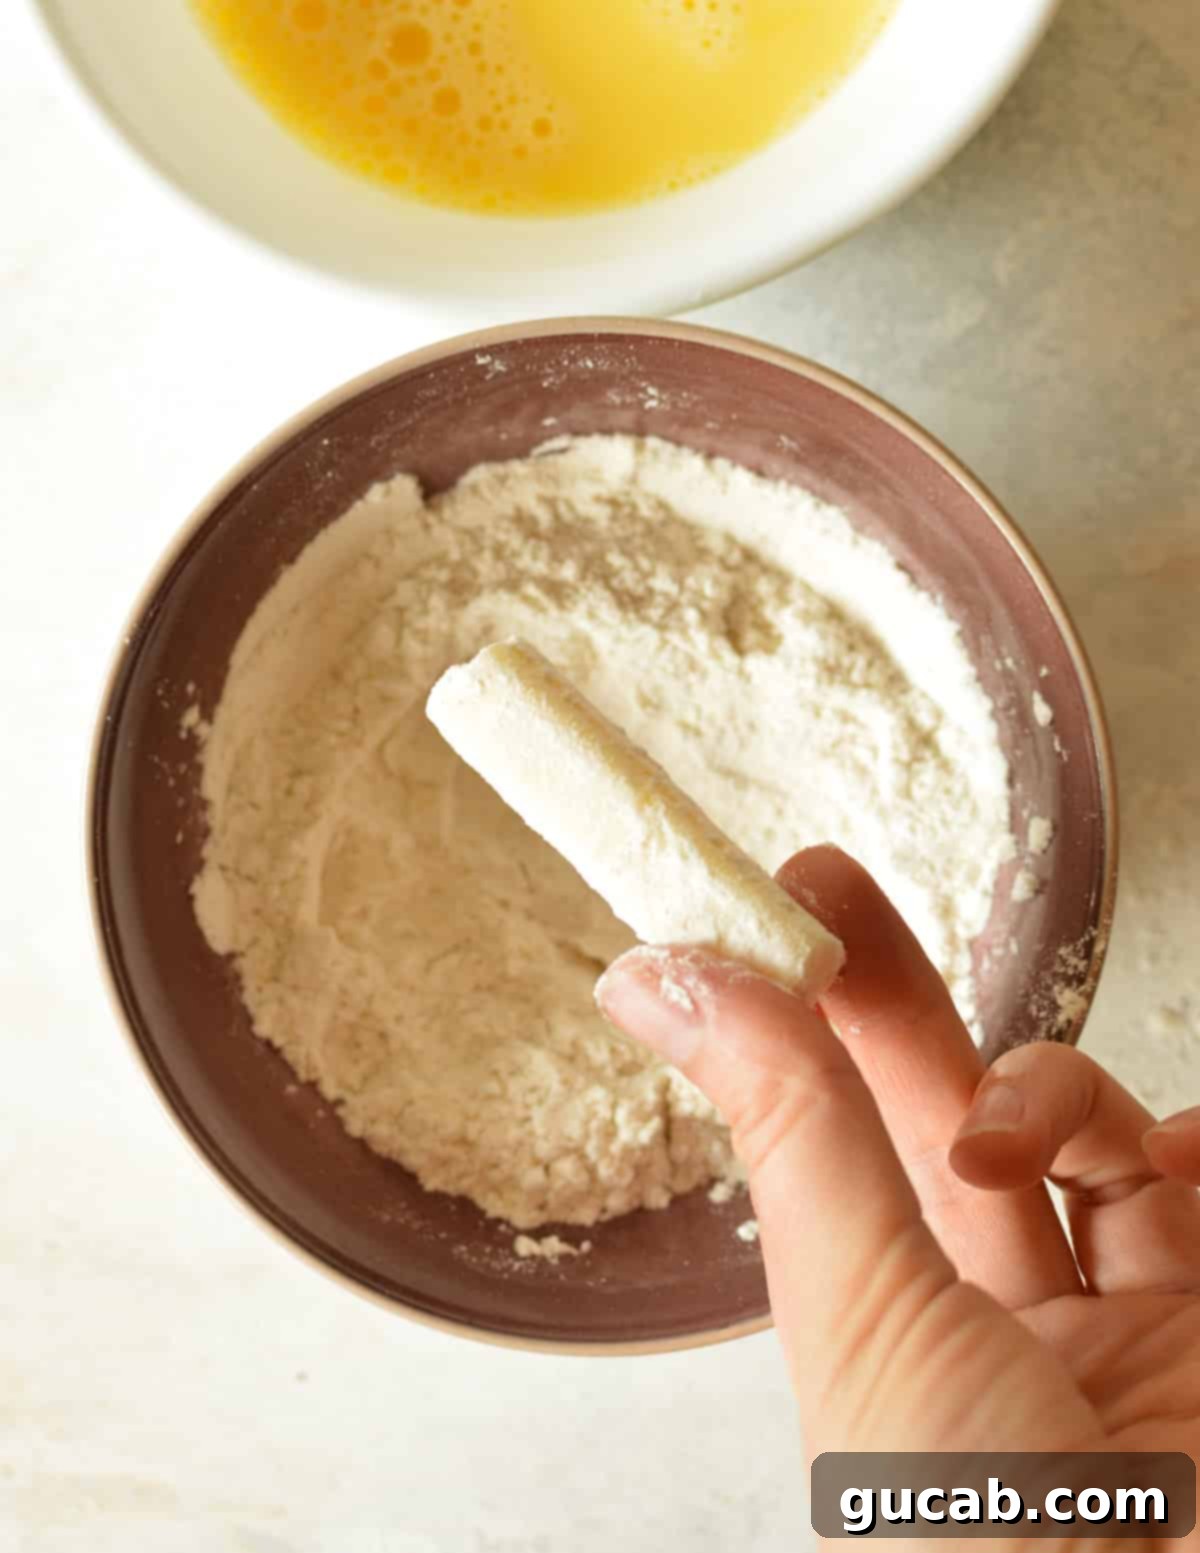
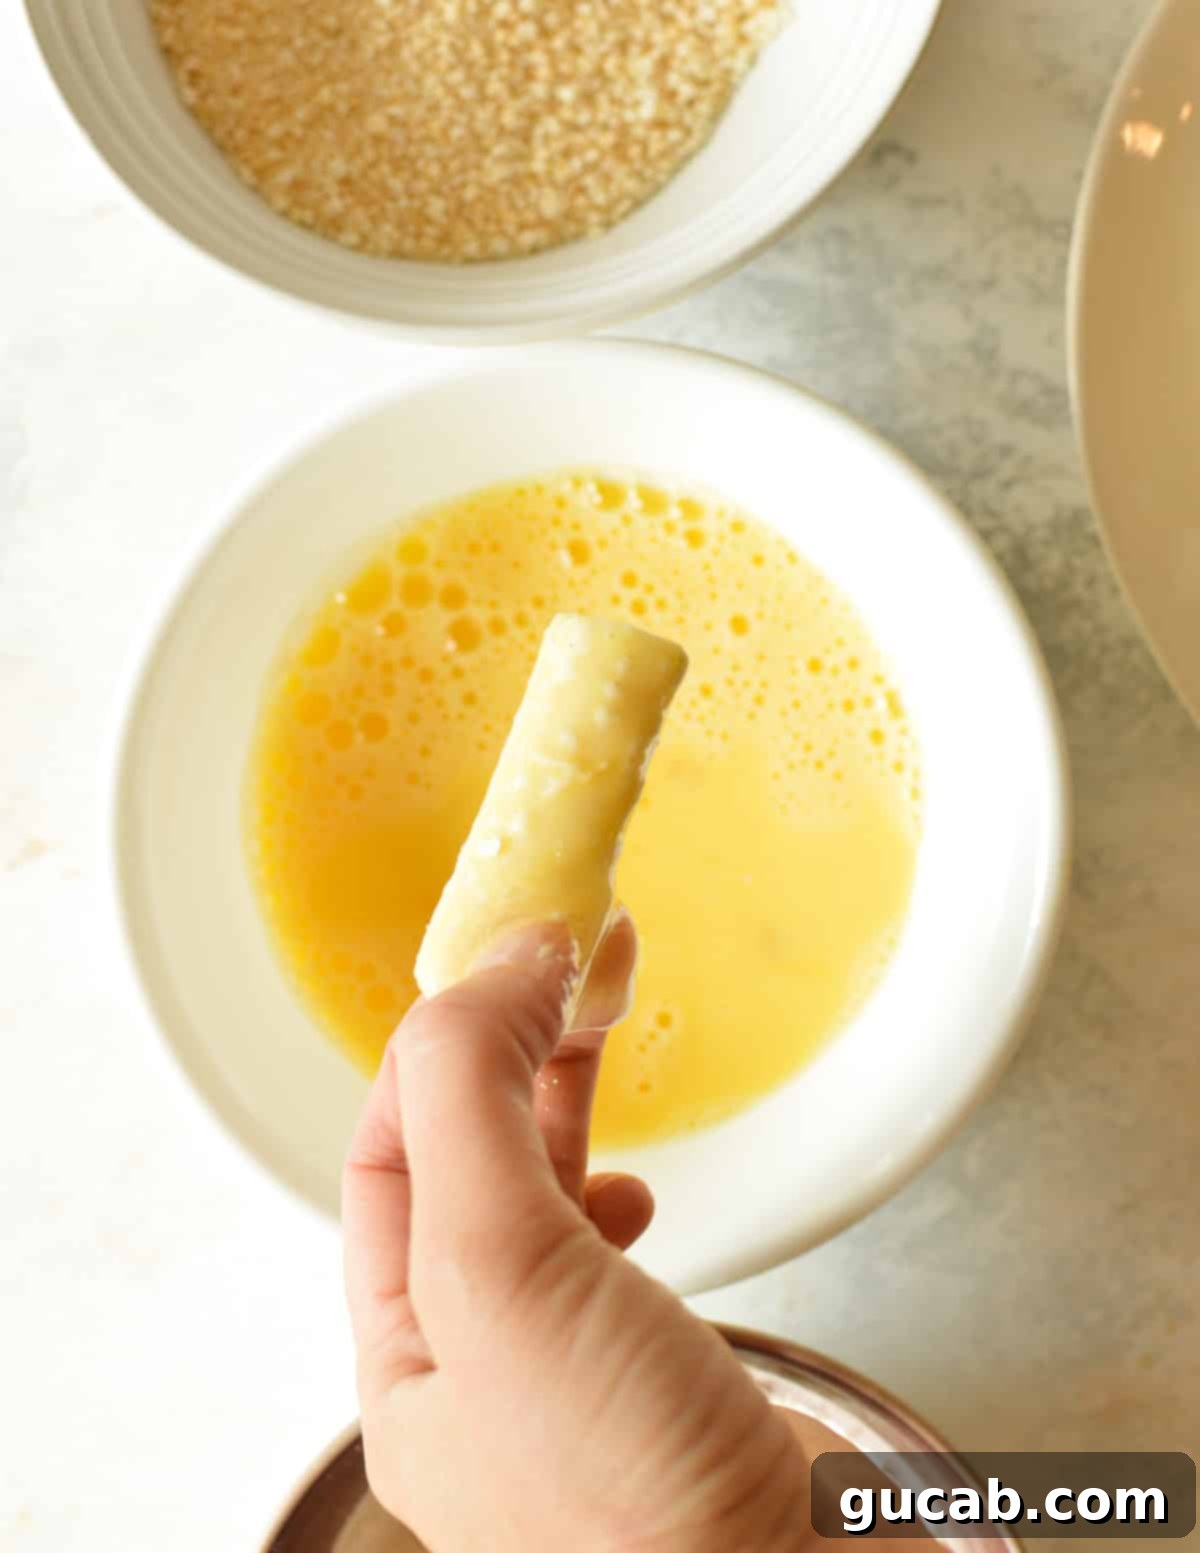
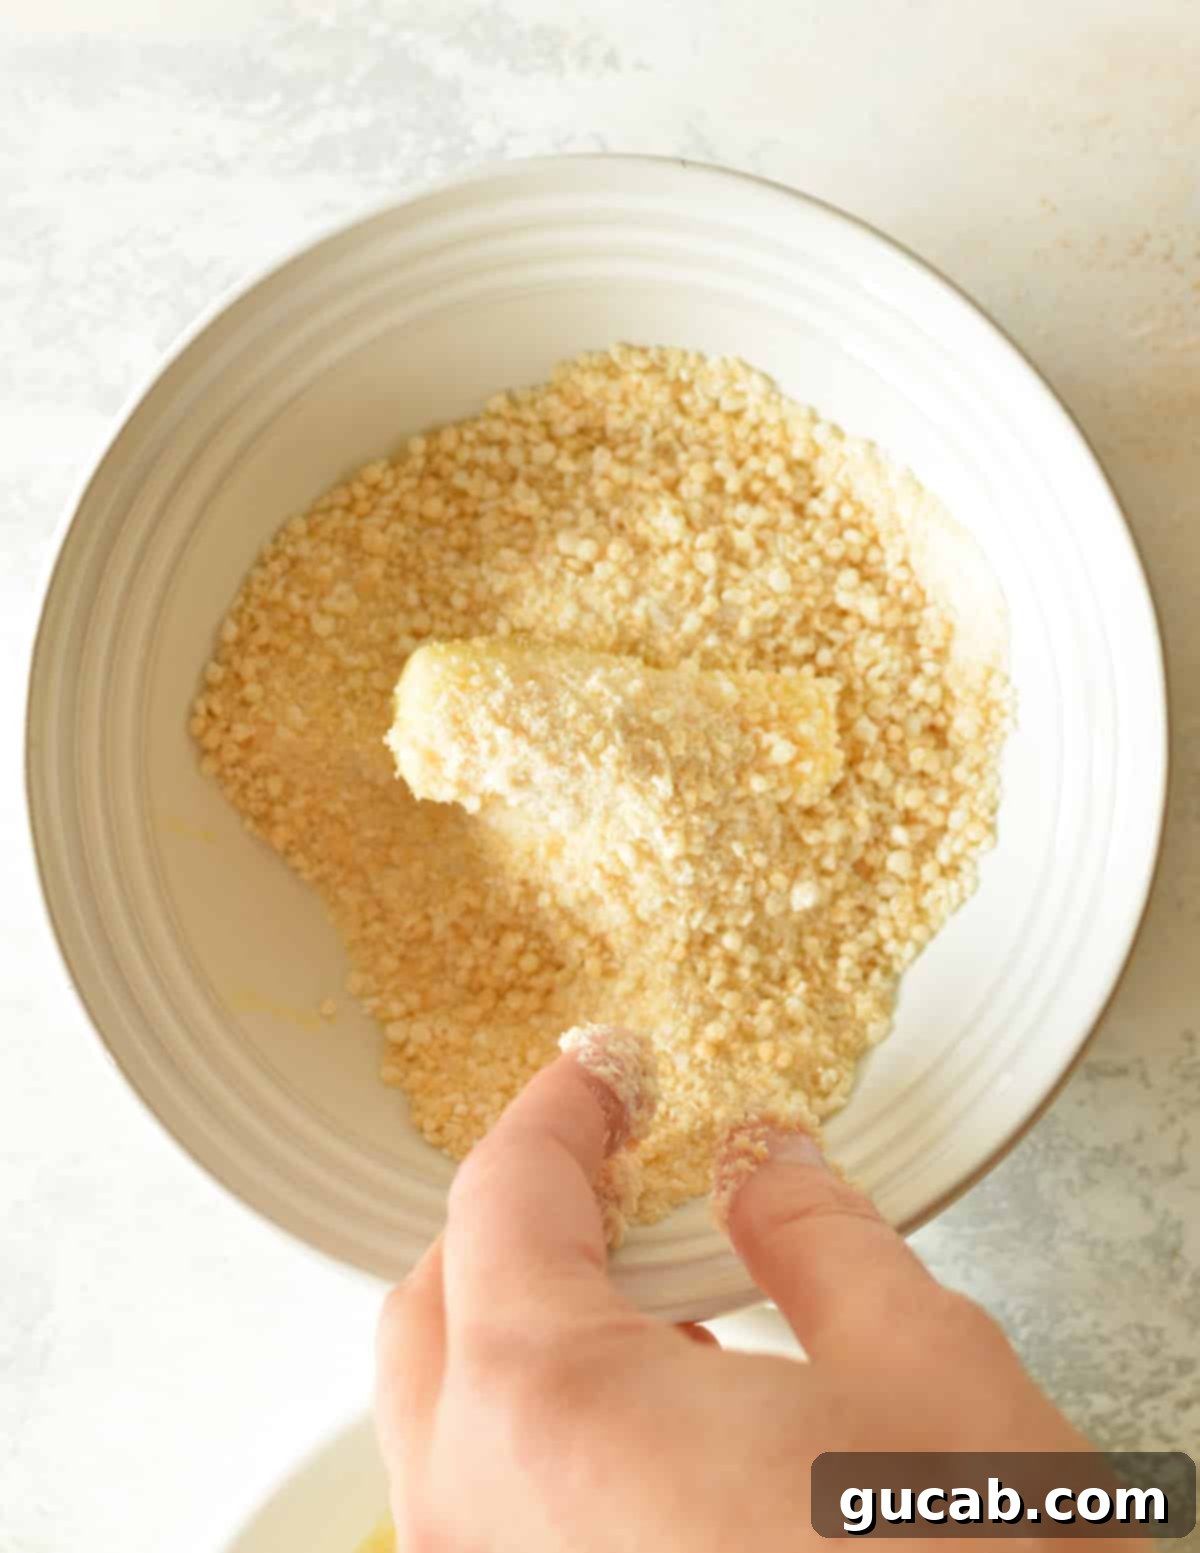
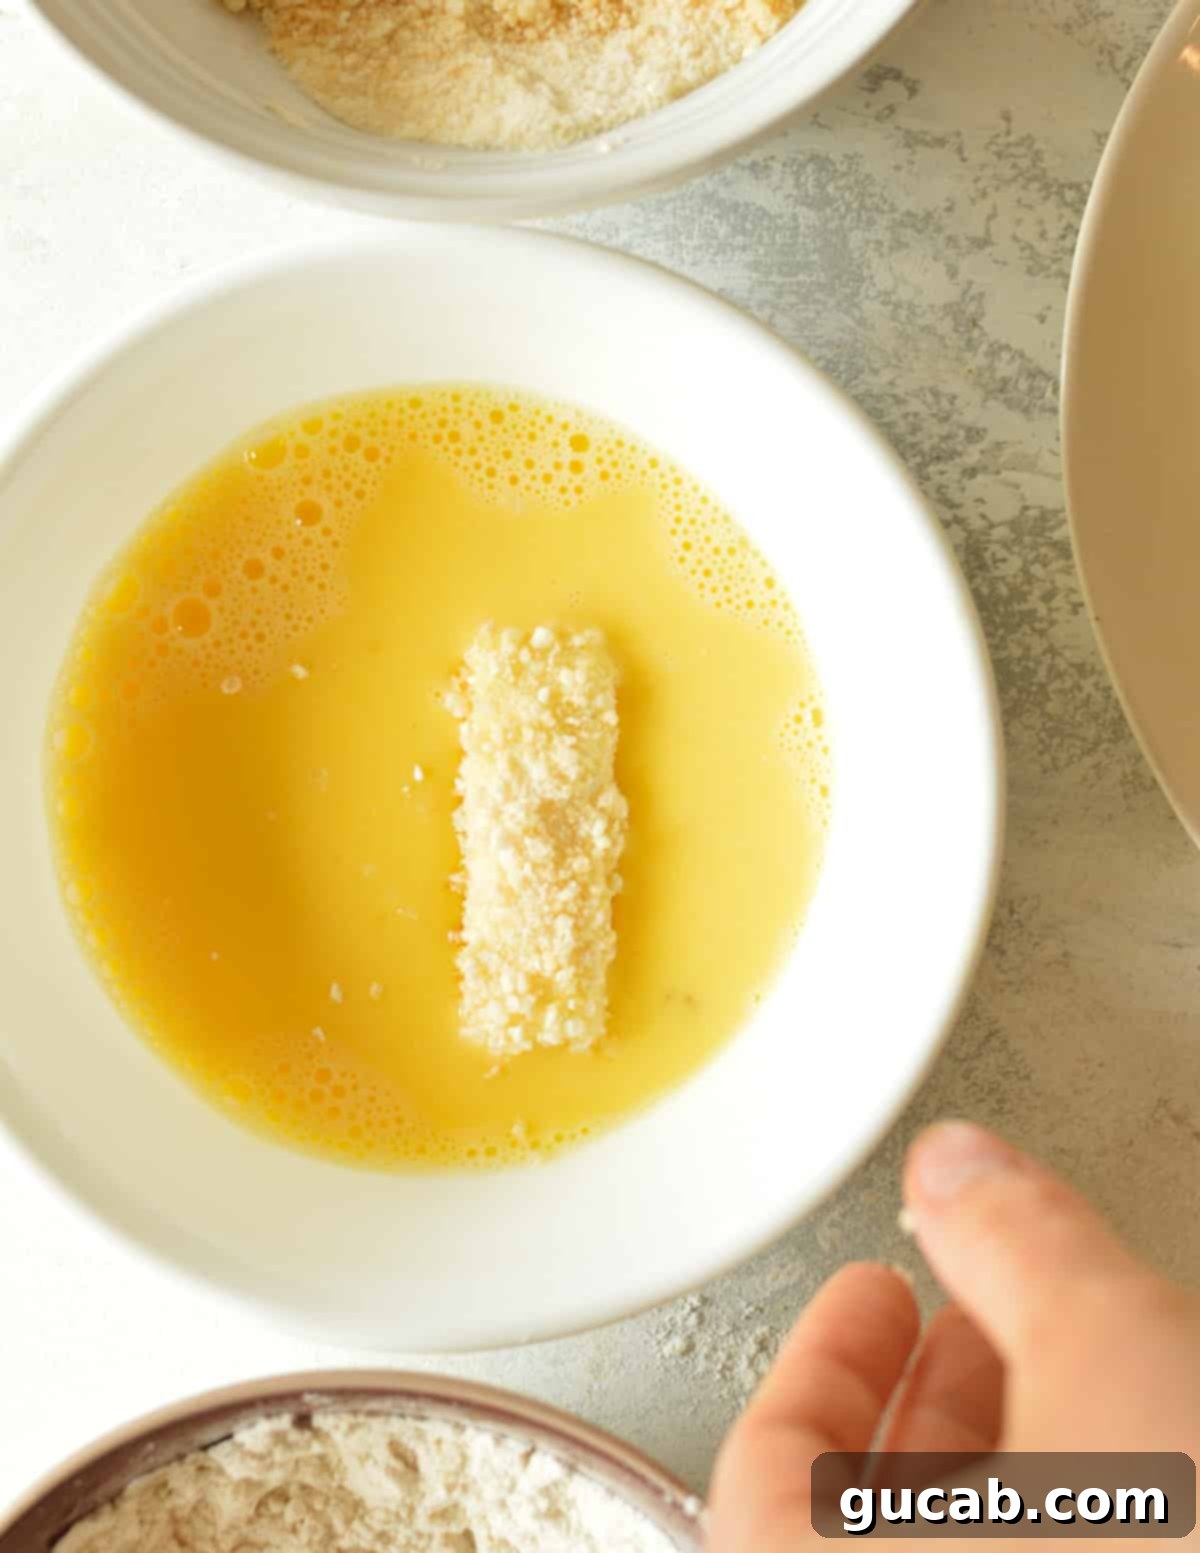
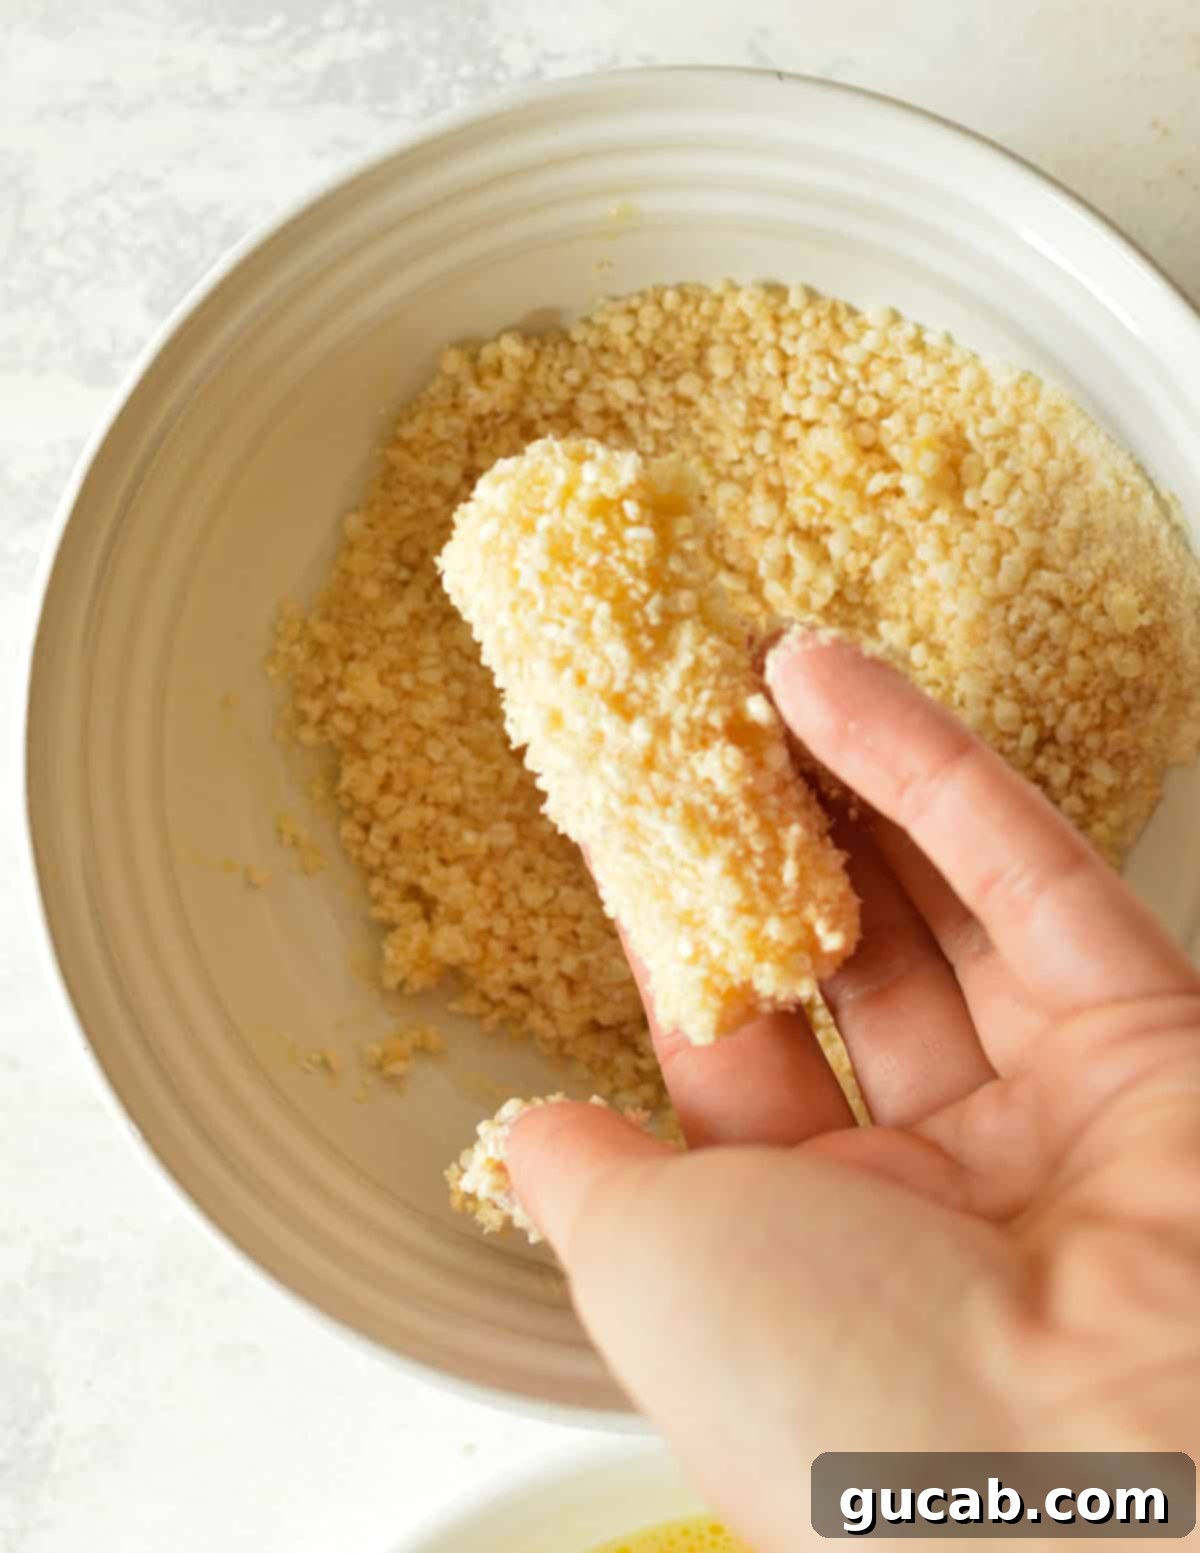
Place the fully coated cheese stick onto a clean plate or a baking sheet lined with parchment paper, and repeat this double-dredging process with all remaining cheese sticks. A helpful tip for minimizing mess: use one hand for the wet ingredients (egg) and the other for the dry ingredients (flour and breadcrumbs).
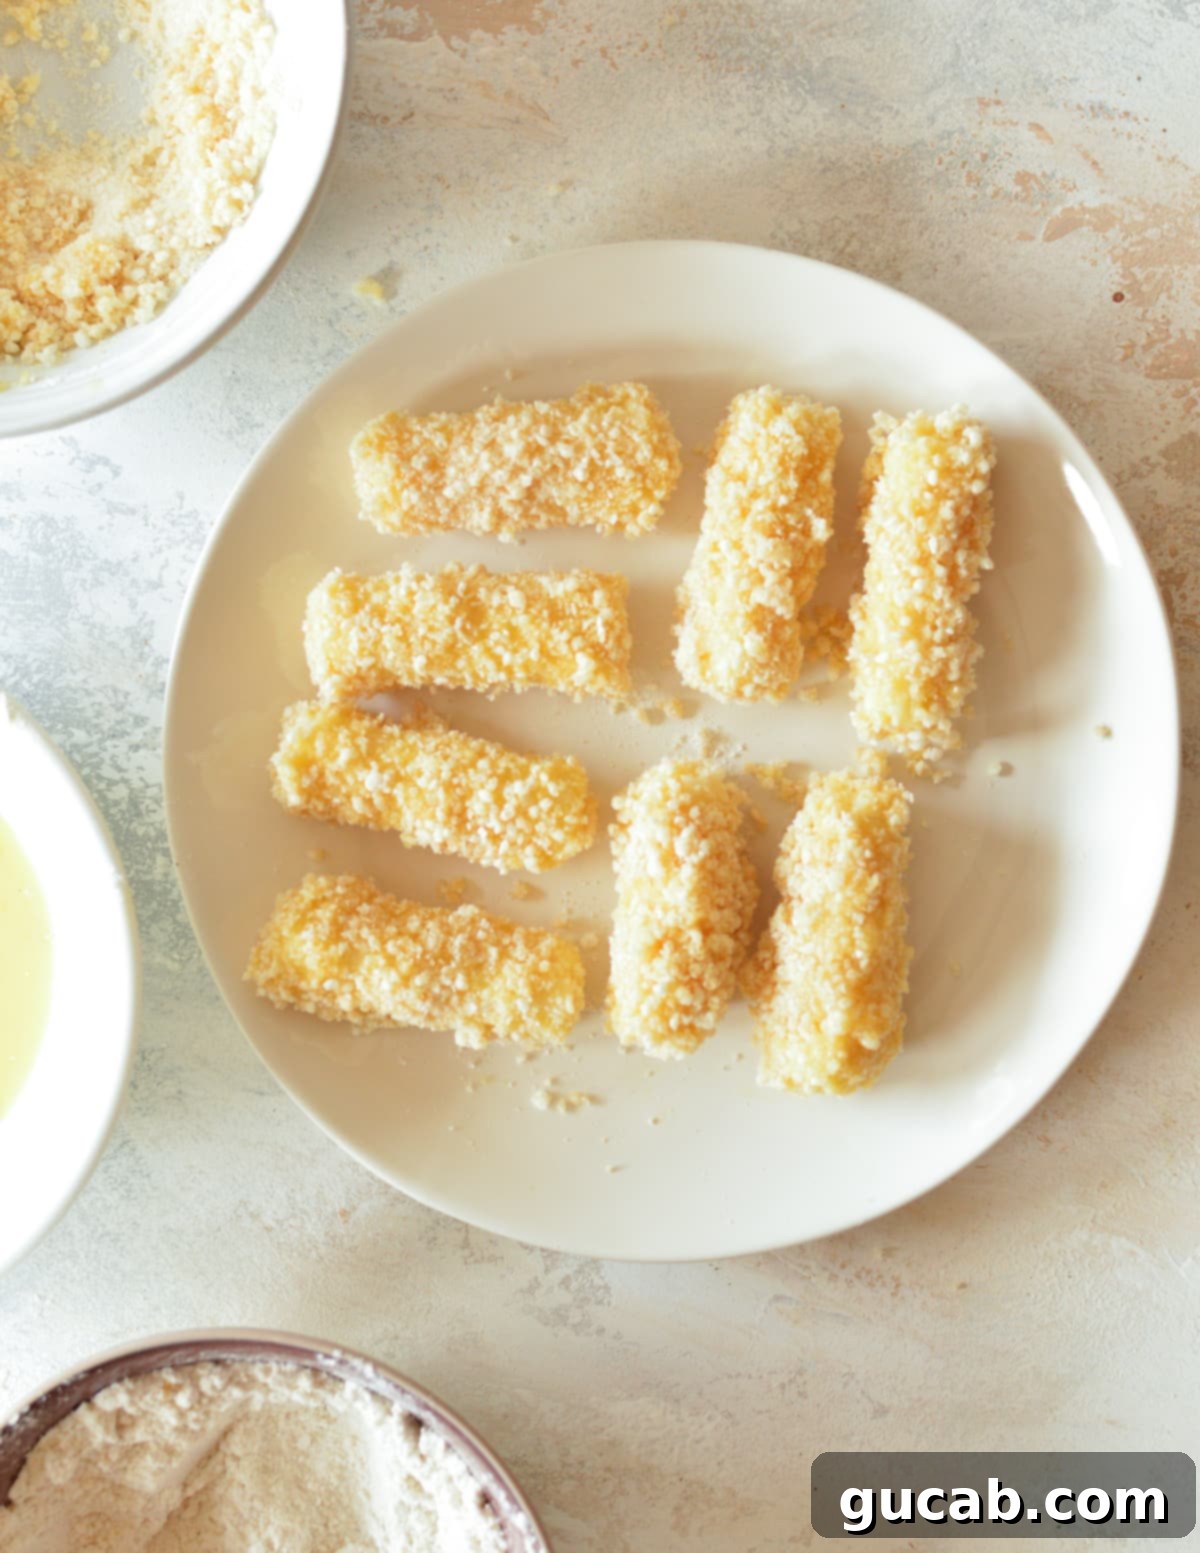
Step 3: Freeze and Deep-Fry for Perfection
This step is where the magic happens, transforming your coated cheese into golden, gooey delights. Precision is paramount here!
- The Critical Freeze: Once all your cheese sticks are breaded, place the plate or baking sheet with the coated gluten-free cheese sticks into the freezer for exactly 20 minutes. This timing is absolutely crucial. Freezing them helps the cheese firm up, preventing it from melting too quickly and bursting through the breading when it hits the hot oil. Freeze them for too long, and you risk a cold, unmelted center. Don’t freeze them at all, and leakage is almost guaranteed. A precise 20-minute chill is the sweet spot.
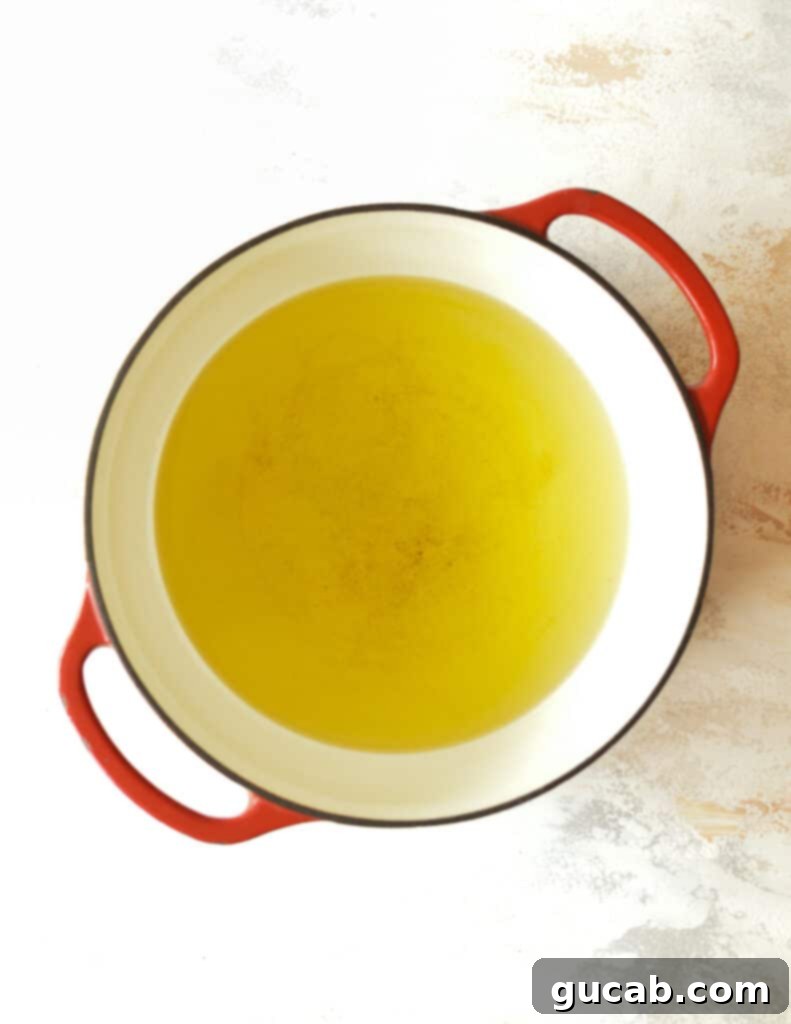
- Heating the Oil: While the cheese sticks are chilling, prepare your frying oil. Fill a heavy-bottomed pot or Dutch oven with at least two inches of your chosen neutral oil. The depth of the oil is important for even frying. Turn your stovetop to medium-high heat. Attach a deep-fry or candy thermometer to the side of the pot, ensuring the tip is submerged in the oil but not touching the bottom. Heat the oil until it reaches precisely 400 degrees Fahrenheit (204°C). Maintaining this temperature is key for a crispy exterior and a molten interior without burning.
- Frying the Mozzarella Sticks: Once the oil hits 400°F, carefully place two or three gluten-free mozzarella sticks into the hot oil, ensuring you don’t overcrowd the pot. Overcrowding will drastically drop the oil temperature, leading to greasy, soggy results. Let them cook undisturbed for 20 seconds. Then, using a slotted spoon or spider, gently turn them over and cook for another 20 seconds. Continue turning them every 15-20 seconds until all sides are a beautiful golden brown. The total frying time should be under one minute per stick. This short, high-heat burst ensures the breading gets crispy while the cheese melts perfectly without leaking. For best results, use a timer!
- Watch for Leakage: You’ll know if cheese leakage begins because the hot oil will start to pop and splatter more intensely. If this happens, remove the stick immediately.
- Draining and Serving: Once golden, remove the fried mozzarella sticks from the oil with your slotted spoon and place them on a plate lined with paper towels to drain any excess oil.
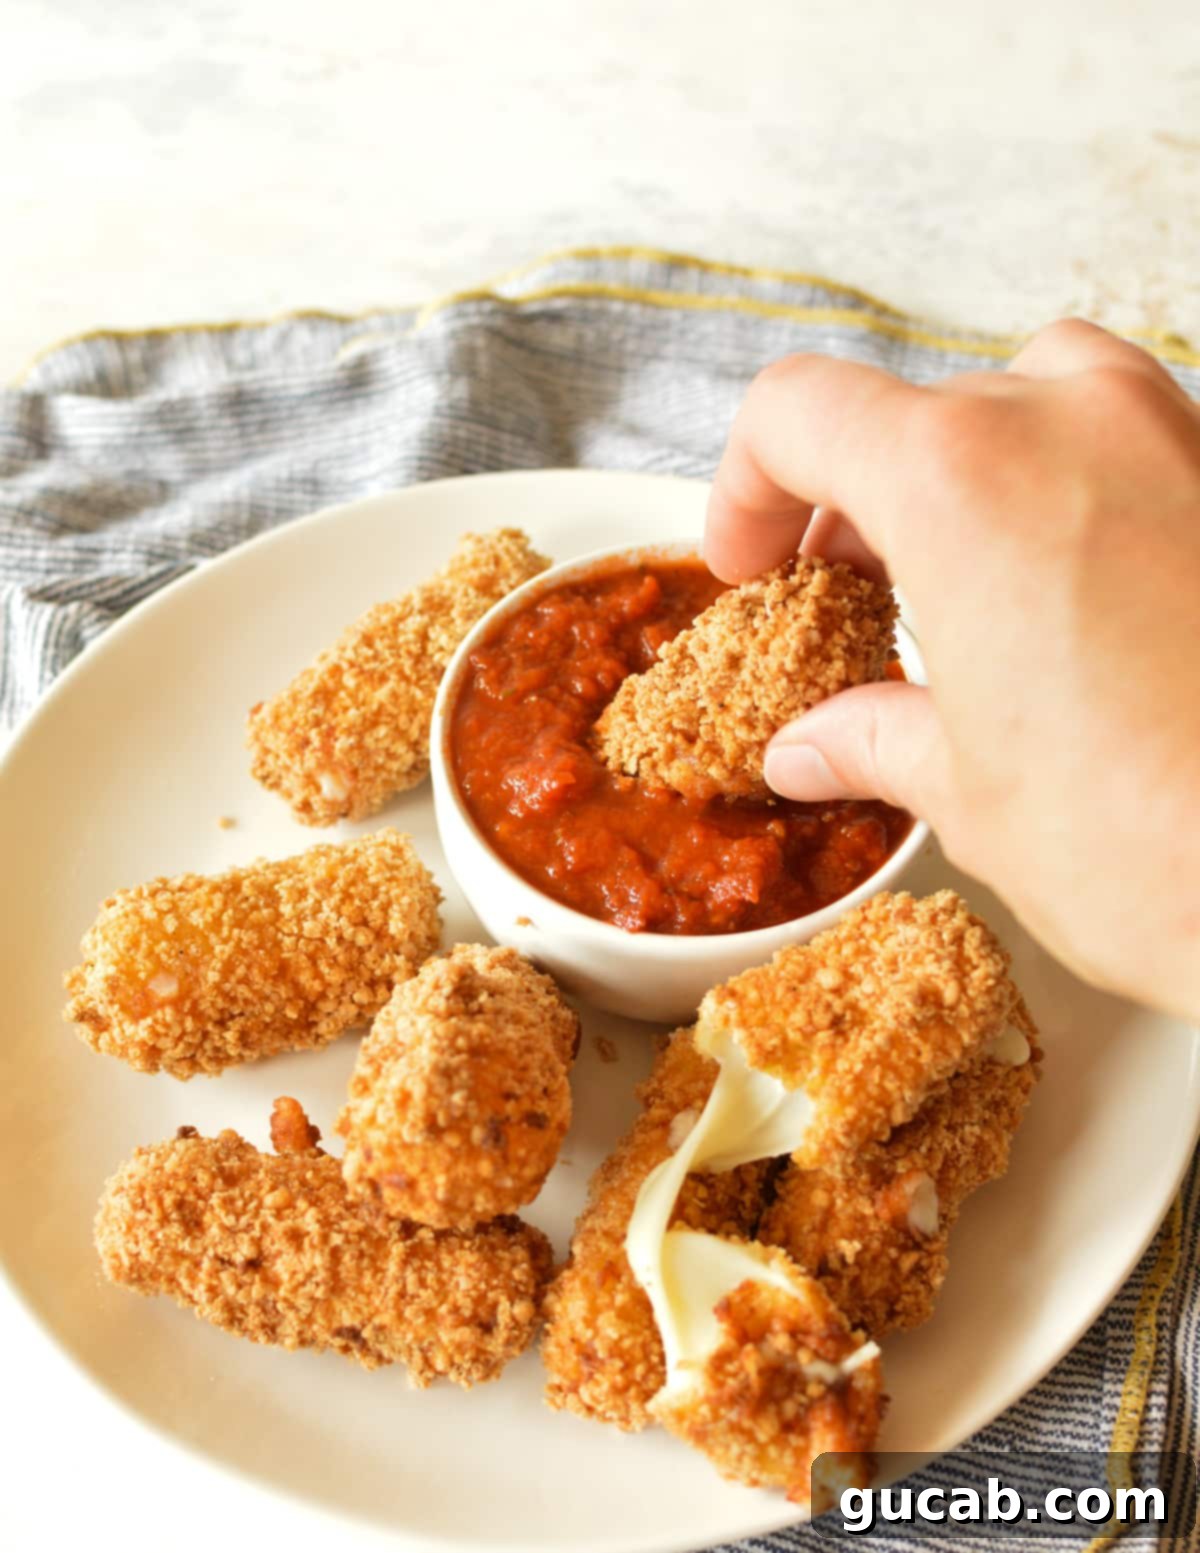
Enjoy your homemade gluten-free mozzarella sticks immediately with your favorite marinara sauce! The cheese cools quickly, so for that perfect melty pull, serve them hot. If, by chance, they do sit for a while and the cheese cools, you can pop them into an oven preheated to 300 degrees Fahrenheit (150°C) for a few minutes until warmed through and gooey again.
Essential Equipment for Frying Success
Having the right tools can make all the difference when deep-frying. Here’s a list of equipment you’ll need, along with why each item is important:
- Large Cast Iron Dutch Oven or a Pot with Tall Sides: A heavy-bottomed pot like a Dutch oven retains heat exceptionally well, which is crucial for maintaining a consistent oil temperature. Tall sides help prevent oil splatters, making the frying process safer and cleaner.
- Fry or Candy Thermometer: Absolutely non-negotiable for deep frying! Guessing the oil temperature is a recipe for disaster, leading to soggy or burnt results. A thermometer ensures your oil is at the perfect 400°F, vital for that crispy exterior and melty interior.
- Slotted Spoon or a Spider: These tools are perfect for safely placing and removing the mozzarella sticks from hot oil. The slots or mesh allow excess oil to drain quickly, preventing greasy outcomes.
- Three Small Dishes or Bowls: Essential for setting up your organized breading station – one for flour, one for the egg mixture, and one for breadcrumbs.
How to Make Gluten-Free Mozzarella Sticks Without the Cheese Leaking Out?
Ah, the age-old question! Cheese leakage is the nemesis of any fried mozzarella stick enthusiast. After many experiments and a bit of good old trial and error (because anything involving the loss of cheese truly *is* a catastrophe), I’ve pinpointed three critical factors to prevent this common culinary heartbreak:
- Embrace the Double Dip: This might sound like a fun dance move, but it’s a serious technique! After the initial dredging of the mozzarella stick in flour, I dip it in the egg wash and then breadcrumbs not just once, but twice! This double layer of breading creates a robust, impermeable seal around the cheese. Think of it as constructing a sturdy fortress, ensuring the precious cheese stays locked inside its crispy prison.
- The Perfect Chill Time: Once the mozzarella sticks are thoroughly breaded, freezing them for precisely 20 minutes is a game-changer. This brief chill period is just enough time to firm up the cheese, making it more resistant to immediate melting when it hits the hot oil. It creates a temporary barrier that gives the breading time to cook and crisp before the cheese completely liquefies. However, I strongly advise against freezing them for much longer than that. The goal is a melty, hot center, and over-frozen sticks will result in a beautifully crispy outside but a disappointingly cold and unmelted interior.
- Fast and Furious Frying: The frying duration is incredibly important. You should not fry the cheese stick on any single side for more than 20 seconds, and the total time in the oil should ideally be under a minute. If you leave the cheese stick on one side for too long, the intense heat will cause the cheese to expand and try to burst through its crispy shell. You can gently roll the cheese stick in the oil with your slotted spoon to ensure even browning on all sides, but maintain that quick turnover. You’ll know if you have leakage because the oil will often start to pop and crackle more, as the water content from the cheese escapes and reacts with the hot oil.
Can You Freeze Mozzarella Sticks After They’re Fried?
Absolutely, and this is a fantastic hack for meal prep and convenience! I actually prefer having a stash of pre-fried gluten-free mozzarella sticks in my freezer. It means you can enjoy all the deliciousness with minimal fuss and clean-up whenever a craving strikes – and who isn’t all about that life?
The process is incredibly simple:
- Once your mozzarella sticks are fried to golden perfection, allow them to cool completely on a wire rack. This prevents them from becoming soggy.
- Arrange the cooled, fried mozzarella sticks in a single layer on a plate or baking sheet. Place them into the freezer for about 30 minutes, or until they are firm enough not to stick together.
- Once partially frozen, transfer them to a freezer-safe plastic bag or an airtight container. Be sure to remove as much air as possible to prevent freezer burn. Store them in the freezer until you’re ready to bake and enjoy them.
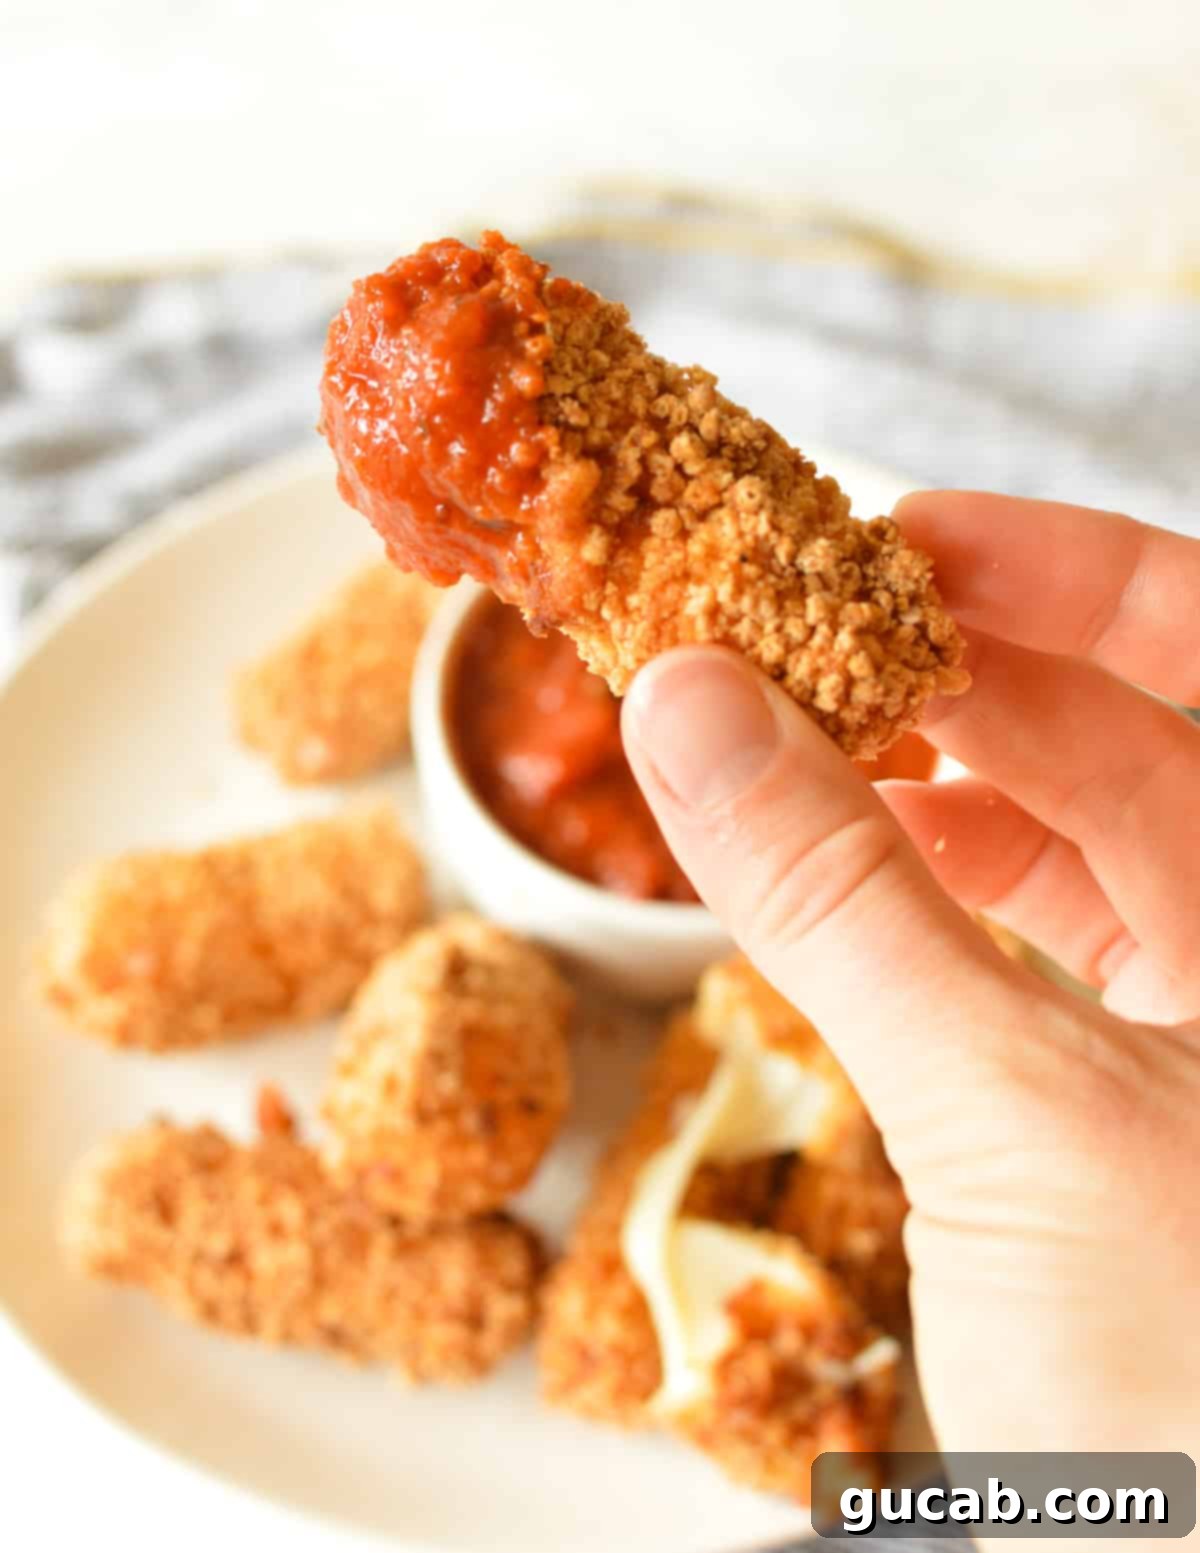
When you’re ready to indulge, there’s no need to thaw! Simply preheat your oven to 350 degrees Fahrenheit (175°C). Arrange the frozen, fried mozzarella sticks on a baking sheet and bake for approximately 10 minutes. Keep a close eye on them to ensure there’s no cheese leakage – if any begin to ooze, pull them out immediately. They should be warmed through, with the cheese melted and gooey again. Enjoy with warm marinara sauce or your dipping sauce of choice!
Smart Tips for Easy Clean Up and Less Mess
Deep-frying can sometimes be associated with a bit of a mess, but with a few simple strategies, you can minimize the aftermath and make the process more enjoyable:
- Disposable Breading Station: For my breading station, I highly recommend using three paper bowls – one for the gluten-free flour, one for the egg mixture, and one for the breadcrumbs. This way, once you’re done breading all your mozzarella sticks, you can simply toss the bowls (and their contents) directly into the trash. It saves you from washing sticky, breadcrumb-laden dishes!
- Paper Towel Lined Plate: After frying, immediately transfer your golden mozzarella sticks onto a paper towel-lined plate. The paper towels will absorb any excess oil, helping to keep your sticks crispy and less greasy. Once all the gluten-free cheese sticks are fried, I like to quickly remove the oil-soaked paper towels and place the sticks on a fresh, clean plate to enjoy as soon as they are cool enough to safely pop into my mouth.
- Protect Your Countertops: If you’re concerned about flour or breadcrumb scattering, place a large sheet of newspaper or parchment paper under your breading station bowls. This provides an additional layer of protection and makes cleanup even easier.
What Do I Do with the Leftover Frying Oil?
Once all your delicious gluten-free mozzarella sticks are long gone, you’re left with a pot full of frying oil. Proper disposal or reuse is important. You have a couple of options:
- Strain and Reuse: Yes, you can strain and reuse frying oil! If you plan to fry again soon, allow the oil to cool completely, then carefully strain it through a fine-mesh sieve lined with cheesecloth or a coffee filter into a clean, airtight container. Store it in a cool, dark place. The number of times you can reuse oil depends on what you’ve fried and how hot it got. You can read more about reusing fryer oil here: How Many Times Can You Reuse Frying Oil? Personally, I don’t often reuse frying oil, mostly because I don’t deep-fry frequently enough to make it worthwhile, and fresh oil is relatively inexpensive.
- Safe Disposal: If you’re not going to reuse the oil, proper disposal is key. Never pour hot oil down the drain, as it can solidify and cause significant plumbing issues. Instead, allow the oil to cool completely (this is crucial for safety!). Once cooled, pour it into a disposable container with a lid, such as an empty milk carton, coffee can, or plastic jug, and then throw it in the trash.
- My Personal Trash Bag Method: I find it easiest to buy cheap, off-brand trash bags specifically for this purpose. Once the oil is completely cool, I carefully line the inside of my pot with the trash bag (making sure it completely encloses the oil) and then gently dump the oil directly into the bag. I tie the bag into a tight, secure knot and toss it into the regular trash. Just double-check that the bag is fully around the pot before you dump – cleaning up spilled oil is definitely not easy!
Frequently Asked Questions (FAQs) About Gluten-Free Mozzarella Sticks
No, traditional mozzarella sticks are typically coated in wheat-based flour and breadcrumbs, which contain gluten. Additionally, if they are deep-fried in a restaurant, there’s a significant risk of cross-contamination from other gluten-containing fried foods in a shared fryer. This makes them unsuitable for those avoiding gluten.
Generally, plain string cheese sticks (which are just mozzarella cheese) are naturally gluten-free. However, it is always crucial to check the product label for any added ingredients, flavorings, or potential processing warnings. I recommend purchasing brands that explicitly label their products as gluten-free or provide clear information on their website. For example, Sargento cheese sticks are a popular choice that are certified gluten-free!
More Delicious Gluten-Free Appetizers to Enjoy
- Simple Guacamole Recipe with a Twist
- Mango Habanero Salsa
- Pineapple Mango Salsa Recipe
- Avocado Dip with Cherry Tomatoes and Feta

Gluten-Free Mozzarella Sticks
Carolyn
Pin Recipe
Equipment
-
Cast Iron Dutch Oven or a Large Pot with Tall Sides
-
Fry or Candy Thermometer
-
Slotted Spoon or Spider
-
Three Small Dishes or Bowls for Breading
Ingredients
- 4 Mozzarella Cheese Sticks Cut in half crosswise to make 8 pieces
- ⅓ Cup Gluten Free All Purpose Flour (I used Bob’s Red Mill 1:1 All Purpose Gluten-Free Flour)
- ½ t. Onion Powder
- ¼ t. Garlic Powder
- ¼ t. Kosher Salt (for flour mixture)
- ½ Cup Gluten Free Breadcrumbs
- ½ t. Kosher Salt (for breadcrumb mixture)
- 2 Large Eggs
- 1 tbsp Milk (dairy or non-dairy)
- Canola or Vegetable Oil for frying (approximately 2 ½ Cups, or enough to reach ¾ inch up the side of your pot)
Instructions
-
Cut each mozzarella cheese stick in half crosswise, creating 8 smaller pieces. Set these aside. In a small bowl, combine the gluten-free flour, onion powder, garlic powder, and ¼ teaspoon of kosher salt. Stir thoroughly with a spoon.
-
In a second small bowl, combine the gluten-free breadcrumbs and ½ teaspoon of kosher salt, then stir well with a spoon.
-
In a third bowl, whisk the eggs and milk together thoroughly with a fork until well combined. Arrange your three bowls in a line on your countertop: flour bowl first, then the egg wash bowl, and finally the breadcrumbs bowl.
-
Begin the double-dredging process: First, take a cheese stick and roll it in the flour mixture, ensuring it’s completely coated. Gently tap off any excess flour. Next, carefully drop the floured stick into the egg wash and turn it until evenly covered. Lift the stick, allowing any extra egg to drip off, then immediately place it into the breadcrumbs.
-
Roll and gently press the breadcrumbs onto all sides and ends of the cheese stick to cover completely. Then, place the coated stick back into the egg mixture for a second dip, ensuring a full coating. Finally, transfer it back into the breadcrumbs for a second, thorough coating, sealing all sides. Place the fully coated stick onto a clean plate or parchment-lined baking sheet. Repeat this entire double-dredging process for all remaining cheese sticks.
-
Place the plate of breaded cheese sticks into the freezer for exactly 20 minutes. Meanwhile, pour the canola or vegetable oil into a large Dutch oven or a heavy-bottomed pot with tall sides, ensuring at least 2 inches of oil depth. Heat the oil on medium-high heat, checking the temperature with a deep-fry thermometer until it reaches precisely 400 degrees Fahrenheit (204°C).
-
Once the oil is at temperature, gently place two breaded cheese sticks into the hot oil, being careful not to overcrowd the pot. Let them cook for 20 seconds. Use a slotted spoon or spider to turn them over and cook for another 20 seconds. Continue turning every 15-20 seconds until the entire stick is a beautiful golden brown (total frying time should be under 1 minute per stick). Remove them from the oil and place them onto a paper towel-lined plate to drain. Repeat this process with the remaining breaded sticks. Enjoy immediately with warm marinara sauce!
Notes
Always monitor your oil temperature carefully. If your oil gets too hot (above 400°F), reduce the heat slightly and wait a moment for it to come down to the ideal temperature before continuing to fry. Consistency is key!
