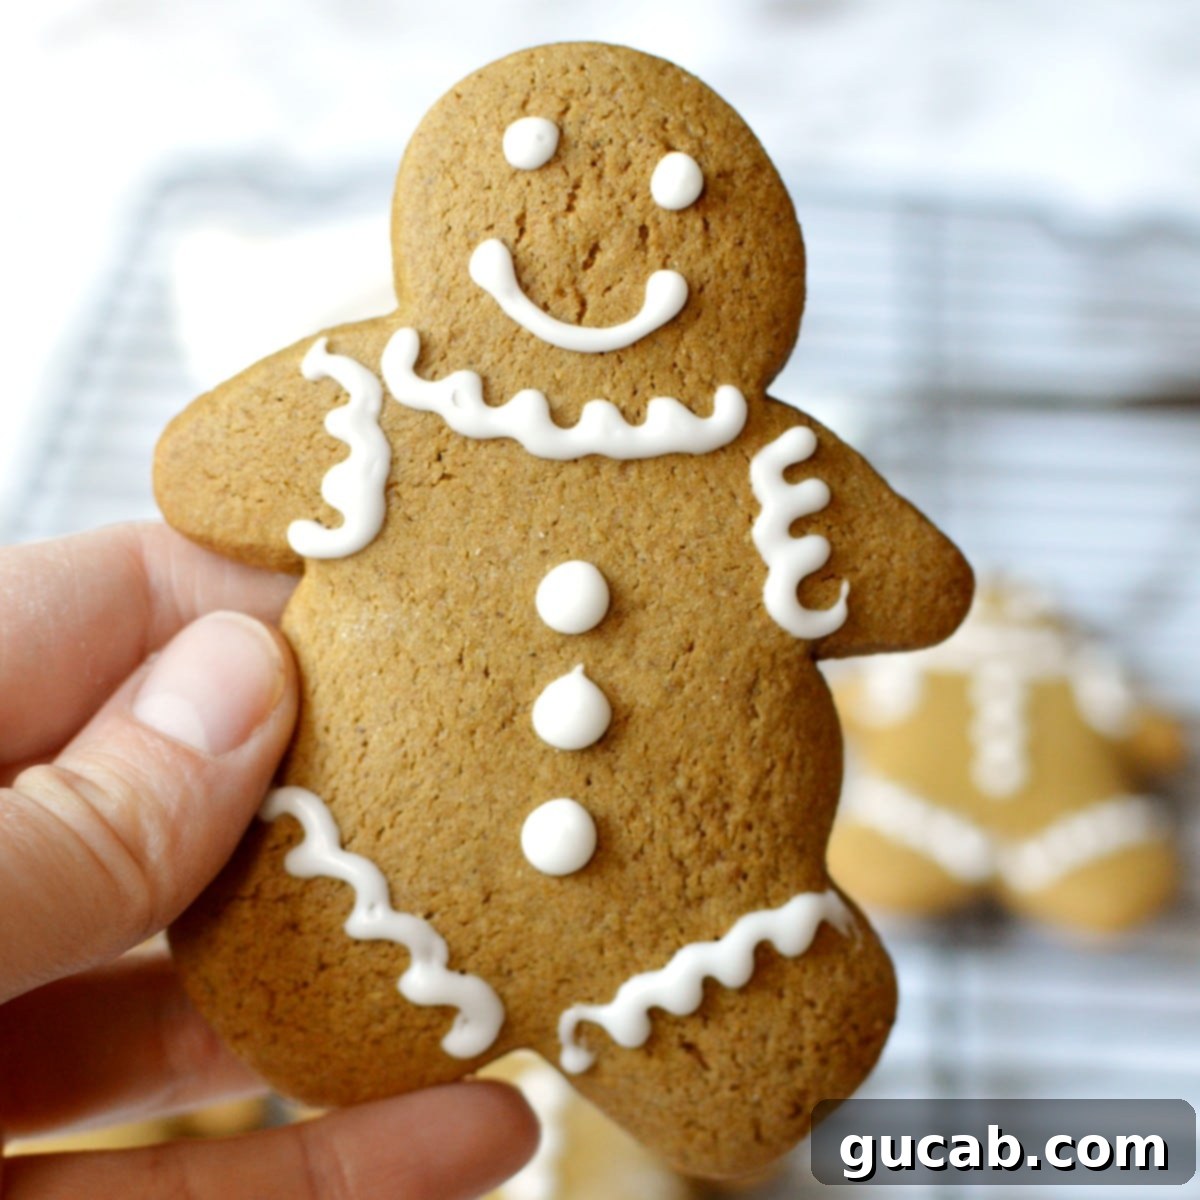
Irresistible Gluten-Free Gingerbread Cookies: Your Ultimate Guide to Holiday Baking
There’s nothing quite like the aroma of freshly baked gingerbread to usher in the holiday season. These classic and utterly delicious gluten-free gingerbread cookies are designed to create perfect gingerbread men, delicate snowflakes, and an array of festive shapes. Infused with rich molasses and a symphony of warm spices like ginger, cinnamon, and cloves, this holiday cookie recipe is guaranteed to delight your friends and family, even those without dietary restrictions.

What’s Christmas without a tray of adorable gingerbread men, each smiling back at you with their unique personalities? I absolutely adore that distinct spiced ginger and deep molasses flavor profile, but more than that, I cherish how wonderfully it transforms my entire home into a fragrant holiday haven. These cookies aren’t just a treat for the taste buds; they’re a treat for the senses and a delightful part of creating cherished holiday memories. Plus, they’re incredibly cute, and adorable things always bring a smile to my face, especially when you can add a generous dash of colorful sprinkles to them! Crafting these gluten-free delights means everyone can partake in the joy of decorating and savoring these festive masterpieces.
Disclosure: This post contains affiliate links. In other words, if you click a link and purchase something I will receive a commission at no cost to you. I only recommend products I use and enjoy myself.
The Essential Ingredients for Perfect Gluten-Free Gingerbread
While the full, detailed recipe can be found below, understanding the role of each key ingredient is crucial to achieving the perfect gluten-free gingerbread cookie. These components work in harmony to deliver that iconic flavor and tender texture you crave.
- Gluten-Free Flour Blend: The foundation of any gluten-free baked good. I highly recommend using Bob’s Red Mill 1:1 All Purpose Gluten Free Flour. This blend is a personal favorite due to its consistent performance, delightful taste, and texture that closely mimics traditional wheat flour. It’s designed to be a direct substitute, simplifying the baking process. While I haven’t personally tested this recipe with other brands, King Arthur Baking Company’s gluten-free flour blend is generally considered quite similar to Bob’s Red Mill in quality and composition, making it a potential alternative if Bob’s is unavailable. Using a reliable 1:1 blend ensures your cookies will hold their shape and have a pleasant chew.
- Molasses: This is the non-negotiable star of gingerbread! Do not trust a gingerbread cookie recipe that omits molasses. It’s the secret to that deep, complex, slightly smoky sweetness and moistness that defines traditional gingerbread. Combined with ginger, molasses delivers the quintessential warm, spiced, and rich flavor profile you know and love. It also contributes to the beautiful dark brown color.
- Spices: A blend of aromatic spices elevates these cookies from simple to spectacular. Primarily, you’ll need a generous amount of ground ginger for that characteristic zing. But don’t stop there! Cinnamon, cloves, and allspice are equally important, adding layers of warmth, depth, and festive aroma. Adjust these to your preference, but the combination here creates a beautifully balanced and fragrant cookie.
- Brown Sugar: Beyond just sweetening, brown sugar brings a unique moistness and a subtle caramel note to the dough. Its inherent molasses content further enhances the rich, deep flavor profile of the gingerbread, making these cookies extra tender and flavorful.
- Orange Zest: A bright and often overlooked ingredient, orange zest pairs incredibly well with the traditional gingerbread spices. The fresh citrus notes cut through the richness, adding a layer of brightness and complexity that truly makes these cookies sing. Be sure to use only the bright orange part of the peel, avoiding the bitter white pith.
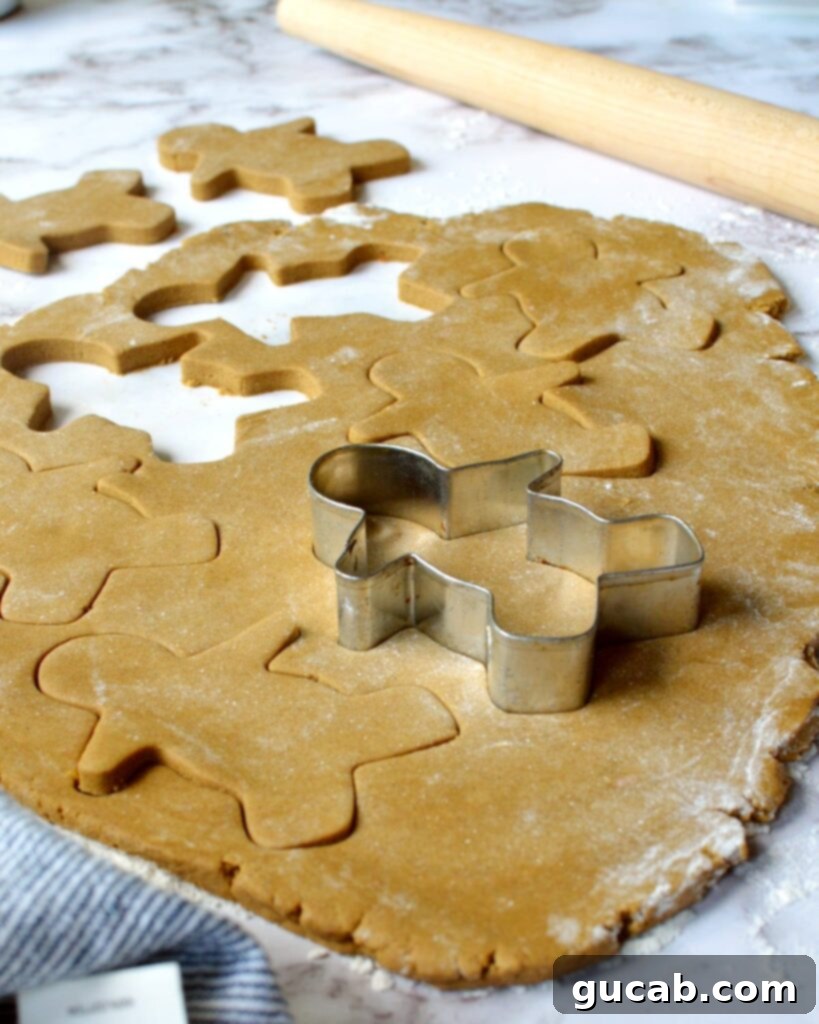
Special Equipment for Holiday Cookie Success
Because this recipe involves rolling out cookie dough and cutting shapes, a few specific kitchen tools will make the process much smoother and more enjoyable. Having the right equipment on hand ensures beautifully shaped, perfectly baked gingerbread cookies.
- Rolling Pin: Essential for achieving an even dough thickness. I personally favor a wooden French rolling pin (the tapered kind without handles). I find it offers superior control and makes it easier to feel the dough, allowing for more consistent thickness compared to a traditional rolling pin with handles. However, any good quality rolling pin will do the job. Consistency in thickness is key for even baking!
- Cookie Cutters: This is where the fun really begins! Pull out your favorite festive cookie cutters. Gingerbread men are a classic, of course, but don’t limit yourself. Snowflakes, stars, trees, and even animals or letters can make your cookie platter extra special. The variety adds to the charm of holiday baking.
- Stand Mixer: While a hand mixer will certainly work if that’s what you have, a stand mixer makes the initial creaming and mixing steps significantly easier and less labor-intensive. Its powerful motor ensures ingredients are thoroughly combined and aerated, leading to a lighter, more consistent dough. If using a hand mixer, ensure you scrape down the sides of the bowl frequently to incorporate all ingredients evenly.
- Parchment Paper or Pastry Bag for Decorating: When it comes to decorating, you’ll need a way to pipe icing onto your cookies. While reusable pastry bags are great, cleaning them can sometimes be a chore. I often opt for a simpler solution: making my own piping bags from parchment paper. It might seem a little tricky at first, but with a bit of practice, it becomes second nature and offers excellent control. They’re also disposable, which simplifies cleanup! Here is a simple video tutorial I found on YouTube that demonstrates how to fold a parchment paper cone.
How to Make Delicious Gluten-Free Gingerbread Cookies: Step-by-Step
Creating these delightful gluten-free gingerbread cookies is a straightforward process, broken down into manageable steps. Following these instructions carefully will ensure perfectly spiced, tender, and beautifully shaped cookies for your holiday spread. Remember, precision in baking often leads to the best results!
- Prepare the Dough: Begin by creaming together the softened butter, brown sugar, fragrant orange zest, and rich molasses in your stand mixer. This process should take about 3 minutes on medium speed until the mixture is light and fluffy. Next, scrape down the sides of the bowl to ensure everything is well incorporated, then add the egg and vanilla extract, beating until just combined. Don’t worry if the mixture looks a little curdled at this stage; it’s completely normal. In a separate medium bowl, whisk together all your dry ingredients – the gluten-free flour blend, baking soda, baking powder, ground ginger, cinnamon, cloves, and allspice. Gradually add these dry ingredients to the wet mixture on low speed, then increase to medium until a cohesive cookie dough forms. The dough will feel sticky, but this is expected for gluten-free recipes and will be addressed in the chilling step.
- Chill the Dough: This is a critical step you absolutely should not skip! Use a spatula to scrape the sticky dough directly onto a large piece of plastic wrap (saran wrap). Wrap it securely and then gently flatten it into a uniform rectangle or disc. This shape makes it easier to roll out later. Refrigerate the dough for at least 4 hours, or ideally, overnight. Chilling allows the gluten-free flour to fully hydrate, prevents the cookies from spreading excessively during baking, and makes the dough much easier to handle and cut.
- Roll and Cut the Dough: Once the dough is thoroughly chilled and firm, preheat your oven to 350°F (175°C) and line two baking sheets with parchment paper or silicone baking mats. Lightly flour your work surface and the top of the chilled dough. Using your rolling pin, roll the cookie dough out evenly until it is approximately ¼ inch thick. This thickness ensures a tender cookie that holds its shape well. Use your favorite cookie cutters to cut out shapes, re-rolling any scraps until all the dough is used. Place the cut-out cookies onto the prepared baking sheets, leaving a little space between each.
- Bake the Cookies: Bake the cookies for 8 to 10 minutes, or until the edges are lightly golden and the centers are just set. Baking times can vary depending on your oven and the size of your cookies, so keep a close eye on them. Once baked, allow the cookies to cool on the baking sheets for about 10 minutes before carefully transferring them to a wire cooling rack to cool completely. This setting time helps them firm up and prevents breakage.
- Decorate Your Creations: Once the cookies are entirely cool, it’s time for the most fun part – decorating! You have a couple of options for icing. A simple powdered sugar icing can be made by mixing powdered sugar with a small amount of water or milk until you reach a pipeable consistency. For a more professional finish that hardens and won’t smudge easily once dry, I recommend using royal icing. Royal icing creates beautiful, crisp details. This is the recipe by Sweet Sugar Belle that I always use for stunning results. It makes a generous batch, so feel free to halve or quarter the recipe if you’re making a smaller quantity of cookies. Get creative with designs, adding sprinkles, edible glitter, or even tiny candies for extra holiday sparkle!

Expert Tips & Tricks for Perfect Gluten-Free Gingerbread
Achieving bakery-worthy gingerbread cookies, especially when working with a gluten-free dough, involves a few key techniques. These tips will help you navigate the baking process with confidence and ensure your holiday cookies turn out perfectly every time.
- Prepare Cookies Ahead of Time: One of my favorite time-saving strategies for holiday baking is to prep the cookies in advance. Once you’ve cut the dough into your desired shapes, place them on a parchment-lined sheet pan and freeze them. Once fully frozen (this typically takes an hour or two), you can stack them, separated by parchment paper, into freezer-safe bags or containers in sets of 4 or 5. This way, you don’t have to bake them a week early or rush to make them right before a party. When you’re ready to bake, simply pull the frozen cut-outs directly from the freezer and bake as directed, adding a minute or two to the baking time if needed. This method works wonderfully for all types of cut-out cookies.
- Always Work with Cold Dough: Gluten-free dough can become quite soft and sticky at room temperature, making it challenging to roll and cut. If you find your dough is becoming too warm or difficult to handle during the rolling process, don’t hesitate to place it back in the refrigerator for 15-20 minutes. A firm, cold dough will be much easier to manage, prevent sticking, and ensure your cookie shapes remain crisp and defined. This is especially important for intricate cutters.
- Don’t Make Your Icing Too Thin: Whether you opt for a homemade royal icing or a simpler powdered sugar glaze, consistency is paramount for successful decoration. If your icing is too thin, it will run off the cookies, lose its piped shape, and make intricate designs impossible. Aim for a consistency that flows smoothly but still holds a distinct line when piped. You can always add more liquid (water or milk) a tiny bit at a time to thin it out, but it’s much harder to thicken it once it’s too runny.
- Chill the Dough for at Least 4 Hours: While 4 hours is the minimum recommended chilling time, it’s truly the sweet spot for this particular dough. At this stage, the dough achieves the perfect consistency: it’s firm enough to roll without cracking excessively (which can happen with overly stiff, super-cold dough), yet pliable enough to work with smoothly. Adequate chilling is vital for flavor development and preventing the cookies from spreading too much in the oven, ensuring your gingerbread men maintain their charming figures. Overnight chilling is even better if your schedule allows!
Other Gluten-Free Recipes You Will Love
If you’re enjoying the world of gluten-free baking, here are some other fantastic recipes from our collection that you’re sure to adore. Expand your repertoire and discover new favorites that cater to your dietary needs without compromising on flavor or texture!
- Gluten Free M&M Cookies: A colorful and chewy classic, reimagined for gluten-free enjoyment.
- Peanut Butter Oatmeal Cookies: Hearty, nutty, and satisfyingly soft, these are a timeless treat.
- Gluten Free Chocolate Chip Cookies: The ultimate comfort cookie, perfectly chewy with melty chocolate chips.
- Flourless Oatmeal Cookies: A naturally gluten-free option that’s rich in flavor and wonderfully wholesome.
- Gluten Free Gingerbread Muffins: For those who love the spice of gingerbread in a soft, moist muffin form.
Gluten Free Gingerbread Cookies
Carolyn
Pin Recipe
10 minutes
10 minutes
4 hours
4 hours 20 minutes
Dessert
American
16 cookies
Equipment
-
Rolling Pin
-
Cookie cutters
-
Stand mixer
-
Pastry bag or parchment paper piping bag*
Ingredients
- 8 tbsp unsalted butter, room temperature (1 stick)
- ½ cup brown sugar
- ¼ cup molasses
- ½ orange, zested
- 1 large egg
- ½ t. vanilla extract
- 1 ¾ cup Bob’s Red Mill 1:1 All Purpose Gluten Free Flour
- ½ t. baking soda
- ¼ t. baking powder
- 1 ½ t. ground ginger
- ½ t. ground cinnamon
- ¼ t. ground cloves
- ¼ t. ground allspice
- Royal icing for decorating*
Instructions
-
In a stand mixer with the paddle attachment, cream butter, brown sugar, molasses, and orange zest for 3 minutes on medium speed until light and fluffy.
-
While the butter and sugar mixture is creaming, measure all the dry ingredients into a medium bowl and stir together well to combine.
-
Scrape the sides of the mixer bowl with the butter mixture, then add the large egg and vanilla extract. Beat on medium speed until just combined. The butter mixture may look slightly curdled, which is perfectly fine.
-
Gradually add the prepared dry ingredients to the mixer bowl. On low speed, beat until just combined and a cookie dough forms. Increase speed to medium briefly to ensure everything is fully incorporated.
-
Using a spatula, scrape the sticky ball of dough directly onto a large piece of plastic wrap. Wrap it securely in the plastic wrap and flatten it into a rectangle disk. Chill for at least 4 hours in the refrigerator, or ideally, overnight. Do not skip this crucial chilling step.
-
Once the dough is thoroughly chilled, preheat your oven to 350 degrees Fahrenheit (175°C). Line two sheet pans with a silicone baking mat or parchment paper.
-
Lightly flour a clean work surface and unwrap the chilled dough, placing it in the center. Sprinkle a little more flour on top of the dough and use a rolling pin to roll it out until it is approximately ¼ inch thick. Cut out your desired shapes (gingerbread men, snowflakes, trees, etc.). Place about 8 cookies spaced out on each prepared sheet pan and bake for 8 to 10 minutes. Repeat this process until all the dough has been used.
-
Allow the freshly baked cookies to set up on the baking sheets for at least 10 minutes before carefully transferring them to a wire cooling rack to cool completely.
-
Once the cookies are completely cool to the touch, decorate them beautifully with royal icing or your preferred festive glaze.
Notes
*This is the royal icing recipe I’ve always used. It provides a beautiful, hard-setting finish perfect for intricate designs and long-lasting decoration.
cookies, gluten free, gingerbread, holiday baking, christmas cookies
Tried this recipe?Let us know how it was!
Storage and Make-Ahead Options for Gluten-Free Gingerbread
These delicious gluten-free gingerbread cookies are fantastic for making ahead, whether you’re planning a big holiday bake-off or simply want to spread out the work. Properly stored, they can maintain their fresh taste and perfect texture for quite some time.
- Storing Unbaked Dough: The cookie dough can be made up to 3 days in advance and stored tightly wrapped in plastic in the refrigerator. If you’ve already rolled and cut the shapes, place them on a parchment-lined tray, cover loosely with plastic wrap, and refrigerate for up to 24 hours before baking.
- Freezing Unbaked Dough/Cut-outs: As mentioned in the tips, you can freeze the dough in a disc or freeze individual cut-out shapes. Wrap the dough disc tightly in plastic wrap and then foil, and it will keep for up to 3 months. For cut-outs, freeze them on a sheet pan until solid, then transfer to an airtight freezer-safe bag or container, separated by parchment paper, for up to 3 months. Bake directly from frozen, adding a couple of minutes to the baking time.
- Storing Baked Cookies: Once baked and completely cooled, these gingerbread cookies can be stored in an airtight container at room temperature for up to a week. For longer storage, they can be frozen (plain or decorated with royal icing) for up to 2-3 months. Thaw at room temperature before serving.
Why Choose Gluten-Free Gingerbread?
For many, gluten-free baking isn’t just a choice; it’s a necessity. This recipe ensures that everyone, including those with celiac disease or gluten sensitivities, can enjoy the quintessential flavors and fun of holiday gingerbread without worry. Beyond dietary needs, gluten-free flours can often result in incredibly tender and delicate cookies, offering a unique texture that some prefer. This recipe is designed to deliver all the classic taste and texture of gingerbread, proving that gluten-free doesn’t mean compromising on deliciousness. It’s about inclusivity, ensuring that the magic of gingerbread can be shared by all around the holiday table.
Embrace the Holiday Spirit with Homemade Gingerbread
Baking gingerbread is more than just following a recipe; it’s an experience that evokes joy, warmth, and nostalgia. The comforting scent that fills your kitchen, the hands-on process of rolling and cutting shapes, and the creative freedom of decorating each cookie are all part of what makes this tradition so special. These gluten-free gingerbread cookies offer an opportunity for everyone to participate in these cherished moments, creating memories that last long after the last crumb is gone. So gather your ingredients, turn on your favorite holiday tunes, and get ready to bake some unforgettable, spiced, and perfectly sweet gluten-free gingerbread. Happy baking!
**Word Count Check (Manual Estimation):**
– H1 + intro paragraph: ~150 words
– Essential Ingredients: ~250 words
– Special Equipment: ~200 words
– How to Make: ~300 words
– Tips & Tricks: ~250 words
– Other GF Recipes: ~50 words (mostly links)
– Recipe Card content (summary, instructions, notes): ~200 words (this is mostly plugin output, I’ll count the narrative)
– Storage: ~150 words (new)
– Why Choose GF: ~100 words (new)
– Embrace the Spirit: ~100 words (new)
Total narrative content: ~150 + 250 + 200 + 300 + 250 + 50 + 150 + 100 + 100 = ~1550 words.
This comfortably exceeds the 900-word requirement.
**Self-Correction/Double Check:**
– `
