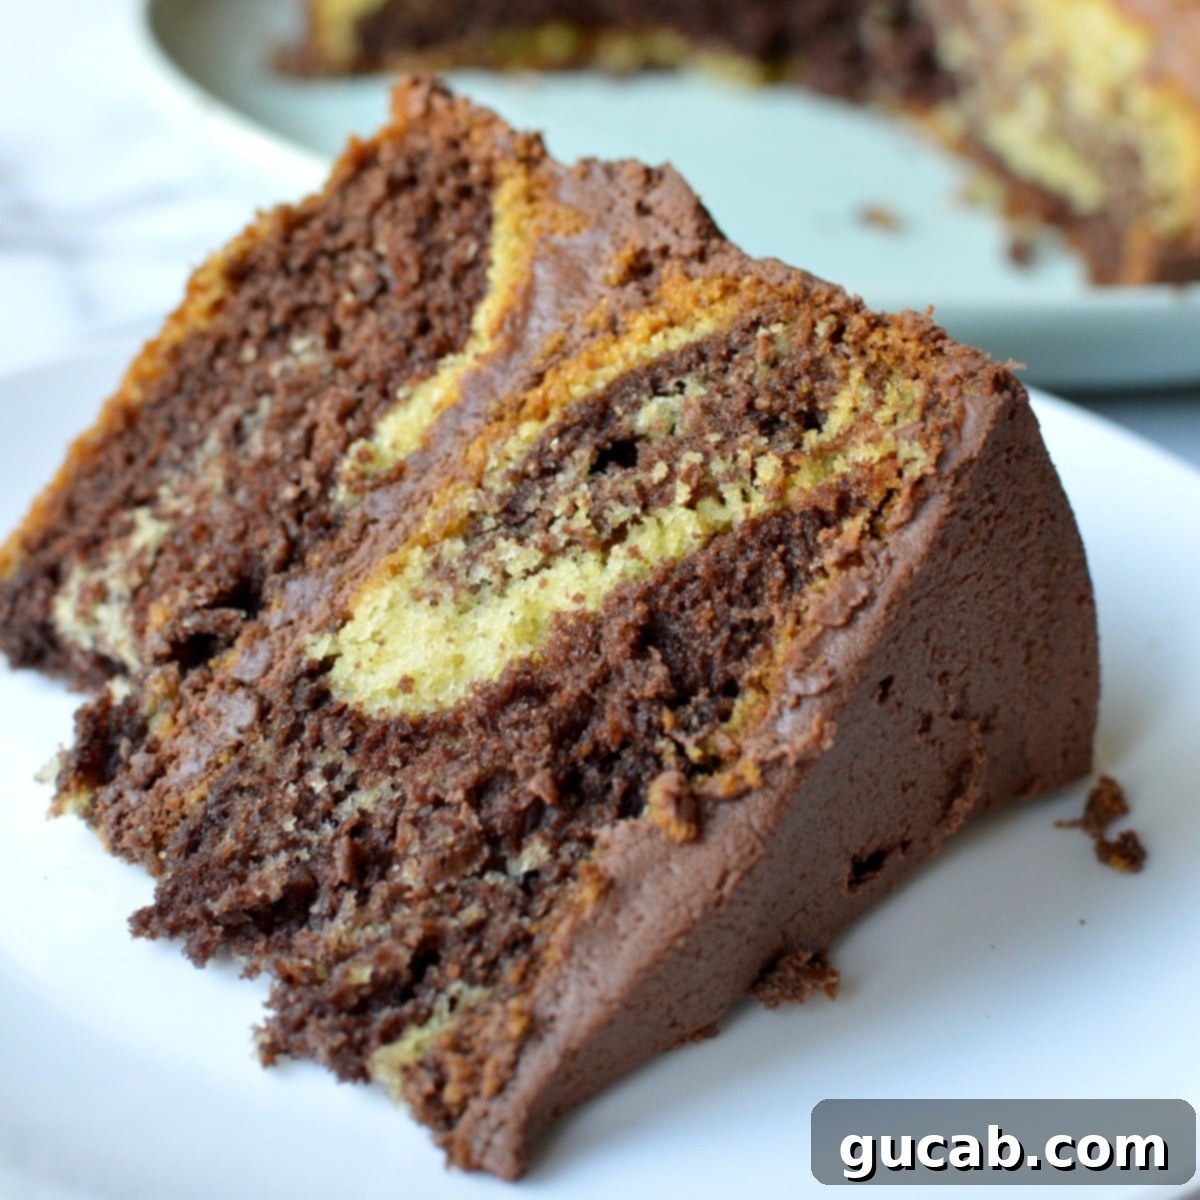
Easy & Moist Gluten-Free Marble Cake: A Perfect Chocolate Vanilla Swirl
Craving a classic marble cake but need it to be gluten-free? Look no further! This recipe delivers an absolutely phenomenal gluten-free marble cake that is wonderfully light, irresistibly airy, and boasts a beautifully defined chocolate swirl. It’s the ultimate “best of both worlds” dessert, combining the rich depth of chocolate with the sweet simplicity of vanilla in every single bite. Forget dense, crumbly gluten-free bakes; this recipe guarantees a moist, tender crumb that will impress even the toughest critics.
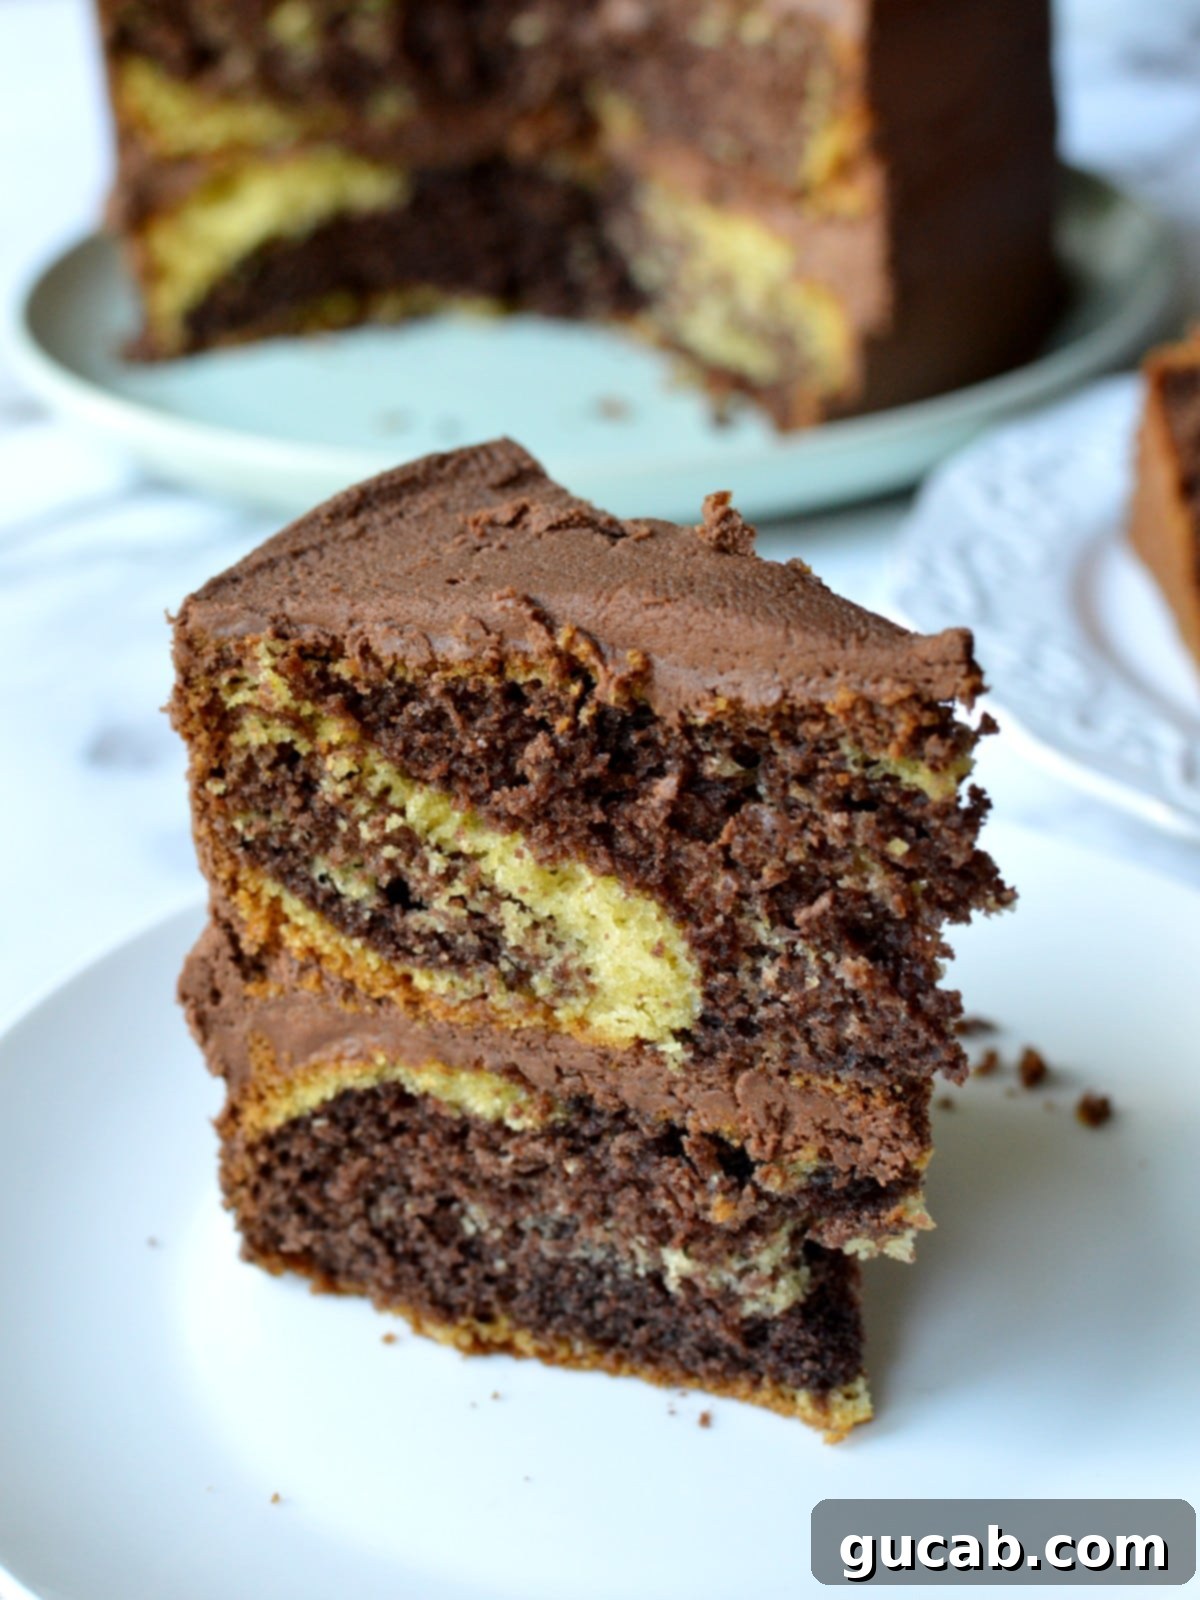
As a passionate baker, I firmly believe that chocolate makes everything better, and marble cake is the perfect canvas for this philosophy. After numerous trials, this particular cake recipe emerged as a true winner. The resulting texture is a dream – incredibly light and airy, never dense or dry, which can often be a challenge with gluten-free baking. What makes it even better is its simplicity. There are no complicated techniques, no need for whipping egg whites separately, just straightforward steps leading to a truly delicious outcome.
While I’ve included a decadent chocolate frosting recipe that perfectly complements the cake’s flavors, you are absolutely welcome to frost it with a classic vanilla buttercream if that’s your preference. This versatile cake is perfect for birthdays, holidays, or simply as an everyday treat.
What Exactly is Marble Cake?
At its heart, marble cake is a delightful confectionery masterpiece that artfully combines two distinct flavors, typically chocolate and vanilla, into a single, visually stunning dessert. The name “marble” comes from the unique swirled pattern created by gently blending two different batters, resembling the natural veining found in marble stone. The magic begins with a single, foundational cake batter. Once prepared, a portion of this batter is then infused with cocoa powder, transforming it into a rich chocolate variant. Both the vanilla and chocolate batters are then carefully poured into cake pans and swirled together, creating that signature, captivating marble effect.
This technique not only creates an appealing aesthetic but also ensures that each bite offers a harmonious blend of both flavors, satisfying cravings for both chocolate and vanilla lovers simultaneously. It’s a timeless classic that has graced dessert tables for generations, cherished for its unique appearance and delightful flavor profile.
Disclosure: This post contains affiliate links. In other words, if you click a link and purchase something I will receive a commission at no cost to you. I only recommend products I use and enjoy myself.
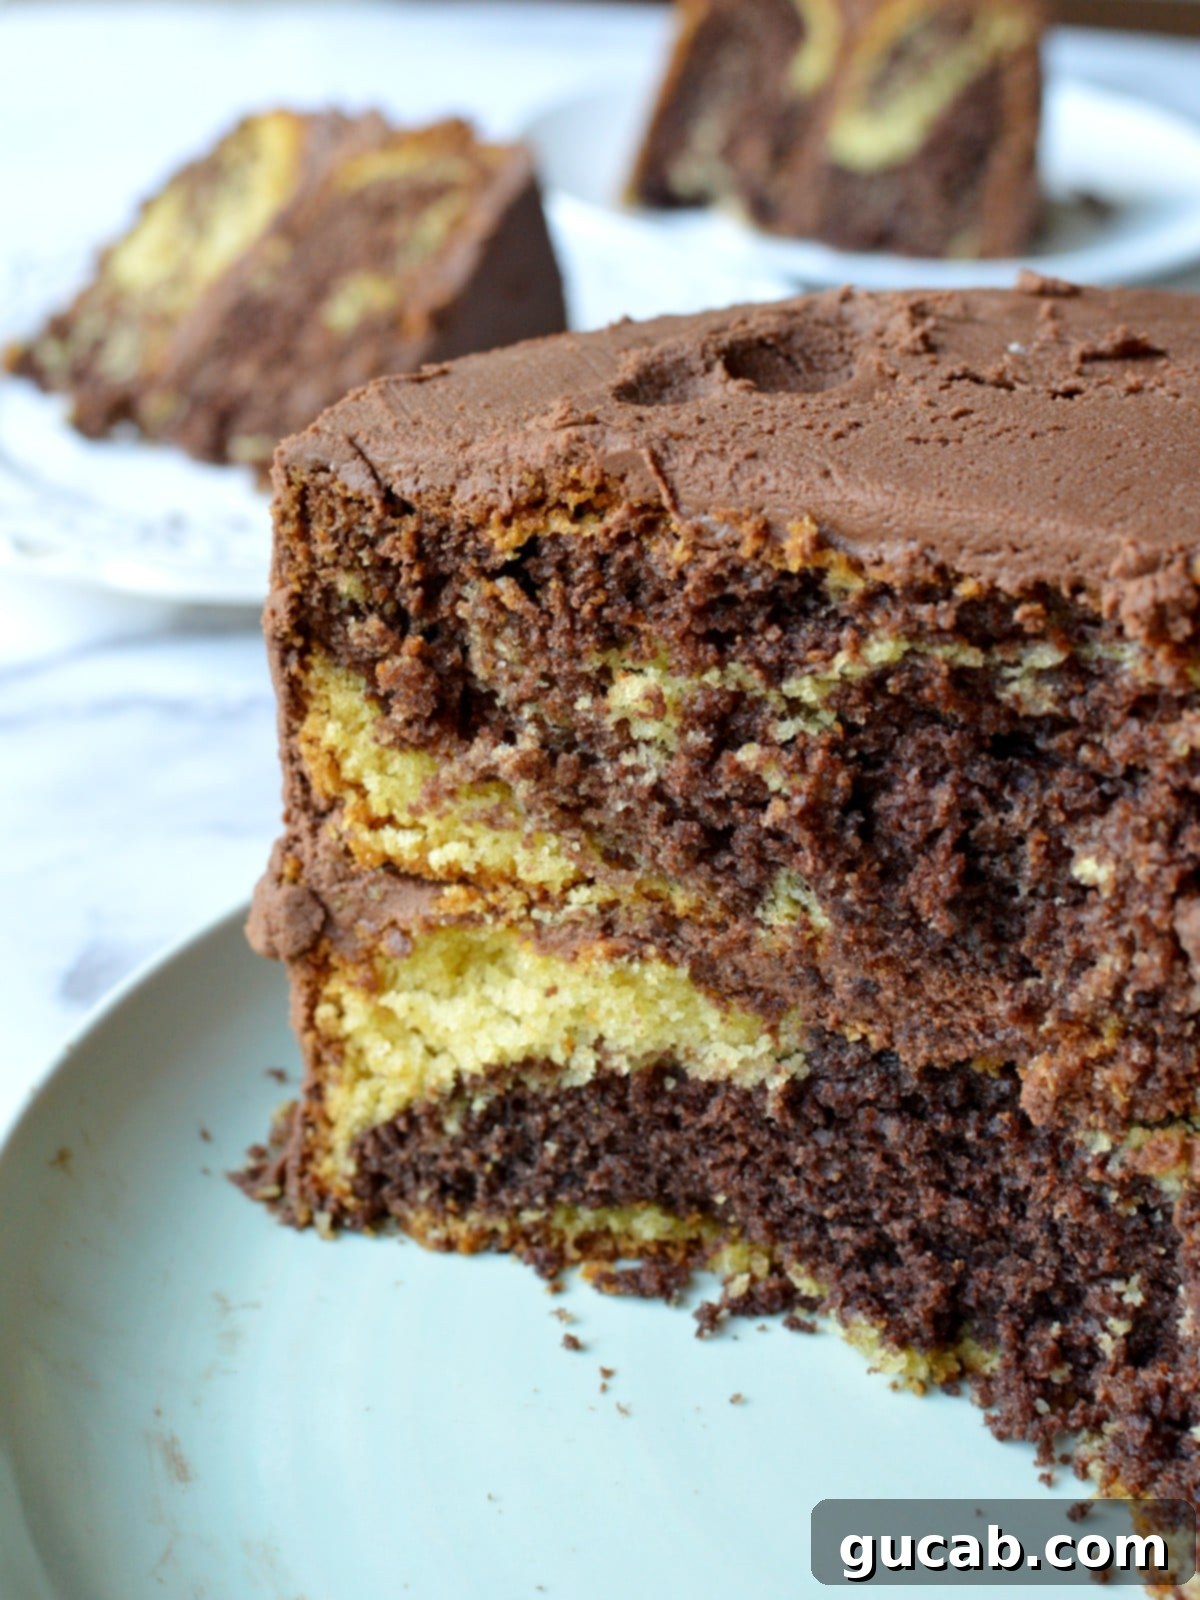
Why You’ll Adore This Gluten-Free Marble Cake
This isn’t just another gluten-free cake; it’s a testament to how delicious and satisfying gluten-free baking can be without compromising on taste or texture. Here’s why this recipe will become your new go-to:
- Perfect Texture: Achieving a light and airy texture in gluten-free baking can be tricky. This recipe masterfully delivers a cake that is incredibly tender, moist, and never dense or gummy. It’s a delightful surprise for anyone used to heavier gluten-free alternatives.
- Irresistible Flavor Combination: The classic pairing of rich chocolate and sweet vanilla is perfected here. Each forkful offers a balanced harmony, ensuring you get the best of both beloved flavors.
- Simple & Straightforward: Despite its impressive appearance, this cake is surprisingly easy to make. No complicated techniques or obscure ingredients are required, making it accessible for bakers of all skill levels.
- Naturally Moist: Thanks to carefully selected ingredients like oil and buttermilk, this cake stays wonderfully moist for days, a crucial quality for any truly great cake.
- Versatile Frosting Options: While our rich chocolate frosting recipe is a perfect match, the cake’s balanced flavor profile means it pairs beautifully with vanilla buttercream, cream cheese frosting, or even a simple ganache.
Essential Ingredients for Your Gluten-Free Marble Cake
Every ingredient in this recipe plays a crucial role in achieving the perfect texture and flavor for our gluten-free marble cake. Using quality ingredients and understanding their function will elevate your baking experience.
- Oil: Unlike many traditional cake recipes that rely on butter, oil is the secret to this cake’s exceptional moisture and light crumb. Oil stays liquid at room temperature, contributing to a consistently moist texture, which is particularly beneficial in gluten-free baking where dryness can be a common issue. While I adore butter in other recipes, you absolutely won’t miss it here!
- Sugar & Brown Sugar: This combination provides a balanced sweetness and contributes to the cake’s tender texture. Granulated sugar offers structure and crispness, while brown sugar adds a subtle molasses flavor and extra moisture, keeping the cake soft.
- Eggs: Eggs are vital for structure, binding the ingredients, and contributing to the cake’s lift and richness. They also help create that desired airy texture.
- Bob’s Red Mill 1:1 All Purpose Gluten Free Flour: This is my absolute favorite gluten-free flour blend due to its reliable taste and consistent texture. It’s formulated to replace wheat flour cup-for-cup, making it incredibly convenient. While other good blends exist, I highly recommend sticking with this one as I haven’t tested the recipe with any alternatives. The quality of your GF flour blend significantly impacts the final result.
- Baking Powder: A generous tablespoon of baking powder might seem like a lot, but trust the process! This powerful leavening agent is essential for giving the cake its beautiful rise and airy structure, especially important in gluten-free baking where there’s no gluten network to trap gases.
- Baking Soda: Working in conjunction with the buttermilk, baking soda provides an additional lift and contributes to the cake’s tender crumb. It reacts with the acid in the buttermilk, creating carbon dioxide bubbles that lighten the batter.
- Kosher Salt: A pinch of salt is crucial for enhancing all the other flavors in the cake, balancing the sweetness, and making the chocolate and vanilla notes truly pop.
- Buttermilk: This ingredient is a game-changer! Buttermilk not only adds incredible moisture and tenderness but also a subtle tang that complements the sweet flavors. It’s also key to activating the baking soda. Important: Do not substitute with homemade buttermilk made from milk and lemon juice/vinegar. While a common hack, homemade buttermilk doesn’t achieve the same thickness and acidity as store-bought cultured buttermilk, leading to different results in this specific recipe. Sometimes, for recipes like pancakes, I might adapt, but for this cake, stick to the real deal.
- Vanilla Extract: Pure vanilla extract is essential for boosting the vanilla flavor in the cake and tying all the sweet notes together.
- Dark Chocolate Chips: For the best and most intense chocolate flavor in your swirl, use high-quality dark chocolate chips. The better the chocolate, the richer and more delicious your marble will be. You’ll also need extra for the frosting!
Essential Equipment for Baking Your Perfect Marble Cake
Having the right tools on hand will make the baking process smooth and enjoyable, ensuring your gluten-free marble cake turns out beautifully every time.
- Two 8-inch Round Cake Pans: For an elegant layer cake, two 8-inch pans are essential. Ensure they are the same size for even baking and beautiful layers. Proper preparation of these pans is key to preventing sticking.
- Stand Mixer with the Paddle Attachment: A stand mixer makes light work of preparing the cake batter, ensuring it’s smooth and perfectly mixed without overworking it. The paddle attachment is ideal for creaming and mixing cake batters. If you don’t have a stand mixer, a reliable hand mixer and a large mixing bowl will work just as well, just be sure to mix thoroughly.
- Additional Mixing Bowl(s): You’ll need at least one extra medium-sized bowl to separate a portion of the main batter for the chocolate swirl. Having a few bowls on hand is always helpful for organizing your ingredients.
- Parchment Paper: This is an optional but highly recommended tool that will save you a lot of frustration! I like to cut out parchment circles that are just slightly smaller than the bottom of my cake pans. After lightly spraying the bottom of the pan with nonstick cooking spray, I place a parchment circle on top. Then, spray the inside sides of the cake pan again, and you’re ready to pour in the batter. This method ensures your cakes release effortlessly from the pans, resulting in perfect, intact layers every time. It’s a small step that makes a huge difference and is definitely worth your time.
- Spatula: A sturdy rubber or silicone spatula is indispensable for scraping down the sides of the mixing bowl, ensuring all ingredients are fully incorporated and no pockets of unmixed batter remain.
How to Make This Effortlessly Delicious Gluten-Free Marble Cake
This recipe truly lives up to its “super simple” promise, yielding an incredibly impressive cake without any fuss. Follow these straightforward steps to create your own light and airy gluten-free marble cake:
- Prepare Your Oven and Pans: Preheat your oven to 350°F (175°C). Take your two 8-inch round cake pans and prepare them thoroughly. Cut two circles of parchment paper, slightly smaller than the pan bottoms. Spray the bottoms of the pans with nonstick cooking spray, place the parchment circles down, then spray the entire insides of the pans (sides included) with more spray. This ensures easy cake release.
- Combine Dry Ingredients: In a medium bowl, whisk together the gluten-free flour blend, baking powder, baking soda, and kosher salt until well combined. Set this mixture aside.
- Melt the Chocolate: In a separate small, microwave-safe bowl, combine the ½ cup dark chocolate chips with 1 tablespoon of whole milk. Microwave in short bursts (15-20 seconds), stirring well after each, until the chocolate is completely melted and smooth. Set aside to cool slightly.
- Cream Sugars and Oil: In the bowl of your stand mixer (or a large bowl with a hand mixer), combine the vegetable oil, both granulated and brown sugars, and vanilla extract. Beat on medium speed for 1 minute until the mixture is light and well combined.
- Add Eggs: Add the eggs one at a time, beating well after each addition to fully incorporate them. Scrape down the sides of the bowl with a spatula to ensure everything is mixed evenly.
- Incorporate Dry Ingredients: Gradually add the reserved flour mixture to the wet ingredients. Start the mixer on low speed to prevent flour from flying out, then increase to medium speed and beat until a smooth batter forms. Be careful not to overmix; just combine until smooth.
- Add Buttermilk: Scrape down the bowl once more with a spatula. With the mixer on low speed, gradually pour in the buttermilk until it’s completely combined into the batter. Mix just until smooth, then stop.
- Create Chocolate Batter: Carefully scoop out exactly 2 cups of the prepared vanilla batter into a separate large bowl. Pour the slightly cooled melted dark chocolate into this batter and stir gently until fully combined and streak-free, forming your chocolate batter.
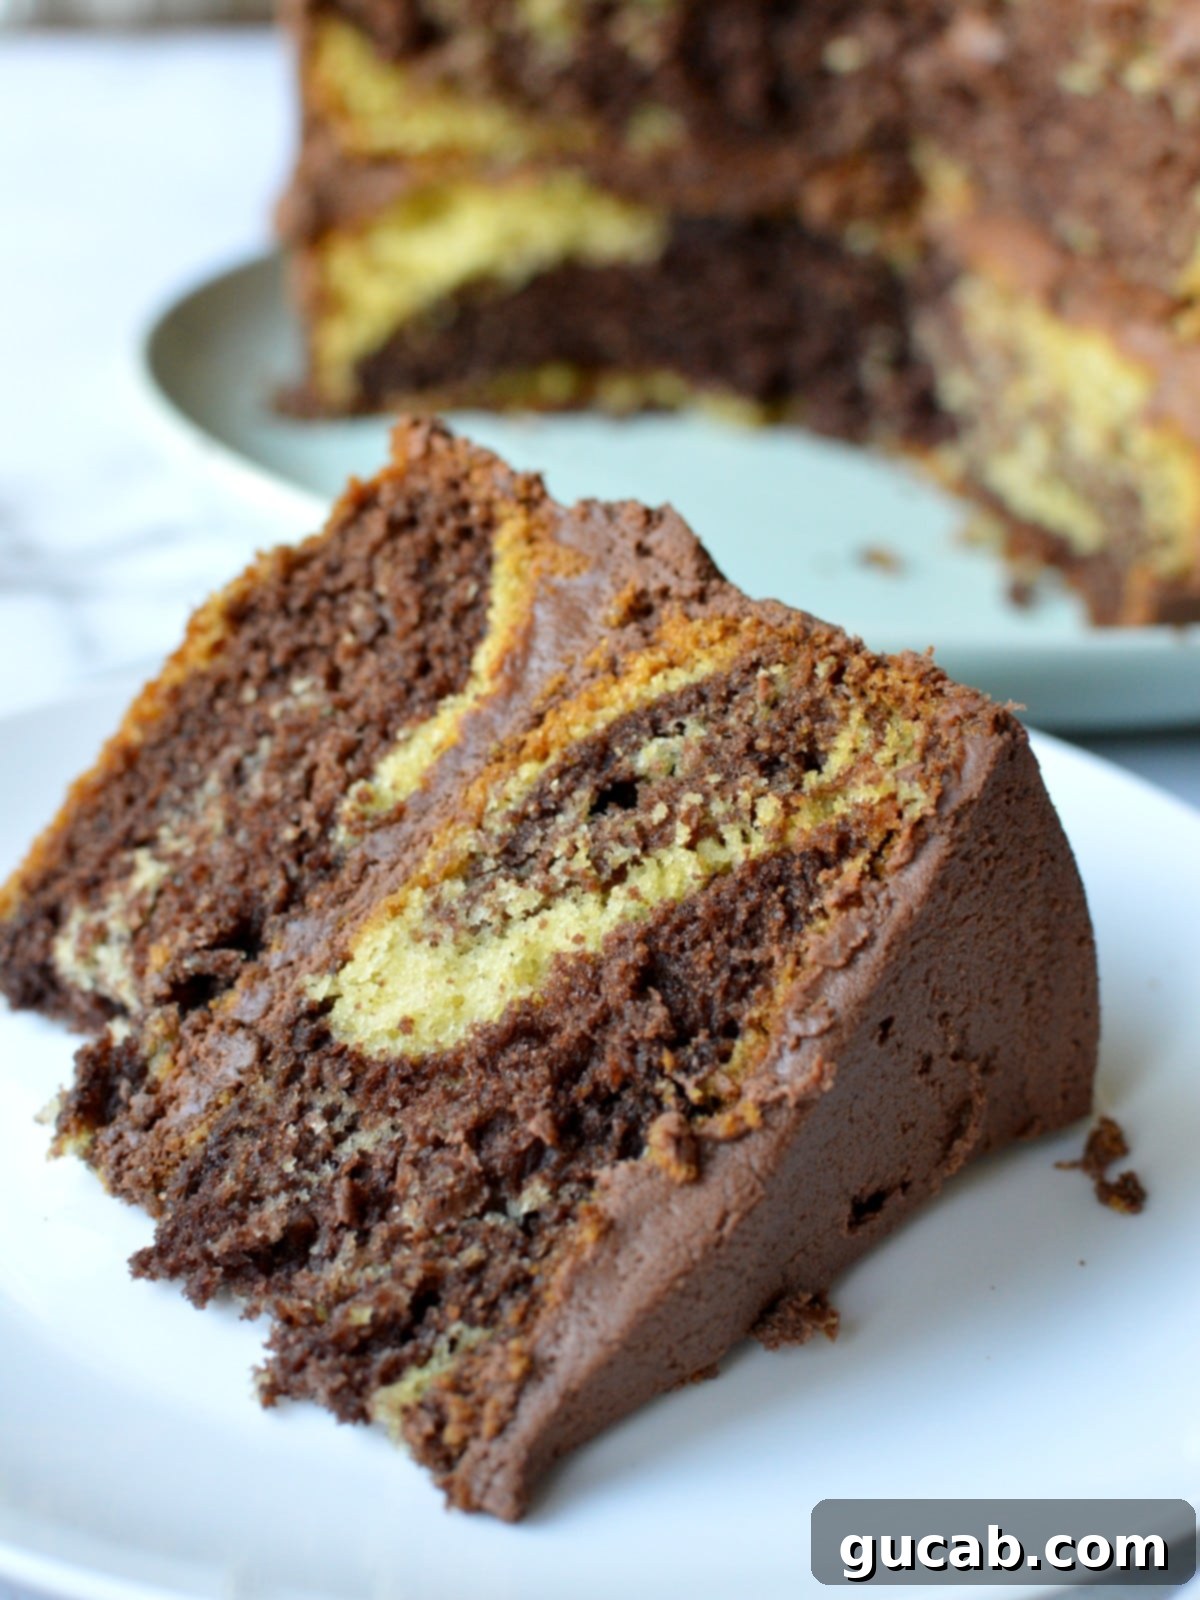
- Swirl into Pans: Now for the fun part! Pour approximately half of the vanilla batter into each prepared cake pan. Then, spoon or pour the chocolate batter equally into both pans, on top of the vanilla batter. Finally, add the remaining vanilla batter to both pans. Using a knife or a skewer, gently swirl the batters together in a figure-eight motion a few times. Be careful not to over-swirl, or the colors will completely blend instead of marble.
- Bake to Perfection: Place the cake pans into the preheated oven. Bake for approximately 33-37 minutes, or until the tops are golden brown and a toothpick inserted into the center of each cake comes out clean.
- Cooling: Allow the cakes to cool in their pans on a wire rack for about 10-15 minutes before carefully inverting them onto the rack to cool completely. Ensure they are entirely cool before attempting to frost them.
Pro Tips & Tricks for a Flawless Gluten-Free Marble Cake
Achieving a perfect gluten-free cake is all about the details. Here are some invaluable tips to ensure your marble cake is a resounding success:
- Embrace Parchment Circles: As mentioned in the equipment section, preparing your cake pans with parchment paper circles on the bottom (after a spray of non-stick oil) is a game-changer. It guarantees that your beautiful cake layers will release effortlessly, preventing any sticking or tearing. I use this trick for all my layer cakes!
- Master the Swirl: The key to distinct marble patterns is gentle handling. Don’t swirl the batters too much, or they will completely mix together, losing the beautiful marbled effect. A few figure-eight motions with a knife or skewer are all you need to create those elegant streaks. Less is often more when it comes to swirling!
- Avoid Refrigeration (for unfrosted cake): If you have leftover unfrosted cake, or if you’re waiting to frost it, do not refrigerate it. Refrigeration tends to dry out cakes quickly, making them less enjoyable. Store unfrosted cake at room temperature, tightly covered, for up to 2-3 days. Frosted cake can be refrigerated due to the perishable frosting, but bring it to room temperature before serving for the best flavor and texture.
- Freezing for Future Enjoyment: This cake freezes exceptionally well! To preserve its freshness, I recommend cutting the cooled, unfrosted cake into individual slices. Place these slices on a lined sheet pan and freeze until solid. Once frozen, transfer them to a zip-top gallon freezer bag or an airtight container. They can be frozen for up to 2-3 months. When a craving strikes, simply pull out a slice and let it come to room temperature before enjoying.
- Customize Your Flavor Ratio: If you find yourself leaning more towards vanilla or chocolate, you can easily adjust the proportions. If you prefer a more pronounced vanilla flavor with just a hint of chocolate, scoop out only 1.5 cups of batter for the chocolate portion and add about 1 tablespoon of cocoa powder (instead of melted chocolate chips and milk, or a mix of both if you prefer a subtle chocolate color) to it. Experiment to find your perfect balance!
- Room Temperature Ingredients: Ensure your eggs and buttermilk are at room temperature before mixing. This helps them emulsify better with the other ingredients, leading to a smoother, more uniform batter and a better-textured cake.
- Don’t Overmix the Batter: Once you add the flour mixture, mix just until combined. Overmixing gluten-free flour can still lead to a tougher cake, even without gluten. Gentle mixing ensures a tender crumb.
Other Gluten Free Cake Recipes You Might Love
If you enjoyed this gluten-free marble cake, you’re in for a treat with these other delightful gluten-free cake creations from my kitchen:
- Gluten Free Chocolate Pound Cake (This one is amazing for intense chocolate lovers!!)
- Gluten Free Italian Cream Cake
- Gluten Free Sour Cream Pound Cake
- Gluten Free Spice Cake
- Gluten Free Pumpkin Cupcakes with Cinnamon Maple Frosting
- Gluten Free Funfetti Cupcakes
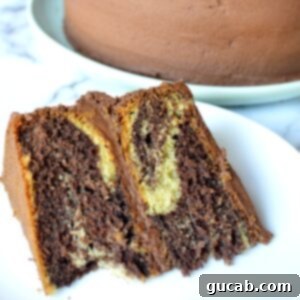
Gluten Free Marble Cake with Chocolate Frosting
Carolyn
Pin Recipe
Equipment
-
Two 8-inch cake pans
-
Stand Mixer with the Paddle Attachment
Ingredients
- 1 cup vegetable oil
- 1 cup sugar
- ½ cup brown sugar
- 1 t. vanilla extract
- 4 eggs
- 2 ⅓ cup Bob’s Red Mill 1:1 All Purpose Gluten Free Flour
- 1 tbsp baking powder
- 1 t. baking soda
- ¼ t. kosher salt
- ¾ cup buttermilk
- ½ cup dark chocolate chips
- 1 tablespoon whole milk
For the chocolate frosting:
- 8 tbsp unsalted butter, room temperature
- 3 cups powdered sugar
- ½ cup dark chocolate chips
- 3 tbsp milk
- 2 tbsp dark cocoa powder
Instructions
-
Preheat the oven to 350 degrees Fahrenheit. Cut out two parchment paper circles slightly smaller than the round 8-inch pans. Spray the bottom of the pans with nonstick cooking spray and place the parchment circles on the bottoms of the pans. Spray the insides of the pans as you normally would.
-
In a medium sized bowl, combine the flour, baking powder, baking soda, and salt. Stir then set aside. In a small bowl, melt the dark chocolate chips and whole milk. Stir until smooth, then set aside to cool.
-
In the bowl of a stand mixer, combine the oil, vanilla and both sugars. Mix for 1 minute on medium speed, then add the eggs one at a time beating well after each addition. Scrape the bowl with a spatula.
-
Add the flour mixture to the egg mixture and start the mixer on low so it doesn’t poof out of the bowl. Beat on medium until a smooth batter forms.
-
While the mixer is on low speed, gradually add the buttermilk to the batter until it’s completely combined, scraping the bowl with a spatula halfway through.
-
Scoop 2 cups of the batter into a large bowl. Add the melted chocolate and stir to combine.
-
Pour some vanilla batter into each cake pan then the chocolate batter and then more vanilla batter. Swirl with a knife.
-
Bake the cakes until the tops are golden brown and a toothpick comes out clean around 35 to 37 minutes.
-
Wait until the cakes are warm to remove from the pans. Wait until they are completely cool before frosting.
For the chocolate frosting:
-
Melt ½ cup of dark chocolate chips and 1 tablespoon of milk in a small bowl in the microwave and stir then set aside.
-
In the bowl of a stand mixer beat together the room temperature butter and 1 cup of powdered sugar for 1 minute on medium speed.
-
Add 1 more cup of powdered sugar and 1 tablespoon of milk. Beat again for 1 minute on medium speed.
-
Add 1 more cup of powdered sugar and 1 more tablespoon of milk and beat for 1 minute on medium speed.
-
Add melted chocolate and 2 tablespoons of cocoa powder and mix for 30 more seconds.
Frequently Asked Questions About Gluten-Free Marble Cake
- Can I make this gluten-free marble cake dairy-free?
- While this recipe calls for buttermilk and milk, you can often adapt it. For buttermilk, use a dairy-free milk alternative (like almond or soy milk) mixed with 1 tablespoon of apple cider vinegar or lemon juice per cup, let it sit for 5-10 minutes. For the regular milk in the chocolate and frosting, simply use your preferred dairy-free milk. Ensure your chocolate chips are also dairy-free. The butter in the frosting can be replaced with a high-quality dairy-free butter stick.
- What if I don’t have buttermilk? Can I substitute it?
- As highlighted in the ingredients section, for this specific recipe, store-bought cultured buttermilk is strongly recommended for the best texture and flavor. Homemade buttermilk substitutes (milk + acid) tend to be thinner and won’t yield the same results. If you absolutely cannot find buttermilk, you might try a thick plain dairy-free yogurt (if going dairy-free) or a full-fat plain yogurt thinned slightly with milk, but expect a slightly different texture.
- How long does gluten-free marble cake stay fresh?
- When stored properly at room temperature in an airtight container, this unfrosted gluten-free marble cake will stay fresh and moist for 2-3 days. If frosted, it can be kept in the refrigerator for up to 4-5 days, though it’s best to bring it to room temperature before serving for optimal taste and texture.
- Can I use a different gluten-free flour blend?
- This recipe has been developed and tested specifically with Bob’s Red Mill 1:1 All Purpose Gluten Free Flour due to its consistent performance and excellent taste. Other gluten-free flour blends vary widely in their composition (e.g., starch-to-flour ratios, added binders), which can significantly affect the final texture and moisture of the cake. While you could try another 1:1 blend, results may vary, and you might need to adjust liquid amounts. For guaranteed success, I recommend sticking to the recommended flour.
Indulge in the Best Gluten-Free Marble Cake!
There’s something truly special about a homemade cake, and this easy gluten-free marble cake is no exception. It’s proof that you don’t have to compromise on flavor, texture, or visual appeal when baking gluten-free. With its delicate crumb, perfect moisture, and the delightful dance of chocolate and vanilla in every swirl, this cake is destined to become a family favorite.
Whether you’re celebrating a special occasion or simply treating yourself, this recipe provides a foolproof path to a bakery-quality gluten-free marble cake right in your own kitchen. So, gather your ingredients, follow these simple steps, and prepare to delight in a truly exceptional dessert. Happy baking!
